Introduction
Zombies are everywhere, searching for living things, as they have only wish to quench their thirst for fresh blood. The world is suffering from a zombie invasion, who are roaming the environment freely. First, let me confirm that do you have enough guts to survive a zombie invasion, which leaves nothing alive? The same thing is happening in LifeAfter – a Role-playing and Survival video game released by NetEase Games. Walkthroughs, guides, and strategies won’t help you until you can’t effort for your survival. So you should always be ready to face off vicious zombies who can attack you in unexpected ways.
LifeAfter centers on a blizzard of the deadliest virus that has spread all over the world. The virus brings instability in peace and turns most of the human population into undead people. It won’t be wrong to say that as the night falls, the world transforms into a living hell full of zombies and other vicious monsters. At night time, there will no place to give your sore feet rest. Therefore, you should always keep walking for scavenging resources and other compulsory tools that you need for ensuring your survival. The problems won’t end here, you are out of food and have limited ammo to use against endless zombies waves. As you find a place to have rest, the sounds of infected people won’t let you sleep.
LifeAfter Review – Be the World’s Best Survivor
If you consider the game is easy to play than having a teacup, you should revise your thought. Don’t dare to judge zombies as the easy target, because they won’t give you a 2nd chance. I suggest you keep modern weapons always loaded and ready to shoot for your safety. Seriously, the graphics are almost realistic, and the protagonist’s movement is great. The opening scene was fabulous, and I enjoyed the company of the partner and a dog. I guess it would be great if developers implement the multiplayer mode. Despite missing the multiplayer functionality, LifeAfter brings fabulous gameplay to your screen. It gives you a chance to whether you survive in a harsh environment or not. You won’t be alone there at the start, as the game features an NPC to help you how to play the game.
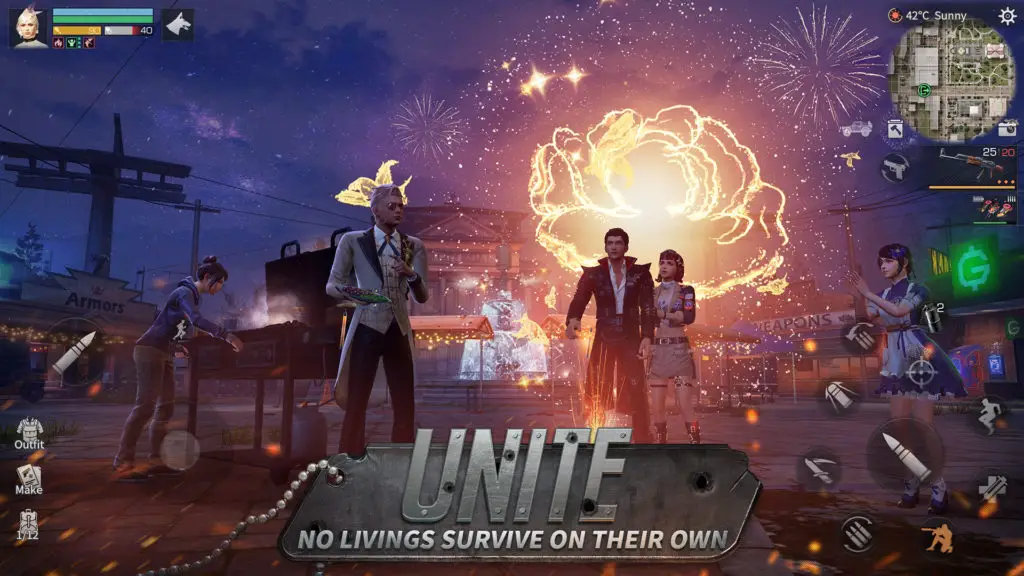
Post-apocalyptic World
It didn’t feel that I’m playing a game because of its realistic graphics. The gorgeous animation effects kept me engaged for endless hours of fun. There are no other tasks, except for finding the ways of your survival. Endless waves of zombies are behind you to kill; you have no option other than running as fast as possible only in one condition when you are out of ammo and weapons. You are limited to escape the zombies because the building and crafting are also the primary parts of the game.
Find out other Survivors
As mentioned above, you are not only the survivor in the game. Many others are also there to help you searching the way out. Each survivor comes with unique behavior, personality, and tools that you can use to proceed with the story. Take care of your character, because he is the last hope of humanity who can bring it out from destruction. You should prefer to move ahead in the form of a team because targeting a single person is much easier than taking on a group of zombies.

Scavenge for Weapons
Like Battle Royale games, you need to scavenge for weapons at the start of the game. Weaponless survivor can’t live longer, because he doesn’t have anything to defend himself from upcoming waves of zombies. Apart from that, the game features a massive world that can’t be easy to navigate. Finding or crafting weapons and items aren’t a cup of tea that you can grab easily to deal with; you should work hard and navigate the environment from a third-person viewpoint to discover objects.
Abandoned Mines, Freezing Forest, and Ruins
LifeAfter introduces a massive world spit into several areas and landscapes as the title implies. In the game, you can explore the following areas:
- Ruin Buildings
- Damaged Colleges
- Abandoned Mines
- Snowy Mountains
You can deal with the said areas to scavenge vital materials to survive. Before starting the game, I suggest you learn how to hunt and collect food while crafting weapons to protect your character. When choosing your companion, you should be careful because no one knows, even you – the person you are selecting will be on your side or attack you for loot. If the selected person is amiable, you should share your food, ammo, and stories of your adventure with him; otherwise, kick him out of your team.

Create the Final Sanctuary for Mankind
Trust characters you found along the way to locate a place to camp and build. During the game, you can place one brick at a time and repeat the process until the final sanctuary for humanity. With your friend, you can enjoy the campfire and cook delicious food to maintain your health meter. The game features a dynamic weather system that brings cold nights and hot days to test your survival skills.
The gameplay features several challenging missions that require you to fulfill objectives and advance the story. You may find yourself helpless in many scenes because you may don’t know what to do next in LifeAfter. At that time, you can get help from LifeAfter Walkthrough that offers you the best strategies and guides to overcome all problems.
LifeAfter Walkthrough
Open world environment gives you the freedom of navigating different landscape freely from a third-person viewpoint. You should be careful because Riots have just reported a deadly virus at Cadimare Hospital. Additionally, they revealed that they had been connected with a person badly infected by an unknown virus. According to reports, the virus has rapidly spread across the land, and riots continue to escalate.
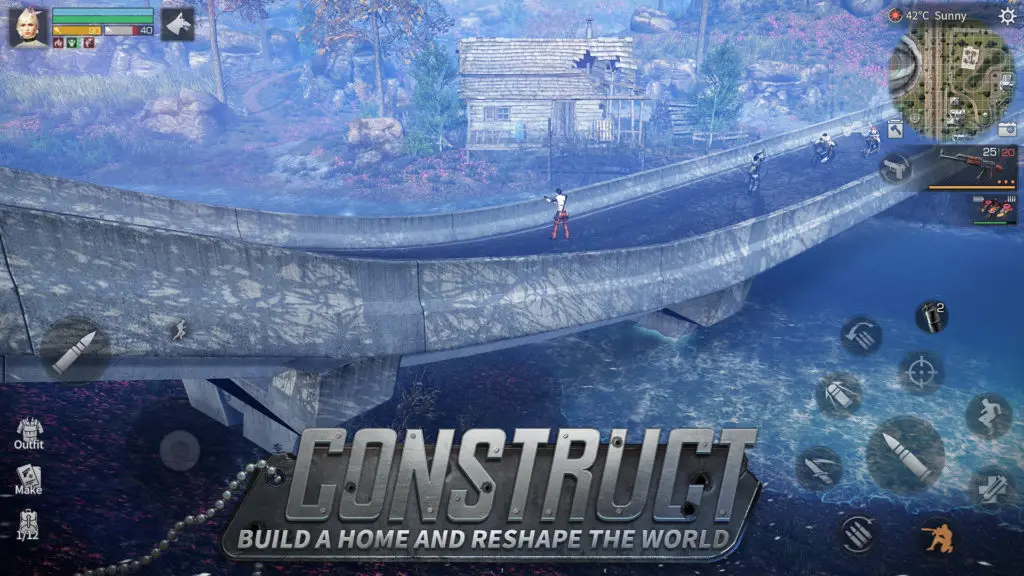
Afterwards, the government has confirmed that hopes for finding a cure have failed and is gearing up for a massive evacuation. To keep the people in confidence, the government has announced that the evacuation is only temporary. Besides that, they suggest people live within a band in this time of need to help each other find anyone in trouble. The last hope of people is imperium; therefore, survivors are surrendering to the Imperium with the hope of getting rescued by the said entity.
LifeAfter Walkthrough – Highway (Hope Valley)
At the start, you find yourself along with a companion on a moving truck on the highway in the Hope Valley. Your ultimate objective is to get rid of all infected undead people that are chasing you to kill. You don’t need to struggle for weapons, because the game added a few of them into your inventory. So, tap and hold the bullet button to shoot continuously. During the invasion, you can use either a shotgun or a pistol. Using a shotgun would be in your favor because the zombie gets killed within one bullet. On the other hand, you have to fire three to four times to kill a zombie.
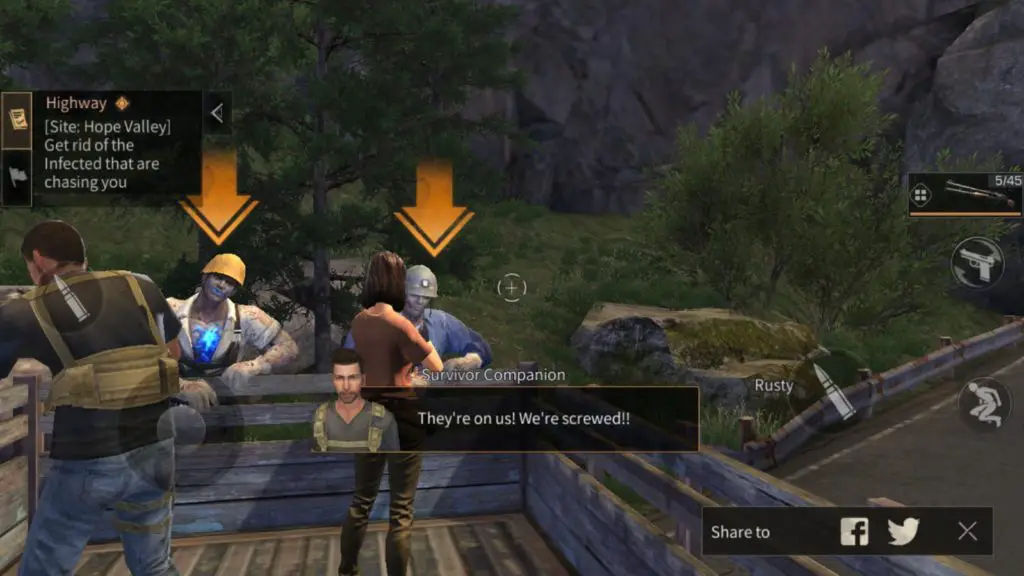
Moreover, the difficulty level increases gradually, and you find yourself in the harsh condition when zombies cover you from all sides. May be some zombies successfully jump into your vehicle to kill your companion. You’re not supposed to rescue yourself, saving the companion is also your mission. After completing the opening scenes, the truck got smashed because of an accident, leaving you alone with an NPC in the jungle with no weapons. Moving a few steps, you find a life-detector who will reveal the identity of your character. Explore the environment surrounding you to find any usable gear nearby.
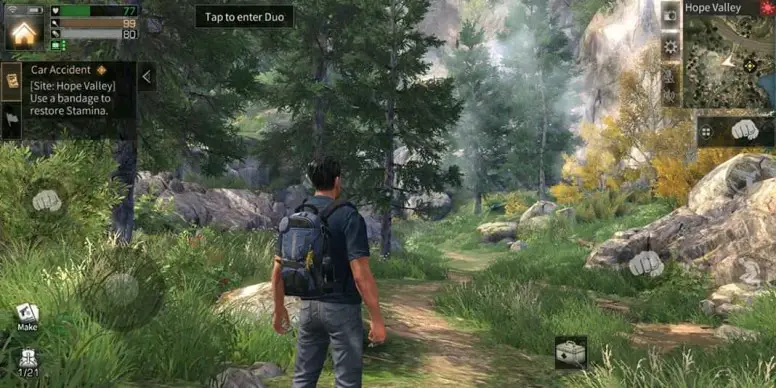
Collect a backpack to keep your stuff secured and use it whenever you need it during the journey. You should keep an eye on your Current HP because your character will die if your HP goes down. Whenever you find your HP low, try to use a medicine kit and choosing the bandage.
Follow Aleksey – A Non-player Character
After maintaining your health and collecting a backpack, you should pursue your journey following the footsteps of Aleksey, who is a helper controlled by AI. We suggest you not stay on a specific spot no longer because zombies can appear anywhere to attack you. The NPC will help you killing vicious creatures using advanced weapons like archery, guns, and more. Using melee weapons and attacks are also possible. Whenever you detect the NPC has stopped running, you should visit him to talk.
Inventory: The game features an inventory where you can select and switch your weapons. You can also unarm your character when there is no enemy around you.
Gather Resources: Your first goal in Highway is to collect resources, including hemp, wood, and stone. Aleksey will let you know who to switch your weapons, aim at a tree with the crosshair, and chop down to get wood.
Collect Stones: You can’t use the basic axe to mine stones. Therefore, you should switch to the pickaxe, aim at some stones with crosshair, and start mining it to get resources.
Gather Hemps: After collecting stones and woods, your goal is to gather hemp as there is a lot around you, and you can use it in many ways.
Crafting System
Once you have collected all said items, you are free to craft the tools you need to survive longer. The game unlocks a new feature, the tablet that holds two tabs such as Simple Crafting and Formula Index. The simple crafting brings some awesome items to your inventory, but first, you have to craft them using the resources you collected.
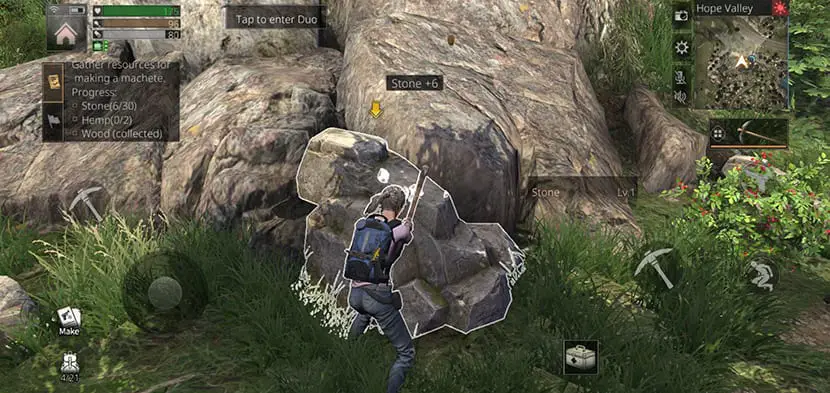
- Machete – To craft a Machete, you need 60 Woods, 30 Stones, and 2 Hemp.
- Stone Axe – It requires you to collect 50 Woods and 10 Stones
- Stone Pickaxe – Collect 60 Woods and 20 Stones to craft Stone Pickaxe.
- Torch – It needs only 40 planks of wood
- Bandage – 9 Hemp
How to craft items?
It is pretty simple and can be done within two to three taps. Choose the item you want to develop and hit the “Craft” button after finding the completed requirements.
Back to Aleksey after crafting a Machete
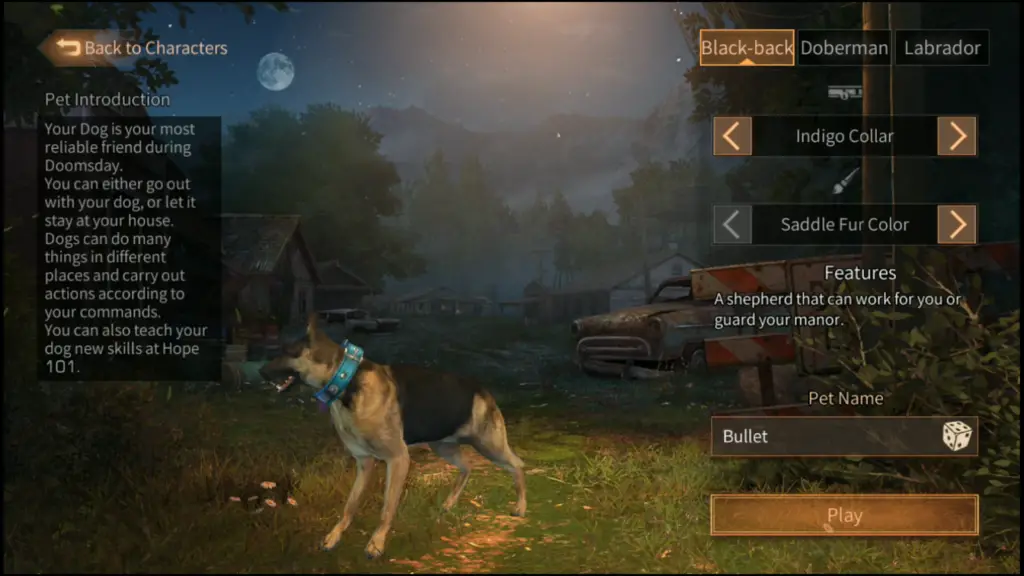
Once you built a machete, go back to Aleksey to continue the journey. Complete the Rookie Mission by interacting with a dog and collecting berries. Next to that, you must back to your companion and start the rest of the journey. Visit the ladder you found fixed with the mountain and once you reach above, push the ladder a bit down to let your companion climb it. Once both climb the ladder, follow your teammate and reach the house.
The Cabin
Once you get into the cabin, you should look around to find something useful. After searching, you will find a medical pack laid on the table. Did you know? The Adrenal Injection may help you restore 200 HP within no time. Therefore, it is effective and requires up to 60 seconds for letting you use it again. A massive fight will soon start with vicious zombies, and you must make use of a machete to kill those undead people. Come out from the house quickly and jump from the mountain along with your companion and dog. You don’t need to take a rest, because a massive giant beast is right behind you. So run as fast as possible to reach a safe place.
Helicopter
The final scene of the first chapter is about to end. Following your companion’s footstep to reach the spot where the helicopter will come to pick up you along with others. As you reach the destination, you found the road has been blocked. So you should talk to a man standing ahead of you. Next to that, a conversation will start between the characters and you. When playing the game, you should carefully choose because it will determine the end and your survival.
Collect Ammo Box
You have a shotgun, but bullets are missing. Therefore, search the environment around to find an ammo box available on the left side of the screen near the helicopter. After that, find a chest box to collect items you need to advance like ammo, wood, stones, and hemp.
Create a Barricade and Escape
To stop enemies, you can use Barricade that cost you 80 planks of wood and 2 bits of hemp. Use your shotgun to fight against undead people to defend Aleksey while he’s repairing the helicopter to escape. As the helicopter gets repaired, Aleksey calls everyone to get ready to escape. Meanwhile, a massive giant beast appears and destroys the helicopter. You and Aleksey save their lives by jumping into the water.
The Opposite Bank – Find a Safe Place
After surviving the helicopter crash, you must follow Aleksey to find a safe. After covering some distance, you will find a small house. You will soon fall into a conversation with Aleksey who is saying that there’s a bad situation because of having no helicopter and communicator. Apart from that, a massive monster is behind you on the opposite bank. Therefore, you should repair the house first to take shelter.
Aleksey found a Chest Box
When you repair the small house, a message will be displayed on your screen that you should visit your companion who reveals a chest box containing letters by Razarov. As you open the chest box, two letters will appear, offering you the following objects:
- Clean Can
- Iron Ore
- Wood (400)
- Stone (200)
Build a Small House
Open the box and collect all the stuff. Being alone in the game isn’t safe; therefore, start chasing your companion and reach the small home’s first floor. Get into the building mode and start creating walls and other furniture to make the house strong. The construction mode contains the following options, such as:
- Structure
- Furniture
- Defense
- Enhance
- Wallpaper

Next to that, you will open your inventory and head to the material bench to build a door. Once done, add the door and set the passcode of your choice to open it.
Make a Rifle
Come out of your house to collect materials and craft a rifle. You must use the pickaxe to mine stones and chop trees using the basic axe. Don’t forget to collect berries, hemp, and other resources you can use later when struggling for your survival. During the exploration, you will find another chest containing a letter left by Octavia, who grants you the following items:
- Iron Ore
- Stone (144)
- Berries
After collecting all the required materials, go back to your home and find a workstation where you can build a rifle using the materials you gathered. Follow the given steps to craft a rifle:
- Head to the workshop and tap on the button “Craft.”
- Click on Make Weapons and then Simple Rifle, which will cost you Iron Ore (10), Stone (120), and Wood (200).
- It will take only five seconds to craft a weapon.
Go to the 2nd floor to battle against zombies
Go to the 2nd floor of your home hurry, because a wave of zombies is coming toward your home. Your task is to kill 10 zombies to complete the objective. Once done, your next goal is to find an airdrop near the river. Before leaving home, you should repair all things zombies have damaged during an invasion.
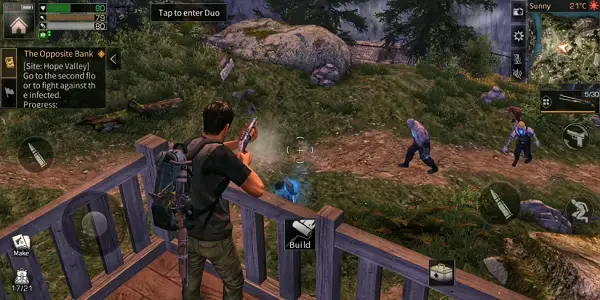
Message Box – You may discover a message box when you are going to find an airdrop. Upon opening, you come to know that there’s a letter left by Bobs to reward you with the following items:
- Wood (400)
- Stone (200)
- Wood (189)
- Hemp
Para-drop Box – Reaching close to the river, you discover a para-drop box that adds a few items (Adrenal Injection and Clan Cans) to your inventory for later use. When your character is busy opening the box, a wave of zombies will appear and attack you to kill. The zombies are larger in number, and you can’t trounce them. You will successfully survive the waves of zombies, thanks to your companion. Next to that, follow your companion to reach a laboratory where you find a dying scientist.
Leave the Laboratory to find a Communicator
After finding a message box, your next goal is to leave the lab to locate a communicator and ask others to help. Follow the Aleksey to leave the laboratory; meanwhile, battle against walking undead people. Now, you have more than two weapons that you can use to confront enemies and their giant bosses. During the lab exploration, you can open lab cabinet doors for collectibles like medical bandages and kits.
Aleksey traps and dies in the Lab
During the escape, you open the door and try to escape along with Aleksey and your dog. A massive door is near to close, and Aleksey holds it for a while until you and your dog pass it. Suddenly, the door gets closed trapping the Aleksey inside it. Meanwhile, a giant monster appears on the backside of the said person, and he brings out a grenade and throws it into the mouth of the monster. Next to that, you see a massive blast inside the lab, and the scene ends.
Find a Radio and a Box
After leaving the laboratory, you should keep moving to find a radio available a few steps in the forwarding direction. Leaving a message for help, you must find a para-box to collect rewards, and your ultimate objective is to find the air-dropped fire support and take on Lararov. At that time, you will confront a massive special mutant and defeat using your weapons. Once you defeat the special mutant, you can make your escape successfully from the MountSnow. The helicopter will come and take you away from there.
LifeAfter Walkthrough – Chapter 2 (Hope 101)
As you know, LifeAfter is available on different platforms to play like Android, iOS, and PC. The PC version is slightly different and challenges compared to the Mobile Version. We are offering LifeAfter Mobile Walkthrough, along with the best strategies and guides. After completing the first chapter, the game welcomes you to the 2nd that takes you to a new location full of vicious zombies and their bosses. You can expect mutant creatures that won’t leave you alive. Keep boosting your survival skills to deal with enemies and crafting weapons and gears, while learning how to use them timely to ensure your survival.

Communicate with Buck Slayer
Your first companion has died in the first Chapter during a bomb blast. Now, the game introduces another one, named Buck Slayer, who will be your companion throughout the 2nd chapter and help you survive and deal with enemies. Buck Slayer won’t give any answers to your questions. If you have any concerns regarding the location, then you should interact with other peoples following the path the game displays you on the floor.
Talk to Rachel
At the start, you should communicate with Rachel – the lady who communicated with you on the radio in the previous chapter (Hope Valley). Afterwards, you should get into the new city and find Fernando and introduce yourself on behalf of Rachel. He warns you to follow the rules described by the Commerce Bureau; otherwise, all tools and gears will be taken back you borrow. Follow Rachel and asks her what places you need to visit first. In the answer, she will reveal the following locations, such as:
- The Commerce Bureau
- Weapon Shop
- Market
- Grocery Store
- Restaurant

After that, she will help register you as a resident of Hope 101. Once you get registered, you will come under their protection. Interact with Emma to grab some information regarding your registration sent to Justin (the mayor of Hope 101) and follow the path the game displays you while chasing Rachel. A pack of boys make their places next to Justin’s office and are ready to fight. Meanwhile, Justin appears to request that the matter be solved with violence, but both you and your companion should act with maturity.
Follow Rachel and go to the Town’s Hall 2
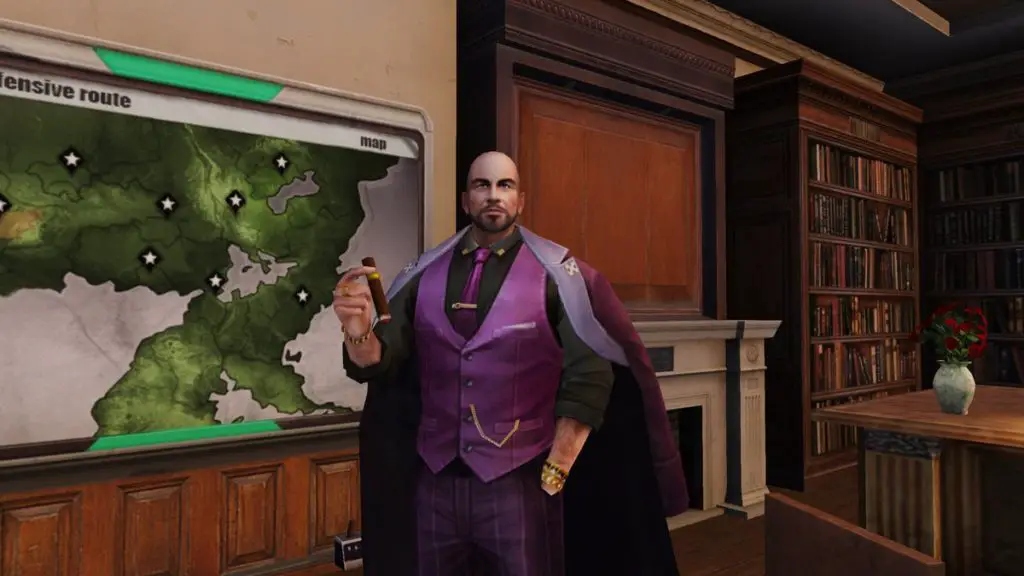
Once the discussion ends, follow the girl to reach the Town Hall’s 2nd floor and talk to Mavor Justin. During the conversation, Justin will admire your survival skills and congrats for leaving the Hope Valley alive. After that, he orders you to follow him because he wants to show you something.
Reaching the said destination will start the next scene of a conversation between you and Justin, who asks you to find a new territory because the number of survivors has been increasing day by day. You are a perfect person to reclaim all territories because you weren’t only survived in the Hope Valley, but also killed a special mutant. That’s the reason, Justin found you fit for the role of a hero.
Find Rachel to visit the Development Area
Rachel awaits you on the hall’s 2nd floor. Go and join her to continue your journey of survival in the new city. Hope 101. Navigate the city and reach the spot where a helicopter awaits you to take you to the development area.
Welcome to 101 Development Zone
As you land at the 101 Development zone, the helicopter flew away after leaving you, and heavy rain has started. Your first objective in the 101 Development Zone is to get in touch with the 101’s Force. There’s a person who is near to die named Eric; you should do hurry to talk. Afterwards, you will see a glowing spot that you must approach as soon as possible to fulfill your objective’s requirement.
Reaching the glowing spot, you will discover a box that holds a Clean Cane for you to collect. Find another box that will give you a Bandage. As you move toward the third box, a wave of zombies attack you from the backside. Safe your life and run toward the glowing light appearing on the other side of the land to find a solution to getting rid of zombies.

Petrol Barrel
After leaving zombies a bit behind you, you must visit the petrol barrel where you find the following items, including:
- Barbecued Meats
- Jam
- Steamed Vegetables
- Grilled Mushrooms
Don’t forget to heal yourself, because your character will die if the health bar depletes zero. Reaching the last glowing light will reveal a hint of your survival with the task of navigating the environment surrounding you to find key weapon formulas.
Interact with TM Remains
Search the environment to find TM remains where you collect two-weapon formulas of Bow and Arrows. The game keeps a container near the TM remains holding woods and stones. Now, your ultimate goal is to use the formula to make bows and arrows that you can use to shoot enemies at a distance.
Use your crafting machine to build a stone axe that costs you 100wood and 25stone. Next to that, the stone pickaxe will cost you 50wood and 50stone. Apart from that, you can use 60 pieces of woods to craft a torch that you can use to see in the dark area.
Craft Bows and Arrows
To craft a bow and arrows, you must use your crafting machine and hit the weapon tab. Click on the Simple Bow button to craft the said weapon that usually takes up to three seconds and will cost you 180wood and 90stone. In the weapon section, you can only develop a bow, and if you want to create arrows, you should visit the ammo section on your tab.
Woods and stones can be collected anytime using the basic axe and pickaxe available in your inventory all the time. You aren’t only limited to find resources for your survival against zombies, building a base and crafting weapons is also a compulsory part of the game.
Contact 101 using Radio
After building bows and arrows, you must find mutated creation and kill it to unlock the achievement. Once done, start working on the next objective tasked you with contacting 101 Force using the radio.
Build Your House
The weather will directly affect your health and make your character slower than average until you use a medical kit. You can’t use the portable medkit, because it will unlock when you reach Manor Level 6. After retrieving your health using a bandage that you can craft using hemp, you must find a radio to communicate with 101 force. Move ahead to build your dream home, but before you should find a place to set your foundations.
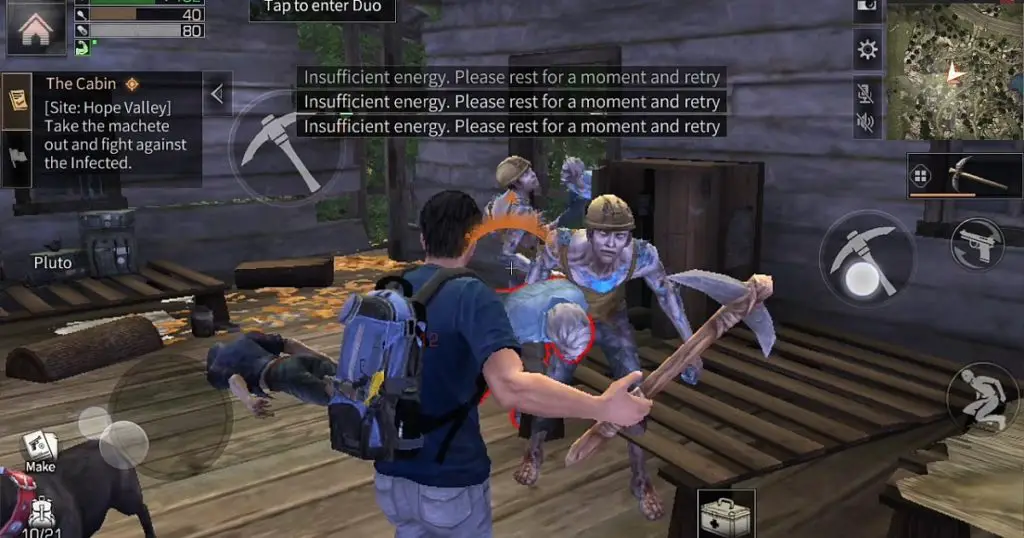
Explore the surrounding environment to collect woods, stones, and floors to add to build your home. Now, there are many tools available in your inventory that you can use to develop a home for your safety and other survivors. Choose the perfect place and start placing foundations. Create walls, doors, and build furniture.
Keep building your home until its completion and defending it from vicious zombies who want to destroy it. Once all done, the game will reward you with Home Defense Achievement.
Learn how to Hunt Wild Animal for food
In the next scene, Rachel will appear with a surprising face because you have successfully survived the night and waves of zombies, as well as completed the construction of your home. Besides that, you must learn how to hunt wild animals for food. For that, you can use bows and arrows depending on the animal standing in front of you.
LifeAfter Walkthrough – Manor Guide
Firstly, you should know that Manor is your home where you can keep your all stuff like weapons, crafting tools, cooking equipment, food, and more. You can also place a safe where you can store your resources like stones, woods, and hemp. In your manor, you can take rest until you want, cook yummy food to eat, and take a shit on the toilet and make fertilizer. Currently, the manor has fourteen different levels, and with the growth of the number, your capacity for storing items will be increased. Here’s a proper Manor Guide for you to learn how it works.
Manor 1
The game will give the label of Manor 1 to your newly built house. In short, it is just a beginning where you can survive longer than outside the area.
Manor 2
After upgrading your manor to its 2nd level, you find repairs are cumbersome, and many times you become upset upon returning home after finding it broken. You can invite a camp mate to live with you in your home, but it requires 300 friendliness.
Manor 3
Level 3 manor will let you change the exterior of your house whenever you want. It will unlock the formula research station where you can craft items as follows:
- 20×20 Fountain Ore Machine
- Livestock Garden
- Old TV
- Tan Sofa
- Double Bed
Manor 4
After upgrading your house to manor 4, you can build up to four floors in your home. It will also unlock some side features and give you access to Formula Research Station that will bring several blueprints to your table as follows:
- Folding Bed
- Vivid Table
- Fabric Sofa
Manor 5
After achieving the 5th manor level, you can reclaim additional farmland for your house.

Manor 6
It allows you to take your home up to five floors and unlocks several construction rights. A new blueprint will unlock like Bell Table, and add several possibilities to your inventory.
Manor 7
It will unlock more farmlands for your home and unlocks the following items such as:
- Retro Stool
- Roller Chair
Manor 8
Finally, the moment has come when you get a chance to remain in the house of your choice. Apart from that, you can build your house up to seven floors. Once you achieve the said level, the game will bring an Italian Sofa to your home.
Manor 9
Your ordinary home is now a lush house where you find an advanced drone energy core and a swimming pool. The manor 9 levels will unlock the following items:
- New Building Level
- Advanced Drone
- Energy Core
- New Manor
- Appearance
It unlocks a diving propeller for you to grab.
Manor 10
Now, you are capable of raising your fowl. The game brings you one step closer to retrieving your food supply of the last year, and it gives you access to build your home up to 9 floors. The prominent items that unlocked are the following:
- Poultry Pen
- 9-Story Construction Rights
Fishing
If you are looking for a simple way to gather ingredients to make yummy meals for you, then let LifeAfter Walkthrough – Fishing Guide help you how to grab. The game features different types of fish; some can use for decoration purpose, while some can be used to eat. You can sell your fish in the Trade City or Market to earn dollars.
- Visit Market to sell your fish Aquarium.
- You can sell all fish other than Grey Quality, to any NPCs for money.
As you reach the location, Hope 101, you have to accept the “Let’s go Fishing.” After reaching the Fall Forest, you will meet Vast – an NPC. Afterwards, you can see your map to locate the location of the said person. After encountering, you will receive a task with increasing your fishing skills. The person will give you the following items:
- Wooden Fishing Rod
- Metal Fish Lure
- Blueprints
LifeAfter Fishing Guide
Indeed, you know that survival is your primary. Keeping yourself alive is compulsory that can’t be possible without having food. The game includes the fishing segment so you could collect some food to keep your character always fed. Therefore, fishing is only the way that grants you unusual cooking ingredients. You can also make a collection of beautiful fish in your aquarium to show off your friends. LifeAfter Fishing Guide will help you learn how to fish and upgrade your fishing tools.
LifeAfter features a fishing task that you have to complete, but first, you must accept it following the said way.
- Visit the Commercial Bureau Building in the Hope 101 City.
- Upon crossing the entrance, you will discover the 5th Caravan Quest Board where you can accept the Let’s Go Fishing Task.
Leave the area to search the rich forest where you may discover the Minor Island 1. If you fail to find the location, you must hit on the Quest to reveal the exact spot. You can also interact with NPCs to have some details regarding the location you have to visit for fishing.
Learn about Fishing Rods and Lures
Like other skills, your fishing abilities will increase as you complete the requirements or advance through the game. After having better fishing skills, you can craft better fishing rods to catch fish big in-size. Here’s a brief guide of Fishing Rods and their levels:
- Wooden Fishing Rod (Level 1)
- Iron Fishing Rod (Level 2)
- Fibreglass Fishing Rod (Level 3)
- Improved FG Fishing Rod (Level 4)
- Exquisite FG Fishing Rod (Level 5)
Before moving ahead, you should learn how many types of lures are available in the game and how to craft a trap. Having said that there are four different lures are available, and their names are given below.
- Meta Fish Lure – It is a primary lure made up of metal and lets you catch a massive variety of fish with no worries.
- Vegetable Fish Bait – Usually, vegetables are used to build a bait that you can use to grab the attention of herbivorous fish.
- Meat Fish Bait – The said bait can be made using the meat to attract carnivorous fish.
- Shrimp Bait – Lastly, the game makes the Shrimp Bait using the live Shrimp that allows you to attract the Carnivorous fish in a more appealing way to collect lobsters from the sea environment.
Two Types of Fishing Methods
Whether you love fishing or not, you have to go on fishing to collect some ingredients to cook yummy meals. Without any food, your character will become lazy and die after a specific time. Therefore, you should take care of your character’s health and keep always fed. LifeAfter introduces two types of fishing methods, such as Automatic and Manual. Usually, players prefer auto fishing feature, because it lets them have some relax when their characters are fishing. Auto-fishing system lacks some features like the catch rate isn’t so good compared to the manual fishing, though it saves a lot of time. Using the feature requires you to follow the given instructions like:
- Hit the Auto-fish Button
- Equip Fishing Rod and Lure
- Cast a line as per usual
After completing all steps, you must hit the icon available on the right side of your screen. The service will stop after the set time or following other possibilities like when you backpack gets full, or your lures run out.
Conclusion
LifeAfter brings several popular genres like Role-playing, Survival, Zombie-apocalypse, and Shooting in one pack. You aren’t only supposed to struggle for your survival and build a house and craft weapons to live longer. I found the gameplay quite challenging compared to other RPG and Survival games, but it is pretty interesting to play because of its story-driven gameplay. During the game, interaction with NPCs is awesome, and the way they deal with you was great. Besides that, it features two modes as Solo and Co-op. The solo mode lets you play alone, while the co-op gives you a chance to interact with other players and visit the manor to see how they are working on their survival plans.

 CodyCross Answers
 Daily Themed Crossword Answers
 Top 7 Answers
 Word Craze Answers