Introduction
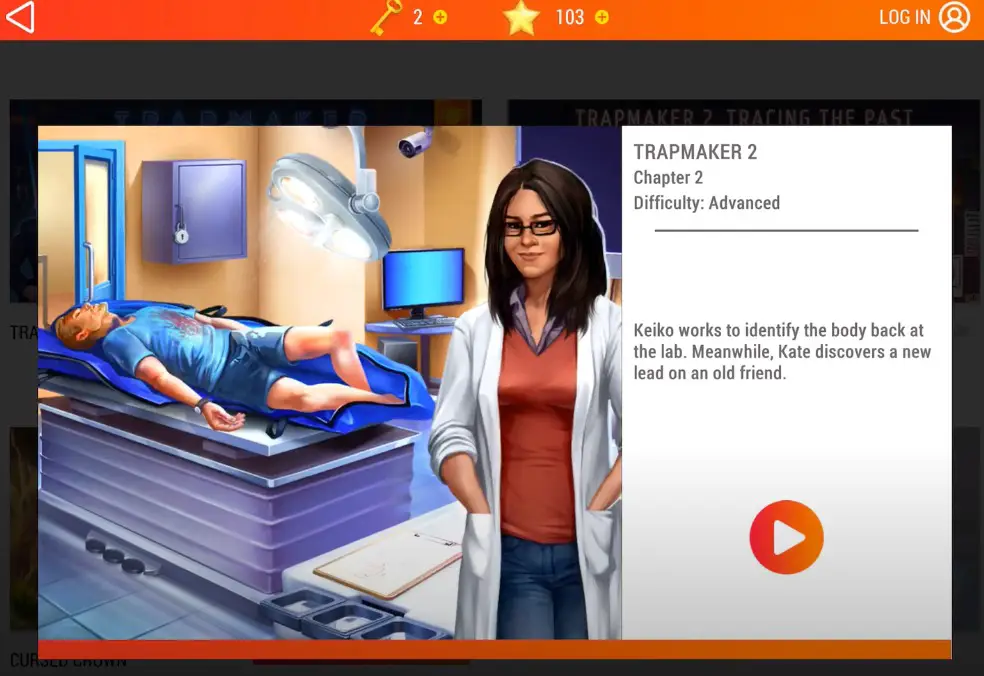
After finding the dead body in Chapter 1 of Adventure Escape: Trapmaker 2, Kate took it to doctor Kaiko. Now, Kaiko is working to identify the body and the protagonist discovered a new lead on an old friend. Help out Kate to find hidden objects and solve a series of mysteries to catch the culprit. The game spans eight chapters and there is something unique for you to collect in each chapter. Therefore, use keys to open the chapter and start helping out Kate find clues, analyze evidence, and find the murderer. Trapmaker 2 starts with an advanced difficulty level that means you can’t expect easy gameplay. Therefore, we decided to bring you a set of complete AE: Trapmaker 2 Chapters Walkthroughs. Here’s an AE: Trapmaker 2 Chapter 2 Walkthrough:

The story continues with Kate who is in an office to look into the business card she found, after leaving the body to the lab. As prior, your objective is to search for hidden objects and analyze clues to find dark secrets; meanwhile, interact with AI-controlled characters who share in-depth information with you. You can’t control the discussion, as your only job is to tap the next button and read the conversation happening between the protagonist and other avatars. Use AE: Trapmaker 2 Walkthrough as a guide to solving the puzzle of Chapter 2.
Adventure Escapes Mysteries: Trapmaker 2 Walkthrough
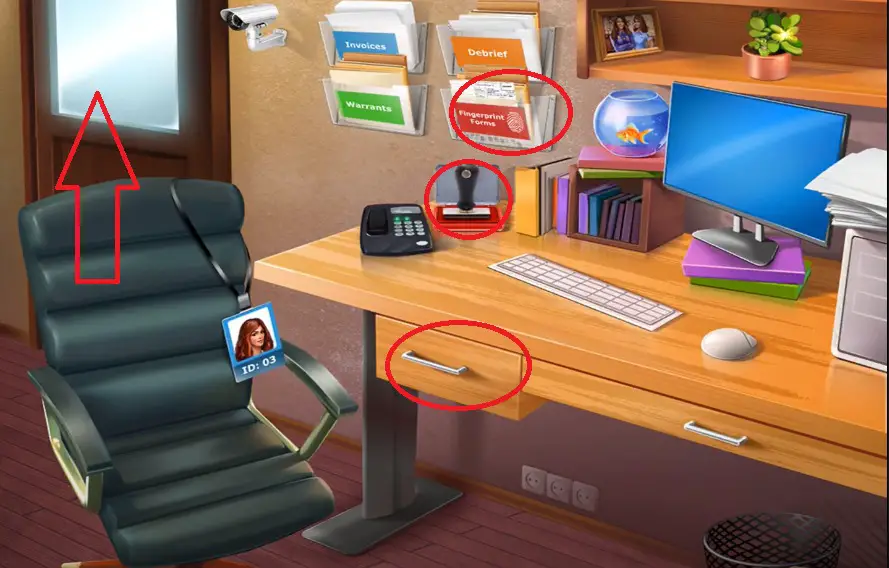
The scene starts within an office where you are standing ahead of a desk near the chair where the ID Badge of Kate is hanging on. To complete Chapter 2 of Trapmaker 2, you have to follow the given steps:
- Collect a fingerprint form first to collect the victim’s prints and add them to your inventory.
- After collecting a form, you should tap on the ink.
- Open the small drawer of the table to collect a “supply key”.
- Now, you should open the door and come out of the office.

Area Outside of Office
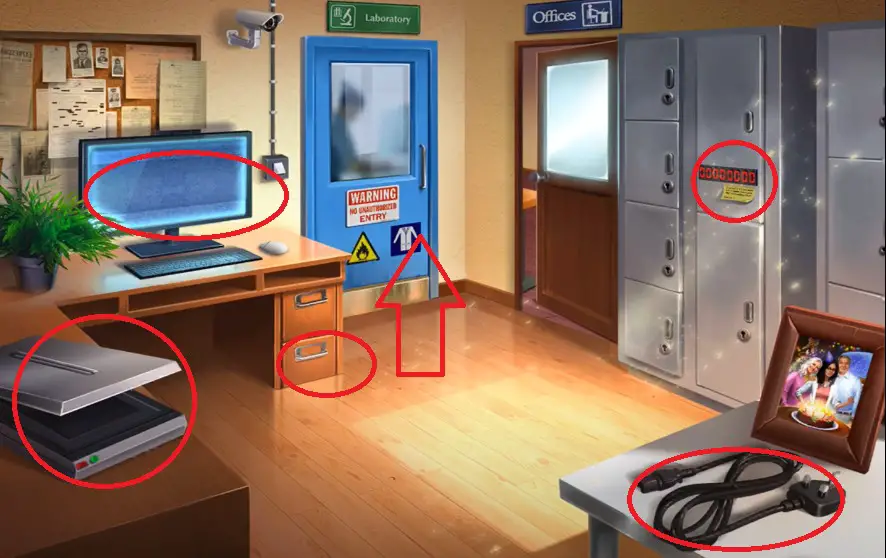
After leaving the office, you find yourself in a locker room where a PC, printer, and a table are kept holding a picture frame.

- Collect a power cable from the table and add it to your inventory.
- Open the drawer to discover a dusting brush.
- After that, you must head to a PC, drag and drop files, and fill the form in the section of previous searches to unlock the door that leads you to Doctor Keiko’s room.

Get into Laboratory
Keiko asks you to fill out the Internal Injury Report as you get into the room. Having said that Keiko leaves the room for a while.

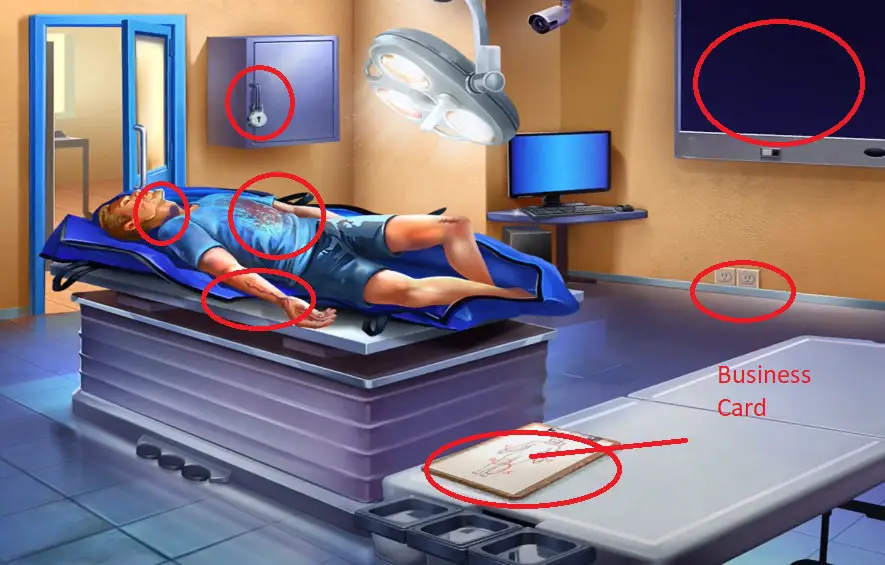
- Firstly, you must use the “supply key” from your inventory to open the box fixed in a wall next to the door to collect fingerprint power.
- Select the link and use the fingerprint paper to get the victim’s fingerprint.
- At the third step, you have to spray some fingerprint powder on the bruises of the victim and use a brush to collect a few prints from there.
- Use cable and connect it to turn on X-ray Machine and lift a board from the patient bed to see fractures of the victim.
- Head to the X-Ray Screen to see how many bones have been fractured of the victim and then back to the board to set the numbers as follows: Neck (3), Arm (4), Hand (5), knee (3), and Leg (2).
- Once done, you can add an injury report to your inventory.
Come out of Laboratory – AE: Trapmaker 2 Walkthrough
- Now, come out from the laboratory and use the scanner to create a database number, which is 22.
- Head to the locker and enter the code (22052703) to collect a business card.
Enter the Laboratory
Next to that, you should get into the laboratory and head to the table. Bring the business card out of your inventory and keep it on the table.
- Use the fingerprint power to highlight the prints on the business card and use a brush to collect them.
- After that, you should move on to the office and try to sketch the culprit.
- Once done, come out of the office and head to the Computer. Enter the Passcode which is 1224 to open the computer and upload the sketch of the trapmaker using a scanner.
- Next to that, try to match the image with a criminal database using a computer.
AE: Trapmaker 2 Chapter 2 Walkthrough has been completed. Let’s move on to the completion of Chapter 3.


 CodyCross Answers
 Daily Themed Crossword Answers
 Top 7 Answers
 Word Craze Answers