

Introduction
Stargazing: Genesis is an Adventure, Puzzle, and single-player hidden object video game released by strongshell Software. It offers similar gameplay to Samsara Room, Ghost Case, Haunted Laia, and Unwanted Experiment video games. The story starts with Professor Wilson, who is forced to run a new laboratory, where his confidence drives him in an unexpected direction. During his research, the professor finds something new, but no one knows the consequences of his discovery.
Get ready to experience a point-and-click escape video game with a unique and immersive storyline. It is tasked with playing the game to unravel an intriguing storyline when finding hidden objects and solving tricky puzzles to progress through the game. For those players who aren’t good at finding clues and completing puzzle-solving games, walkthroughs.net will keep releasing Walkthroughs, Guides, and Tips & Tricks to help them. Read Stargazing: Genesis Walkthrough Guide to find all the answers and solutions.
Stargazing: Genesis Walkthrough Guide
You start to find hidden objects in a cage with two sides. At the start, you need to discover a screwdriver and a crystal and use them to find other clues. If you are looking for a guide that helps you solve all tricky puzzles, read the Stargazing Genesis Walkthrough Guide to get help.
Cage
- First, pick up a screwdriver from the spot and add it to your inventory.
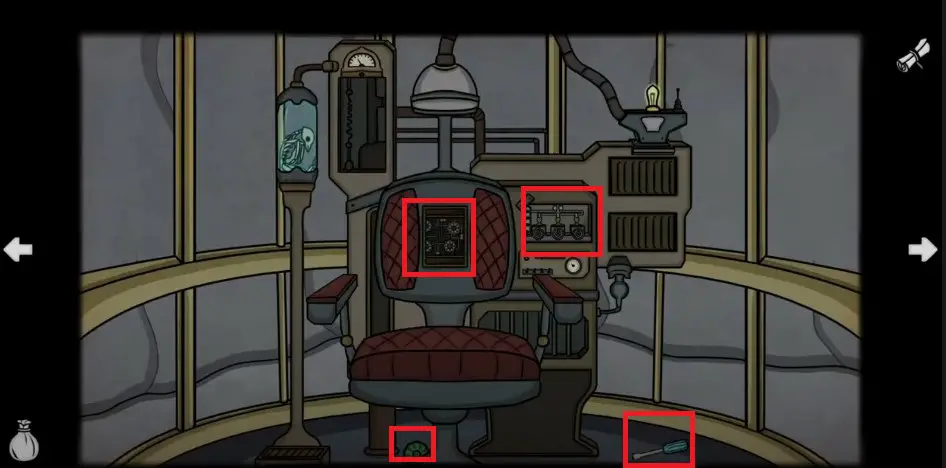
- Please pick up the button from the bottom of the chair and keep it on your list.
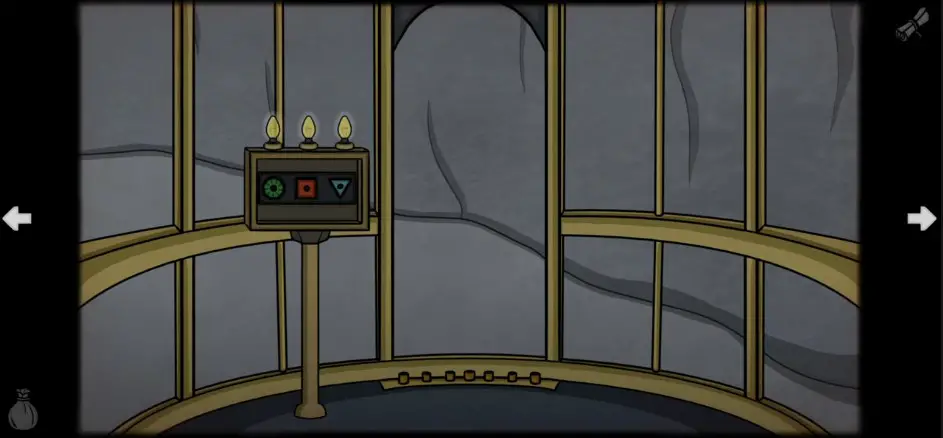
- Click the meter fixed on the right side of the chair to play a mini-game, wherein the game displays you three different meters and two bulbs. Each meter belongs to a different color and may be used to change the color. Your objective is to match the color of the second bulb by adjusting the meter and keeping the first bulb in mind.
- Once you complete the puzzle, the secret section reveals a triangle that you need to open the cage. Keep the triangle piece in your inventory and start completing other puzzles.
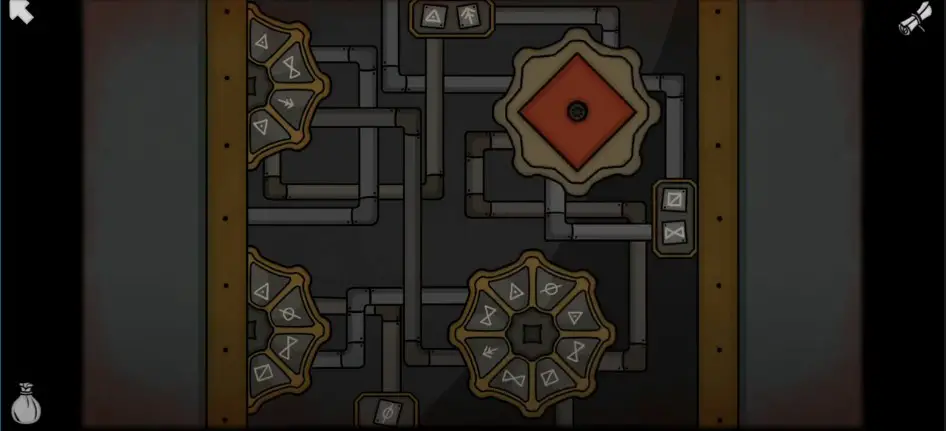
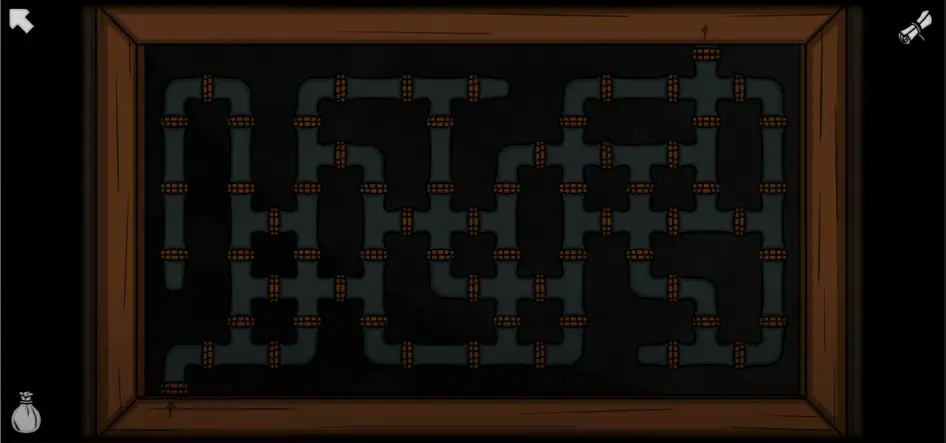
- Next, tap the chair back pad to reveal a mini-game and try to understand the puzzle. To solve the mini-game, you have to see the image and find the connection with the help of pipes. You can also check the image below to find out how to complete the puzzle.
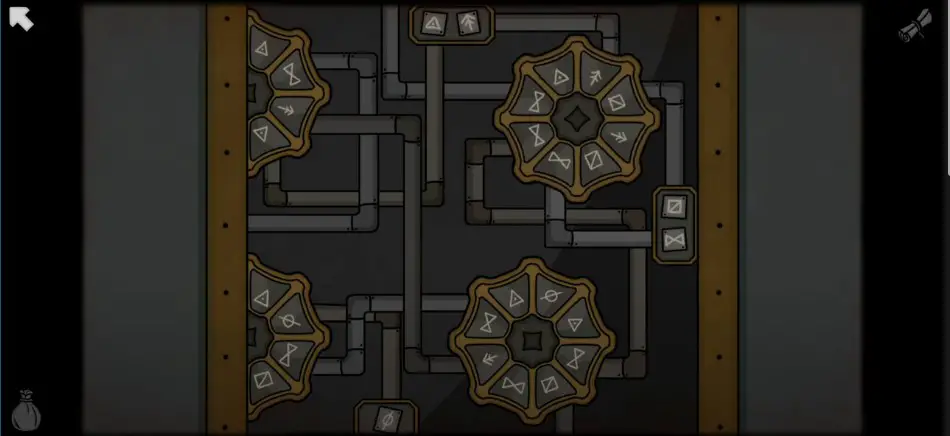
- As you solve the puzzle, the gear drops off, leaving you a square piece. Please pick up the piece from the spot and add it to your inventory.
Cage Exit
- After solving the puzzle, hit the back button and tap the right arrow to discover the door and a puzzle.
- Head to the box fixed next to the door, select and add all pieces to the board to open the door, and go through it to reach the room.
Room 1
You will discover dozens of cages in the room as you leave yours to find the truth behind the scene. Finding hidden objects won’t be easy as they are hidden and beautiful, which makes the gameplay tricky.
Room 2
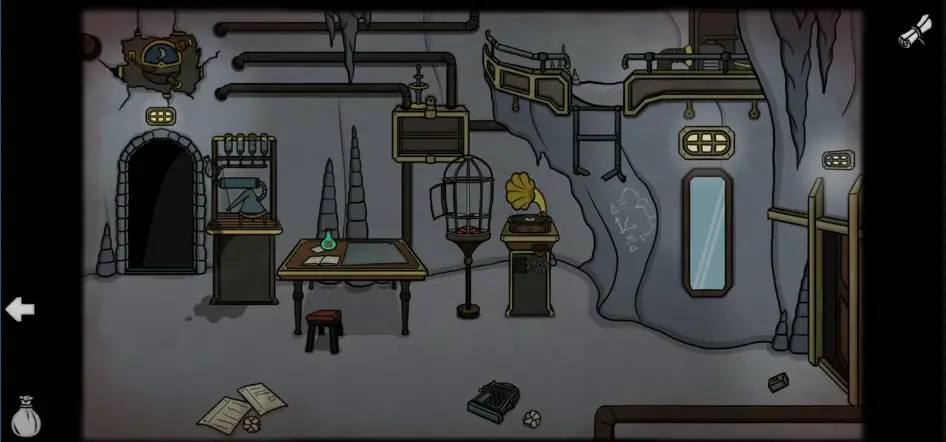
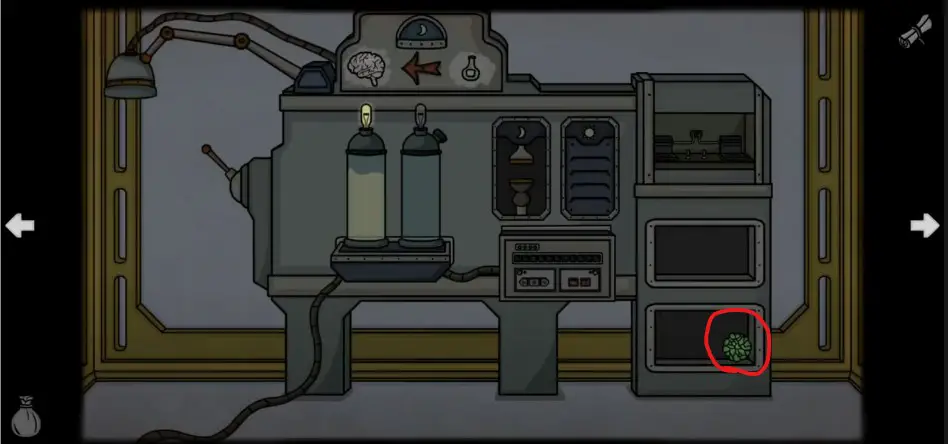
- Hit the right arrow to reach Room 2, which seems like a Laboratory. Tap the table in the room to pick up a Green Bottle. Add the bottle to your inventory and click the book to read what it says.
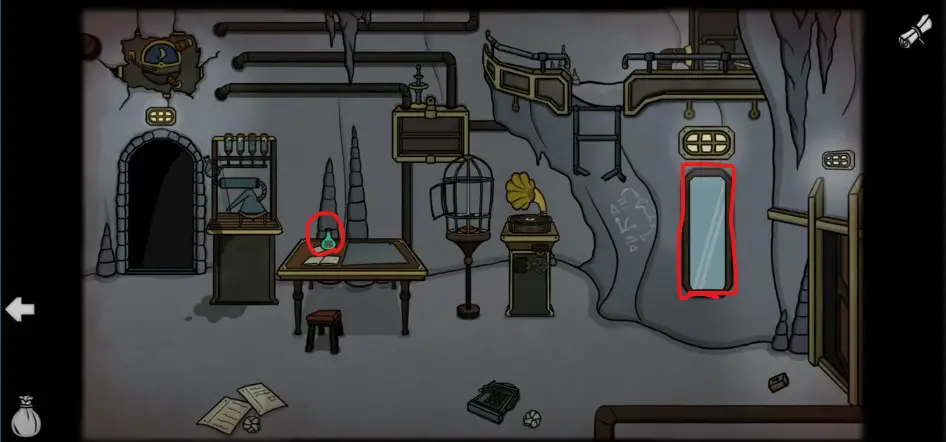
- Before leaving the room, don’t forget to click on the mirror to see the crow’s image and its notes.
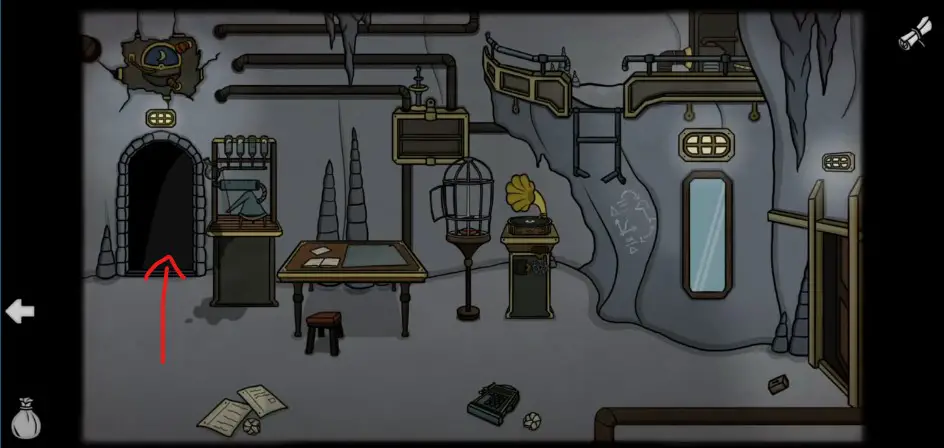
Doorway – Attached Room
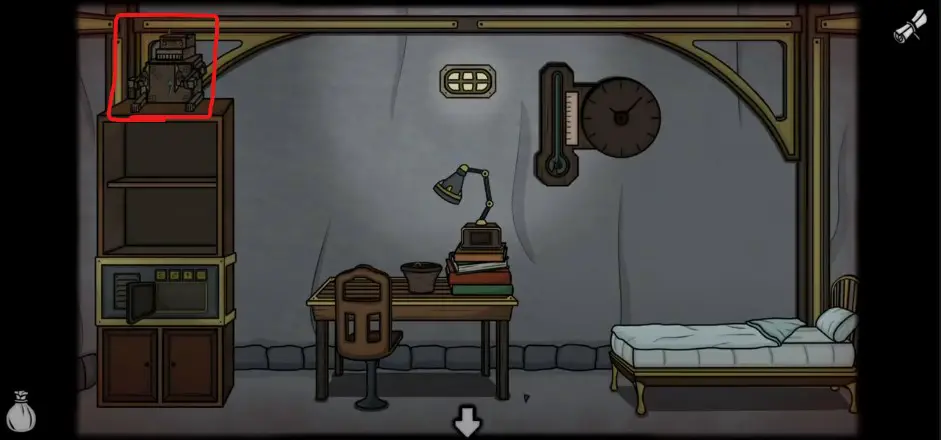
After picking up the bottle, tap the doorway to reach the attached room and search for a toy above the cupboard.
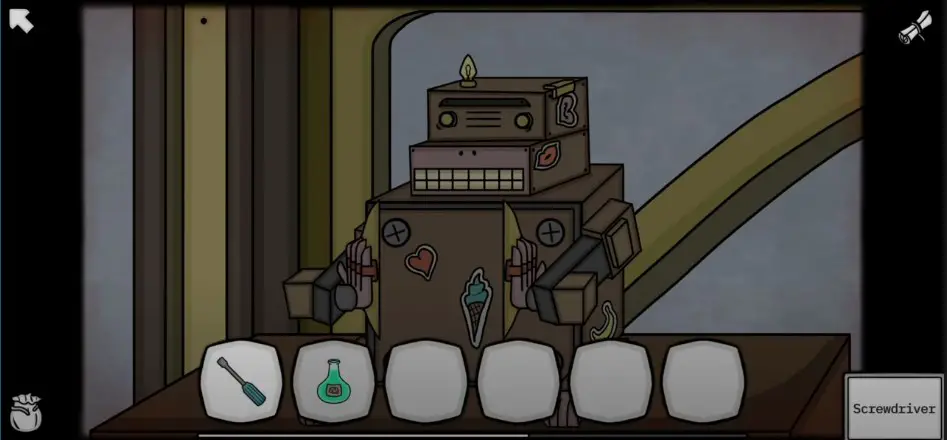
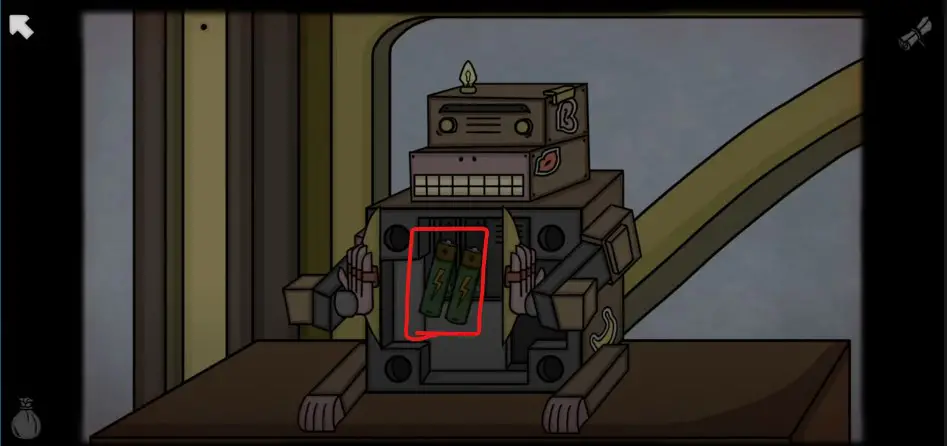
- Select the screwdriver from the inventory and open the box to get batteries inside it.
- Hit the back button to leave the attached room and return to Room 2.
Room 3
- Once you step back, go through the passageway on the right side to reach Room 3, where you will discover two machines and an unlocked door.
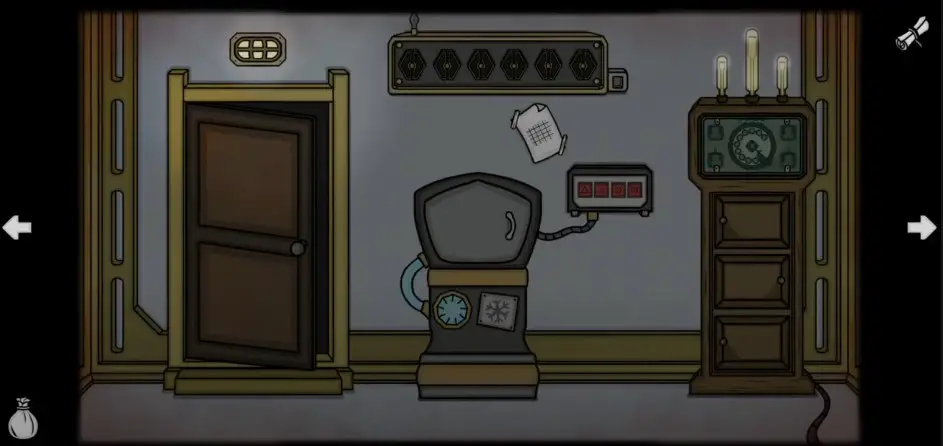
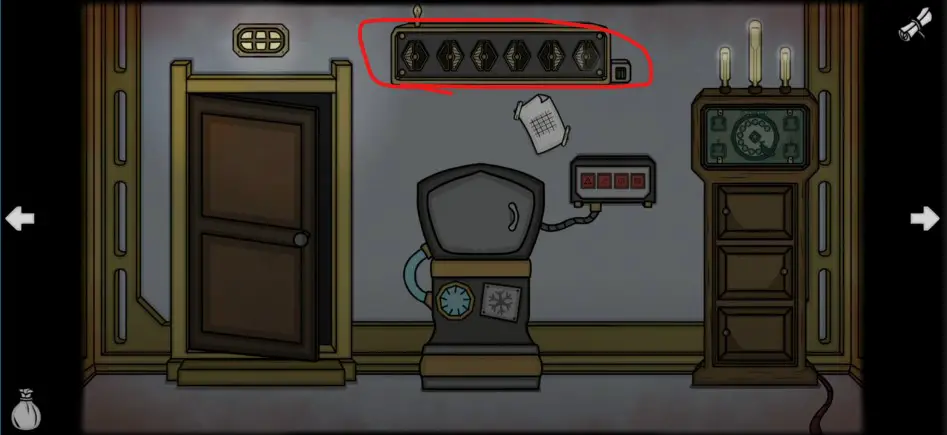
- At the start, select batteries and insert them into the box fixed above the paper on the front wall. As you add batteries, six bulbs start to blink, showing you a particular pattern that you must keep in mind as it may help you solve a tricky puzzle.
Room 4
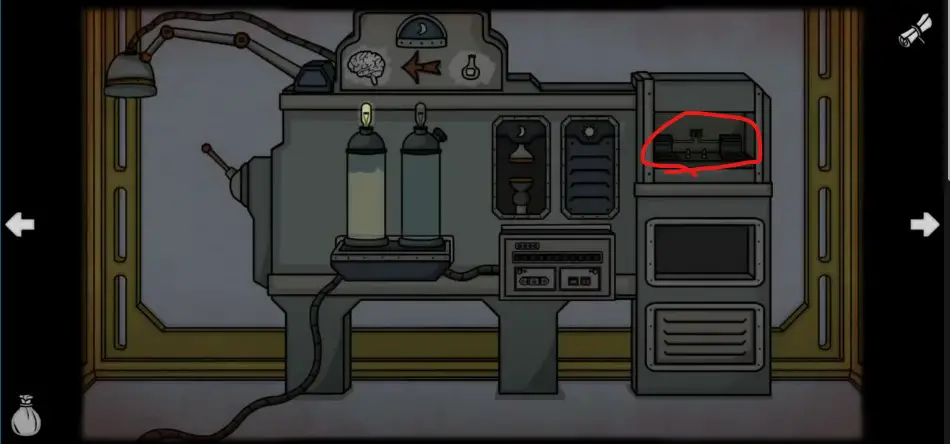
- Hit the right arrow to reach Room 4, which seems to be a generator room. Tap the right side of the machine to discover two buttons. You must tap them in the following order: Left, Right, Left, Left, Right, and Left.
- Tap the back button to find the crystal on the scene as you solve the puzzle.
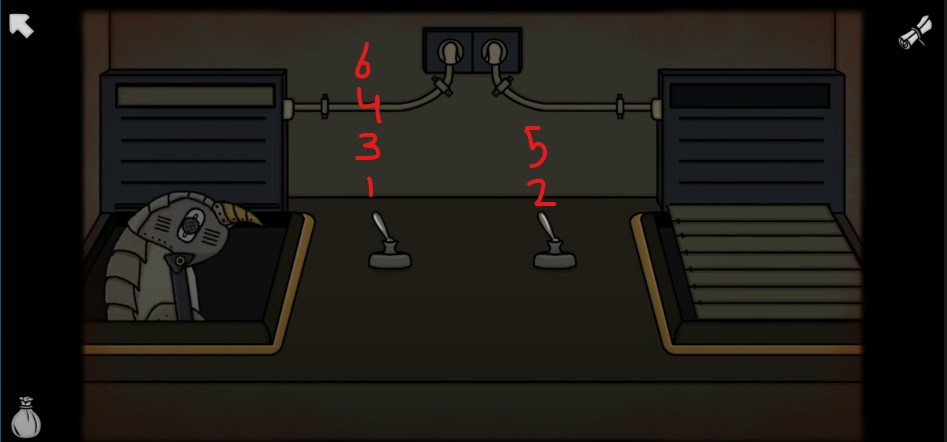
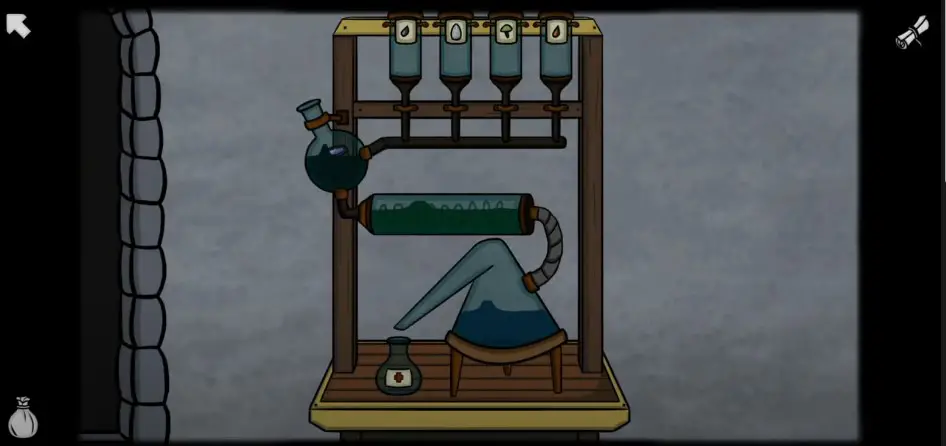
- Select the crystal from the inventory and place it in the machine. Head to the buttons and tap them in the sequence given below:
- Pull the handle as the second jar is filled with solution, select, and add the potion to the second jar.
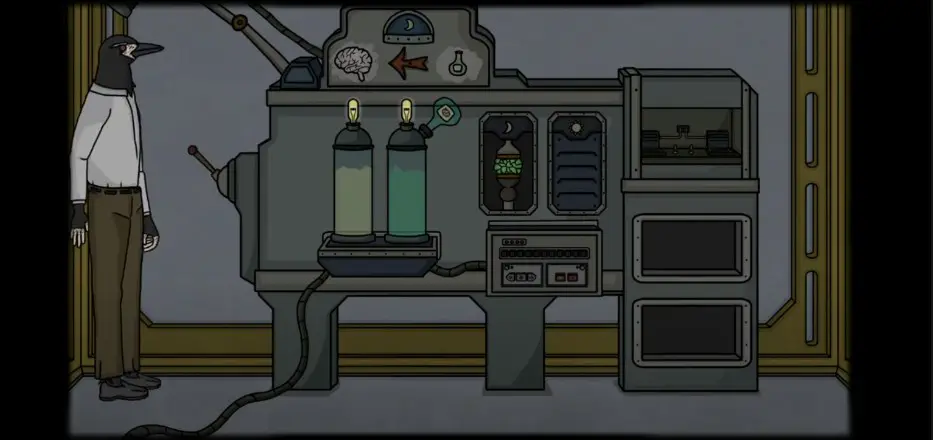
- The solution you have prepared may help the professor bring his memory back. Soon, the game takes you back to the professor’s memory when all his attempts were failures.
Experiment Goes Wrong
The story starts on the previous dates when the professor’s attempt is a failure.

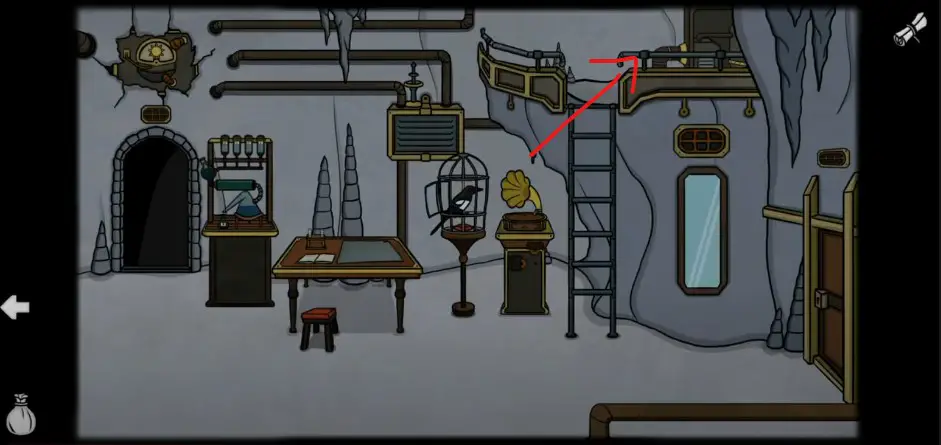
- You must tap the cage to read about the bird and go through the passageway to the attached room. Tap the clock to discover a record and add it to your inventory.
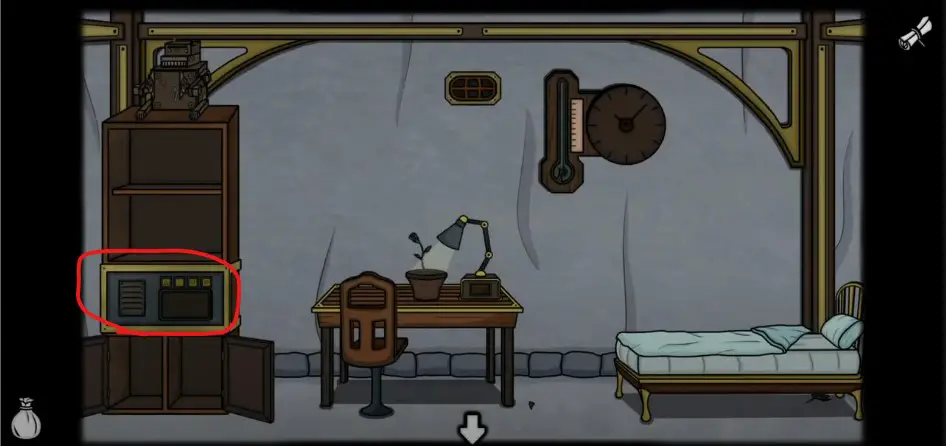
- Pick up a candle from the closet and a watering can from the cabin.
- To reach Room 2, leave the space, tap the platform on the right side, and select the watering can from the inventory.
- Water is dropping off from the melting ice, and you must fill it into the watering can.
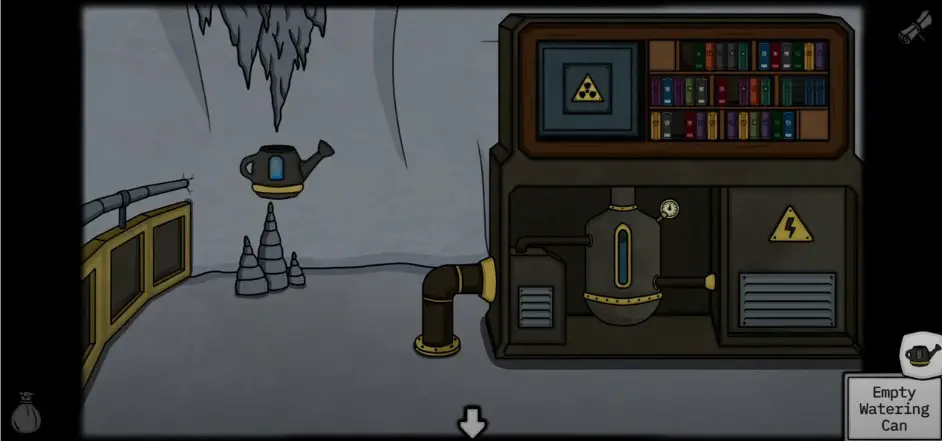
- After that, tap the books on the shelf and arrange them in three rows to solve the puzzle.
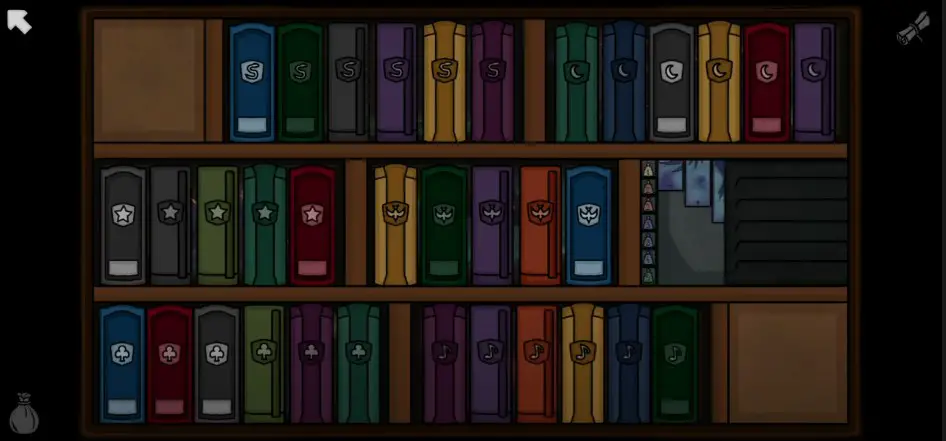
- The image below can help you learn how to solve puzzles. It also reveals another task to complete.
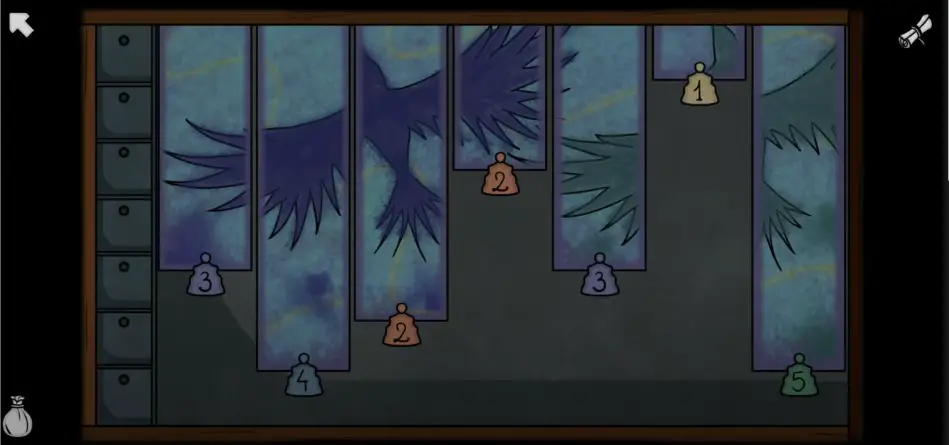
- Tap the puzzle on the right side and use weights to complete the painting. A section will open next to the books, and you will receive a crystal as you complete the painting.
- Hit the back button and go to the attached room. Tap under the bed to discover a mushroom, and use the crystal you recently collected to get a mushroom.

- Return to Room 2, head to the table to collect two test tubes, and add them to your inventory.
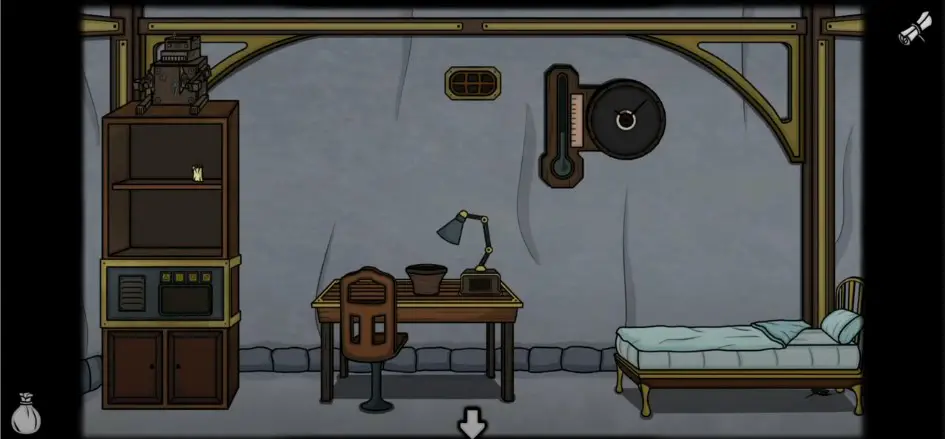
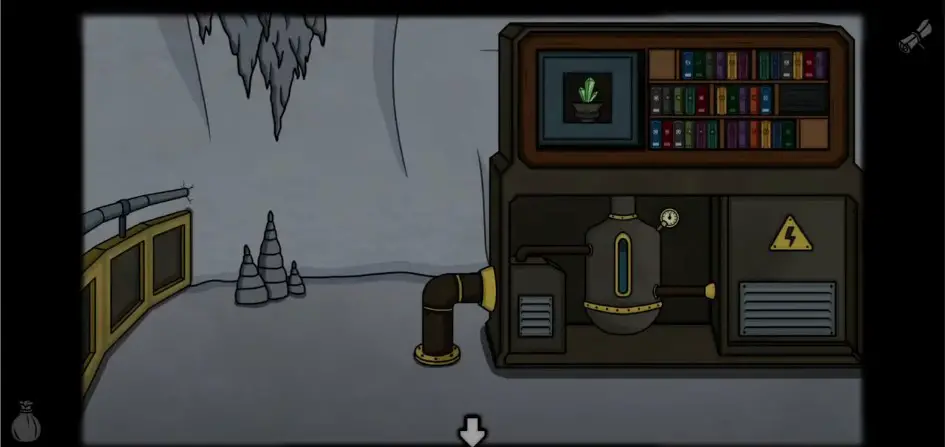
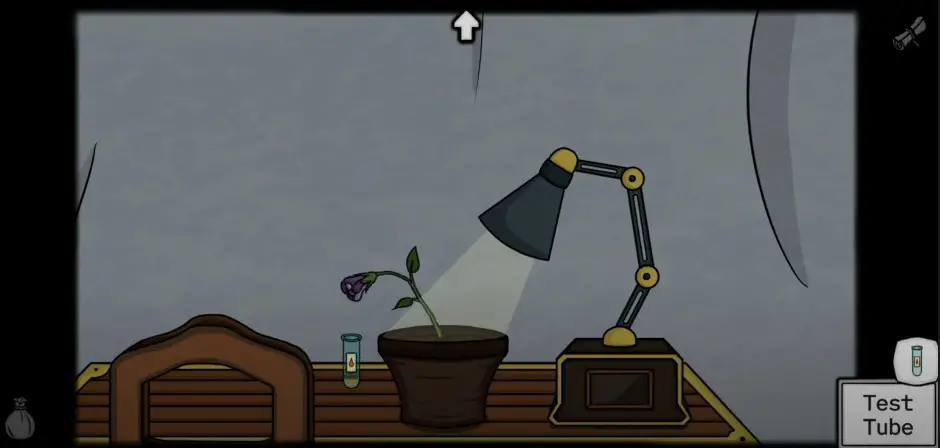
- Take a step back and reach the attached room. Tap the table to discover a plant pot below the lamp and select the watering can to give water to the pot.
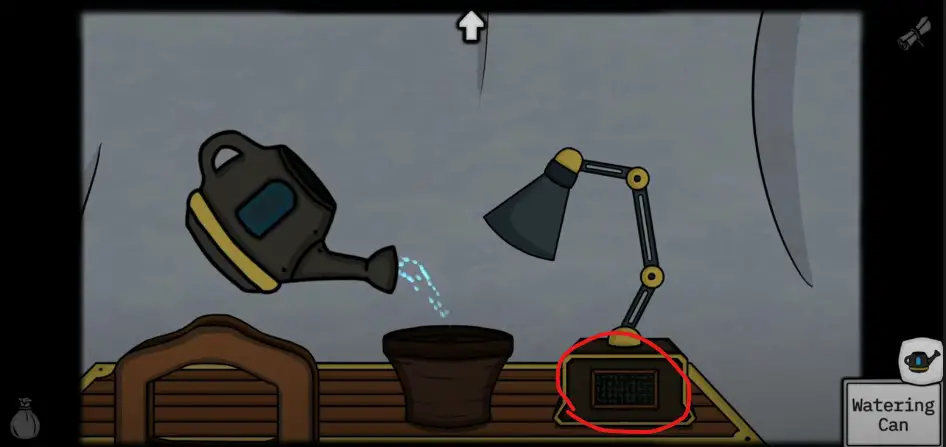
- Tap the lamp to discover the “Connect Pipe” mini-game and start making the connection to solve the puzzle.
- As you solve the puzzle, the lamp will turn on and start lighting the pot, helping the plant grow gradually.
- Head to your inventory as the flower grows, select the test tube, and fill it with the flower juice.
Return to the Room 1
Leave the attached room and go to Room 2. Next, go through the left side to reach Room 1. Once you get there, set the sunlight using the mirrors to solve the puzzle.
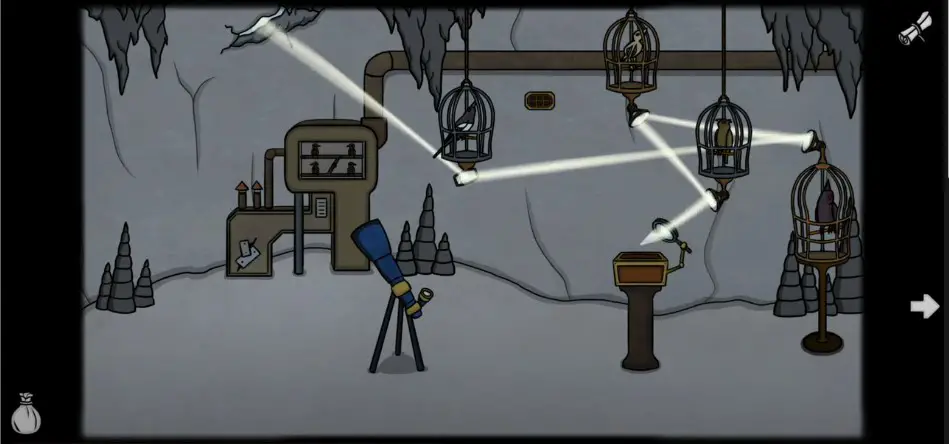
- Set the mirrors so they throw sunlight into the magnifying glass.
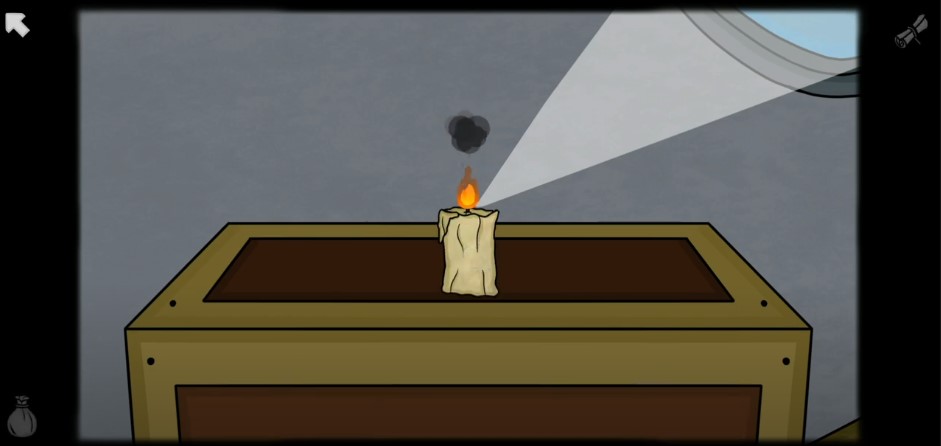
- Tap the magnifying glass to zoom in on the box, and keep the candle on it to make it burn.
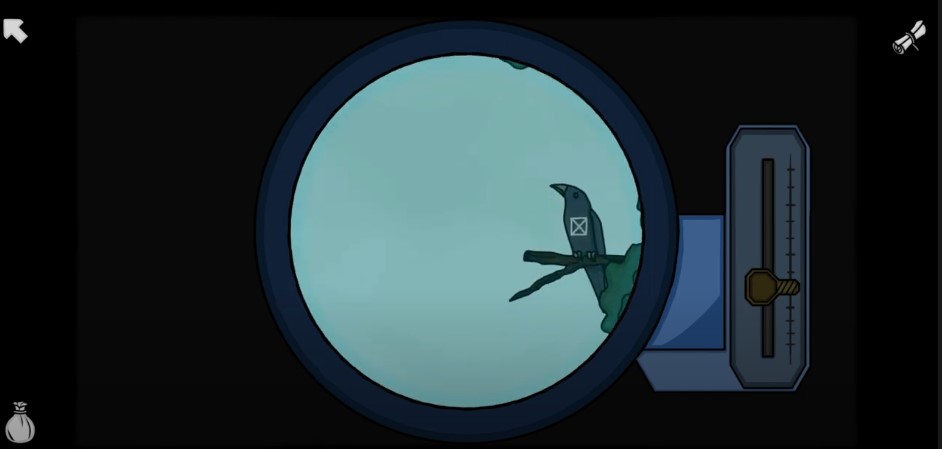
- Click the telescope to see the beautiful birds through it, and try to find the symbols needed to unlock a box.
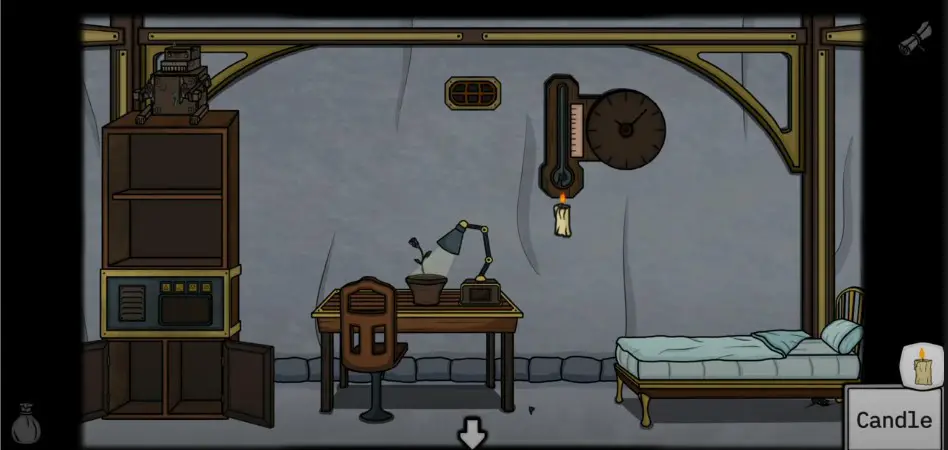
- Return to the attached room and head to the clock. Select the candle from the inventory and take it close to the thermostat.
- Select the second test tube from the inventory and bring it below the meter to fill it with the solution dropping.
- Head to the cupboard, tap the vault, and set the symbols in the image below to get a toothed gear.
- Return to Room 2, tap the cage, and put the Record onto the instrument next to the bird.
- After that, tap the tools between the table and the passageway to experiment.
To be Continued…
 CodyCross Answers
 Daily Themed Crossword Answers
 Top 7 Answers
 Word Craze Answers