
Introduction
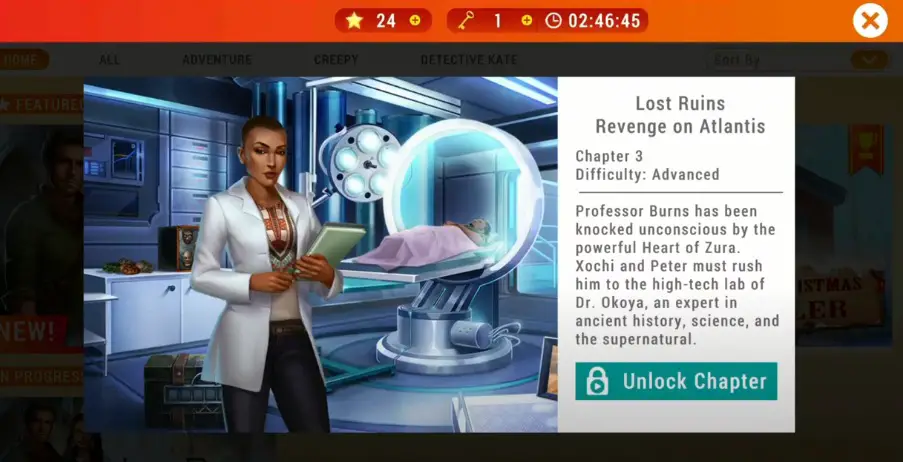
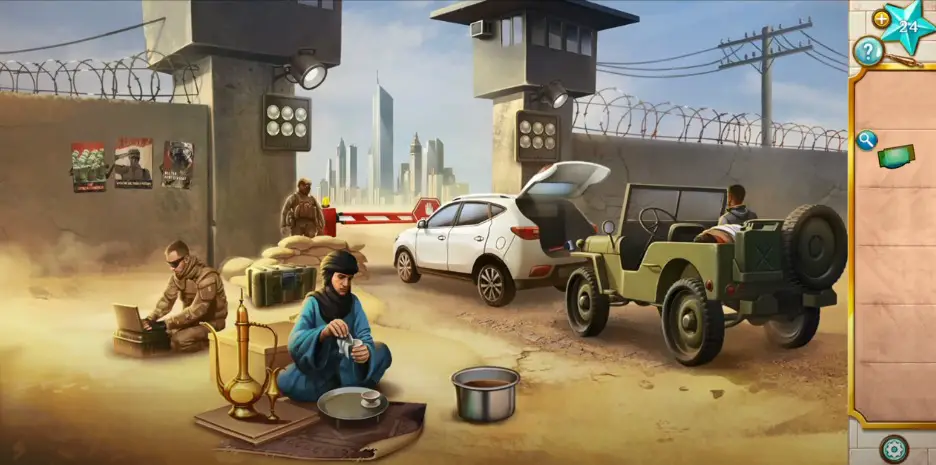
Adventure Escape Mysteries: Lost Ruins Revenge Chapter 3 puts you in trouble as you have to find the Laboratory to save Professor Burns. Your journey starts by cracking tight security where two soldiers have been reported to catch three characters. Escaping Chapter 3 won’t be easy as it keeps you engaged for several mini-games, and finding hidden objects are complex. Therefore, we jump in to help you with our Adventure Escape: Lost Ruins Revenge on Atlantis Chapter 3 Walkthrough. First off, start finding hidden objects by keeping the teapot aside as it helps you find Plastic Sheets that you can use to discover the code to unlock the briefcase on the floor.
AE Mysteries: Lost Ruins Revenge on Atlantis Walkthrough Chapter 3
In the previous chapter, Peter and Xochi found Professor Burns unconscious because of the Powerful Heart of Zura. Both characters are in a rush, and they need your help to take Professor Burns to the high-tech laboratory of Dr. Okoya.

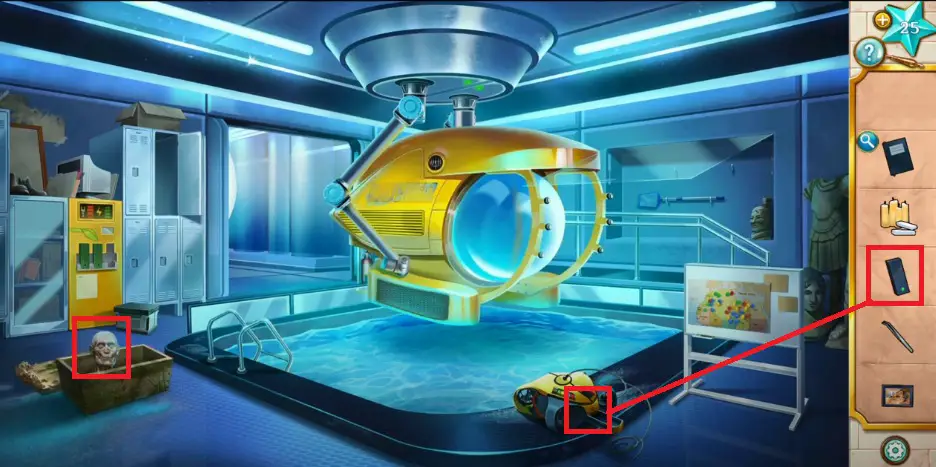
- First off, drag the pot next to the man aside and discover “Plastic Sheets.” Next, tap the back mirror of the white vehicle to obtain a Windshield Scrapper.
- Head to the front wall to discover posters, select the Windshield Scrapper to remove them, and find the Interesting Symbols.
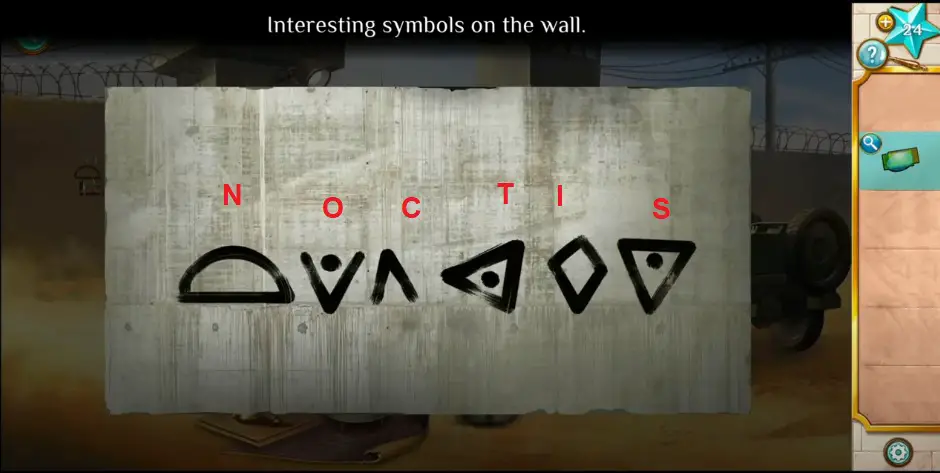
- Keeping the exciting symbols in mind, you must tap the Plastic Sheets and discover the same shapes over there, and keep noticing the letters. After figuring out, the passcode you get will be “Noctis.”
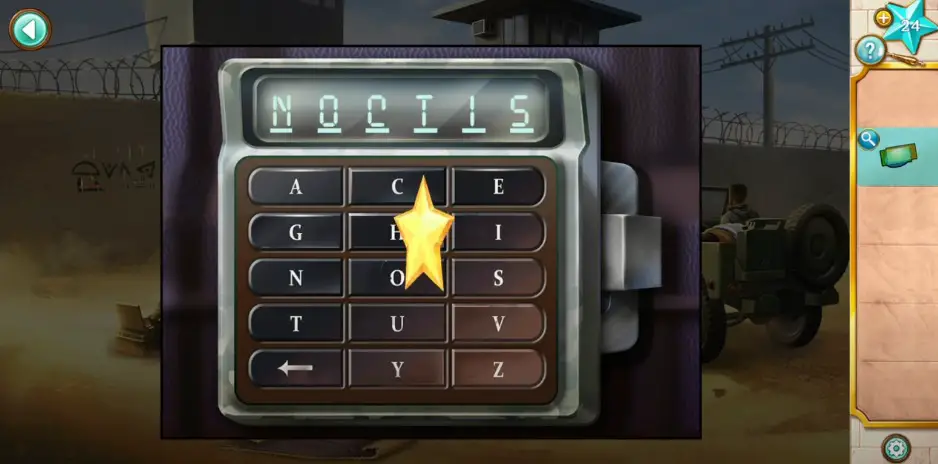
- Next, tap the trunk on the floor and enter the code “Noctis” to unlock it. As the box gets opened, collect the following hidden objects: Sleeping Pills and Remove control.
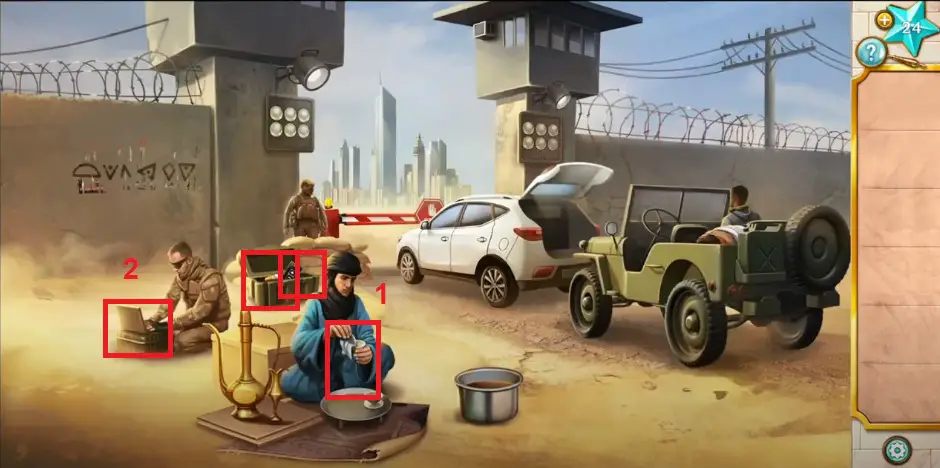
- Select the Pills from the inventory and offer them to the local man making a tea on the spot. Afterward, collect the Tea with Sleeping Pills and add it to your inventory.
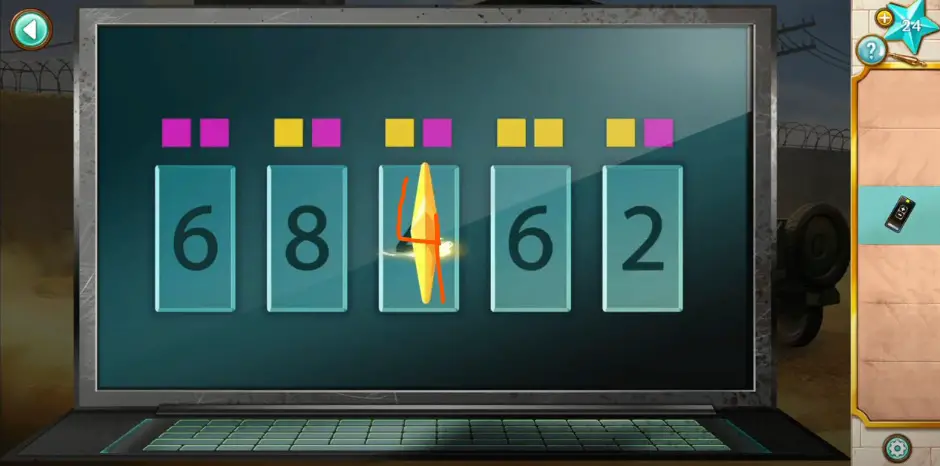
- Offer the tea to the soldier on the left side and wait for a while until he falls asleep. Click the laptop of the sleeping soldier and try to crack it by understanding the color combination. To understand the combination, you should hit the back button and see the lights placed on both gate pillars that are continuously blinking.
- Enter the passcode “68462” to see the Arrest Warrants of three protagonists: Professor Burns, Xochi, and Peter.
- Here your objective is to DELETE all records one by one, hit the back button, close the car window, and go through the passageway to discover a map.

Map Puzzle – Reach the Laboratory
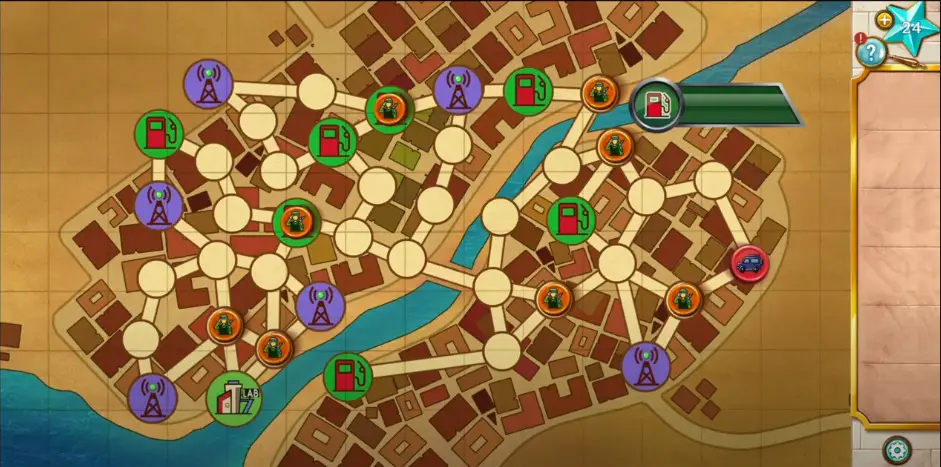
As you go through the passageway, the game displays a huge map containing different spots, fuel stations, and many other areas to explore. Reaching the lab is your ultimate goal; however, watching the map, it seems finding the way to the lab could be challenging.
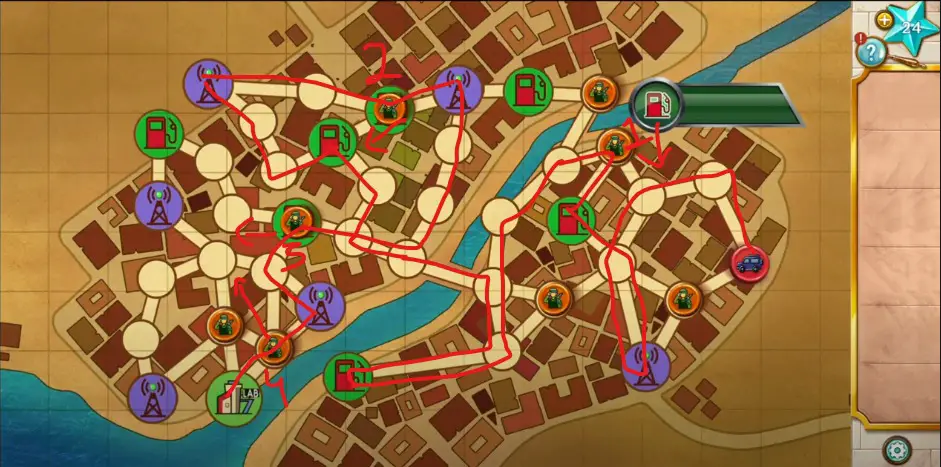
- To solve the puzzle, you have to see the map given above carefully as the red line shows the path you have to follow, and numbers printed on soldiers highlight how to select that soldier first and move to the next pointed block.
Laboratory
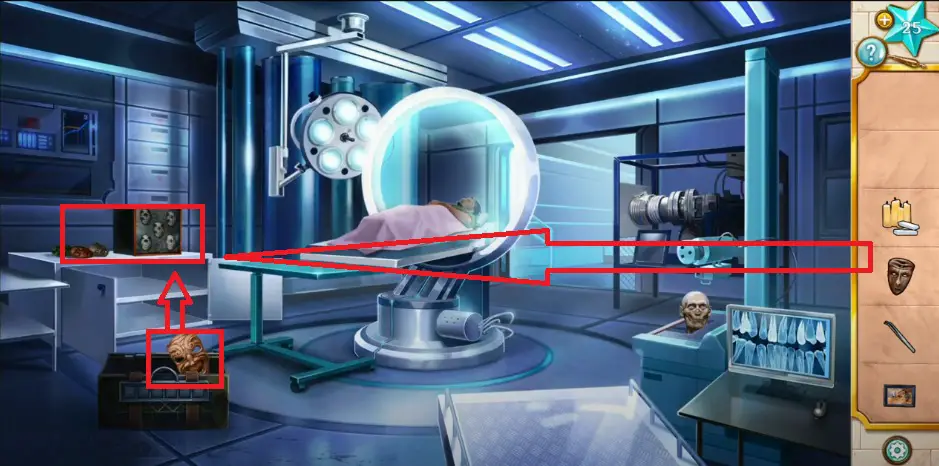
After arriving at the Laboratory, Dr. Okoya welcomes you and asks about the scenario. As the discussion ends between Dr. and Xochi, the game displays you a next scene wherein Professor Burns has been placed inside the massive machine to do the treatment.
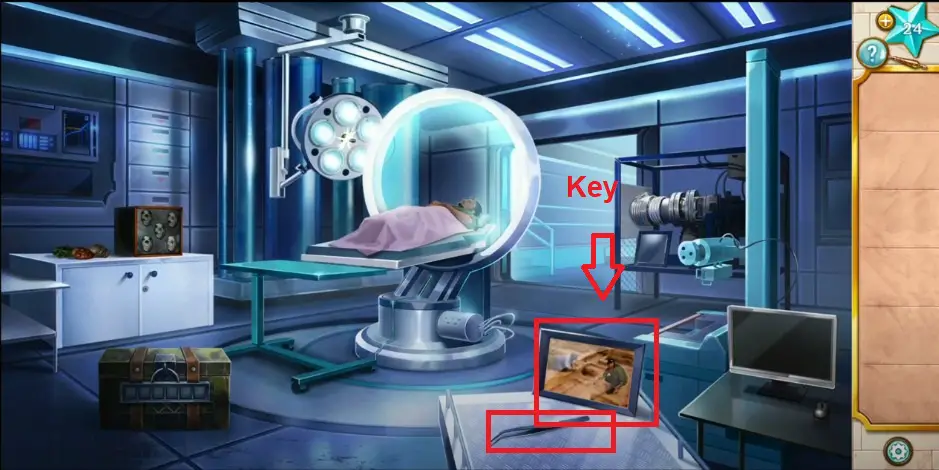
- First off, you need to pick up Tweezers and Photo of Burns from the table and add them to your inventory.
- After discussion, pick up a key from the same table and open the storage cabinet on the left side.
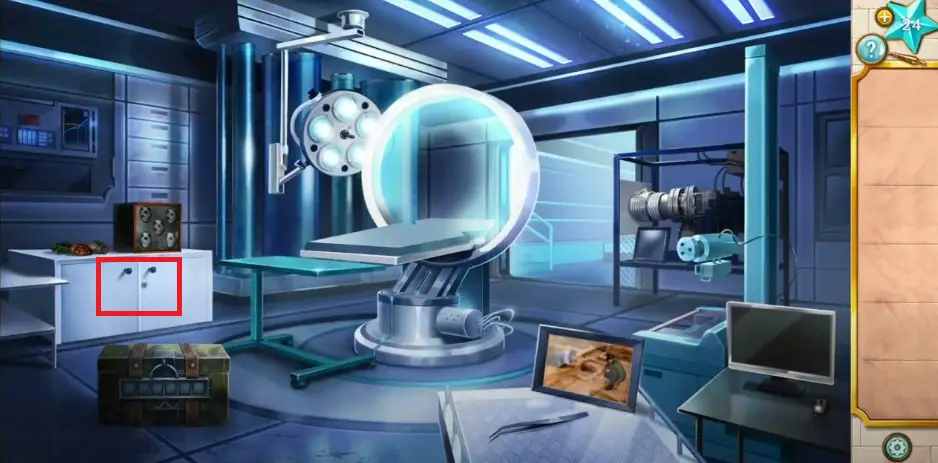
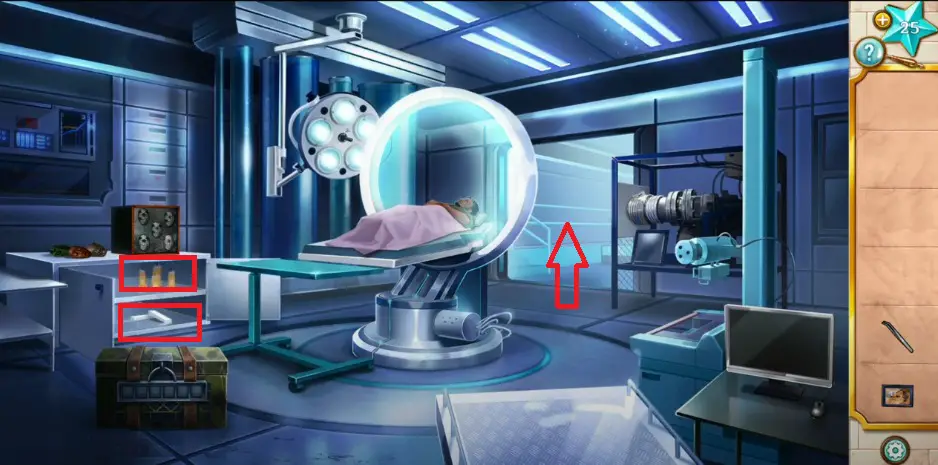
- Pick up the candles and chalk from inside the storage cabinet and go through the passageway to discover another room.
Laboratory – Room 2
Going through the passageway may lead you to the second room, where you will discover a high-tech setup designed to recover undersea artifacts.
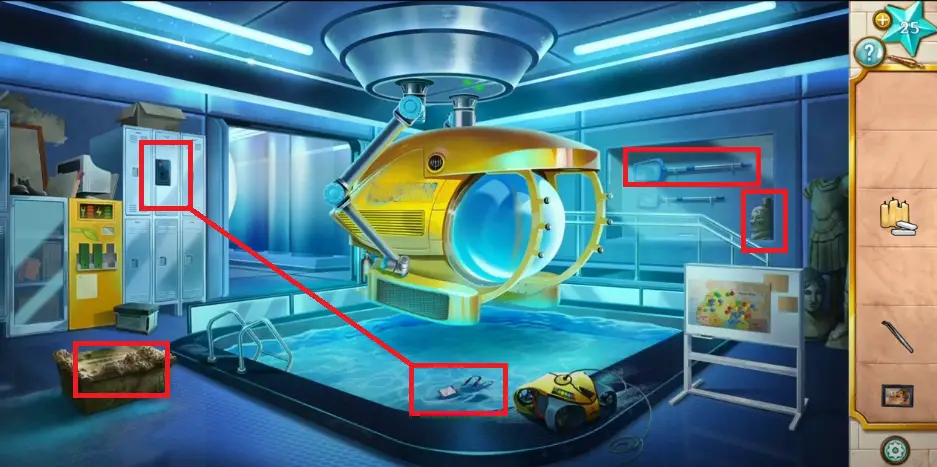
- Open the window to collect Pool Net and use it to bring an ID Card out of the pool.
- Use the ID Card to open up the locker on the left side and pick up the Lab Journal from the spot.
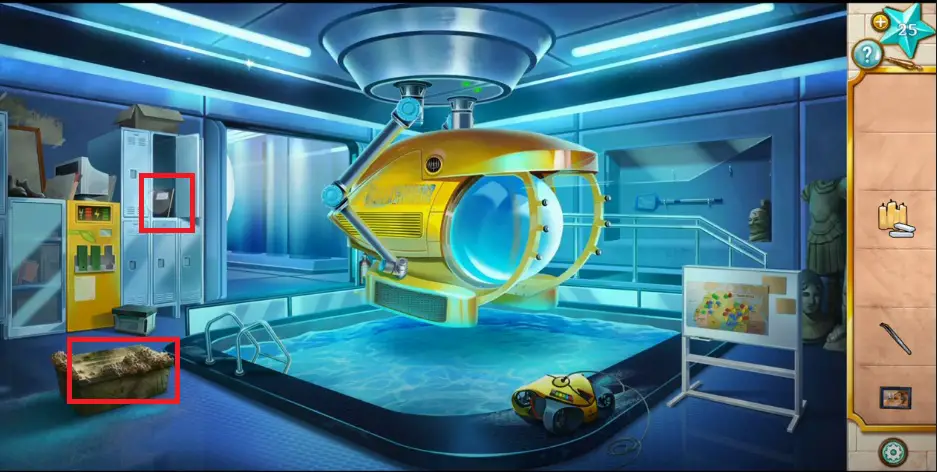
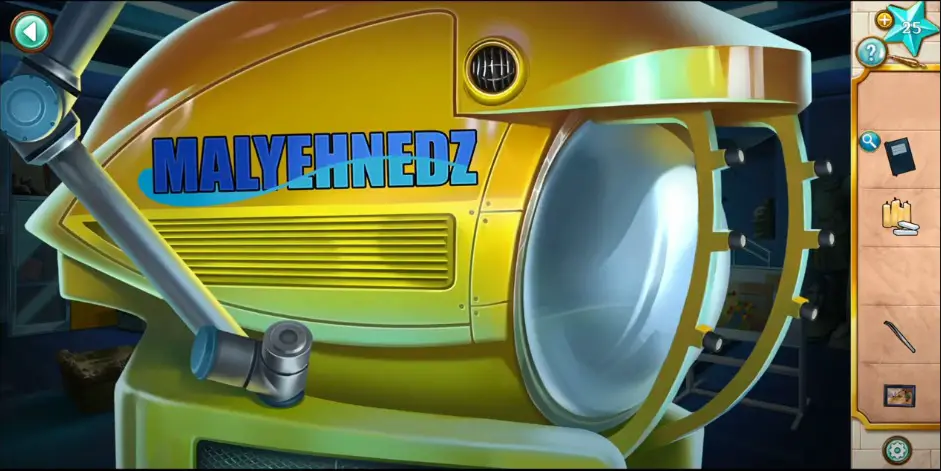
- A device on the edge of the pool requires you to enter the passcode. To find the passcode, you need to tap the submarine and keep its name (MALYEHNEDZ) in mind.
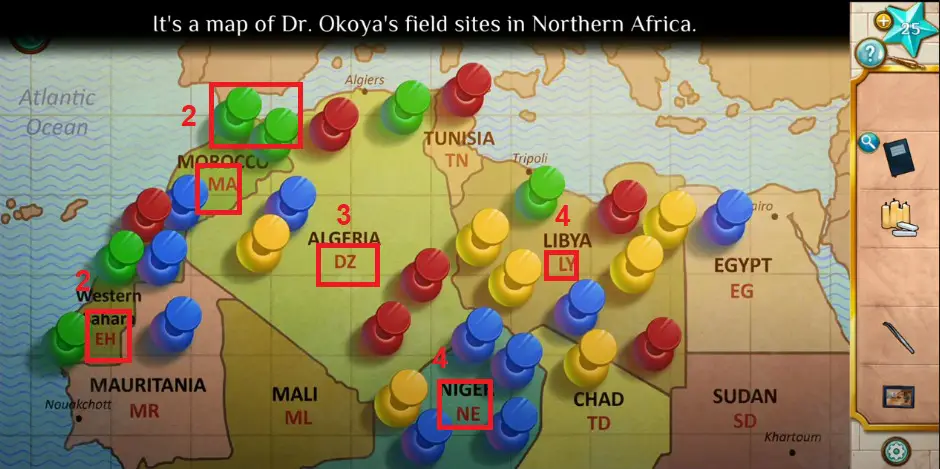
- You must discover MA, LY, EH, NE, and DZ on the map and see how many pins of the same colors are available there. After that, the numbers you receive will be the following: 24243.
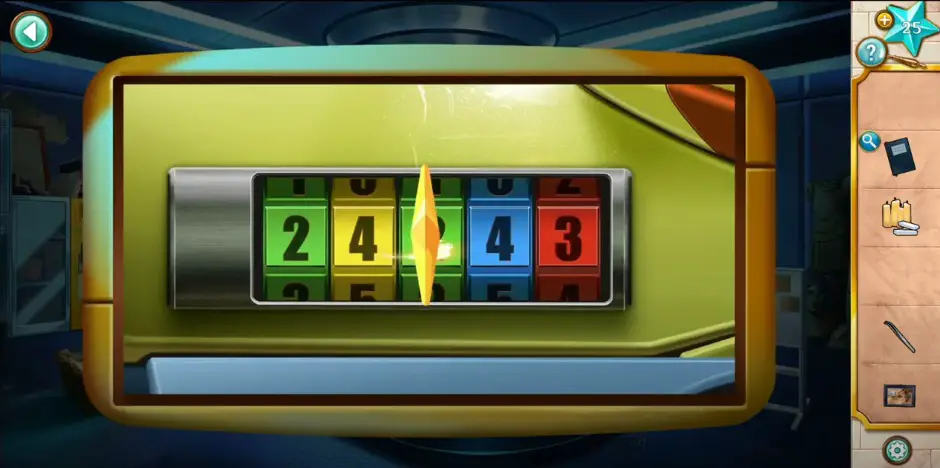
- Head to the yellow device near the pool, enter code (24243) to open a tray and collect an Uncharged Battery.
- Now, select the uncharged battery from the inventory and place it on the yellow-colored device to your left side.
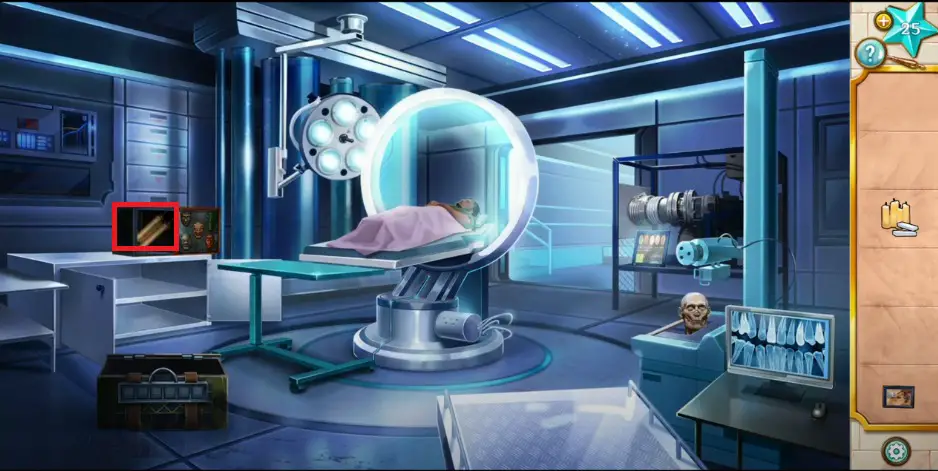
- Pick up the battery once it gets fully charged. Select the battery and put it back where you picked it up. Before leaving the scene, tap the box on the left side to remove the cover and discover a Mummified Head.
- After that, dive into the water and solve a tricky puzzle. When playing the game, you should remember that you have only 48 turns to lead your character to the endpoint using only the down and left buttons.
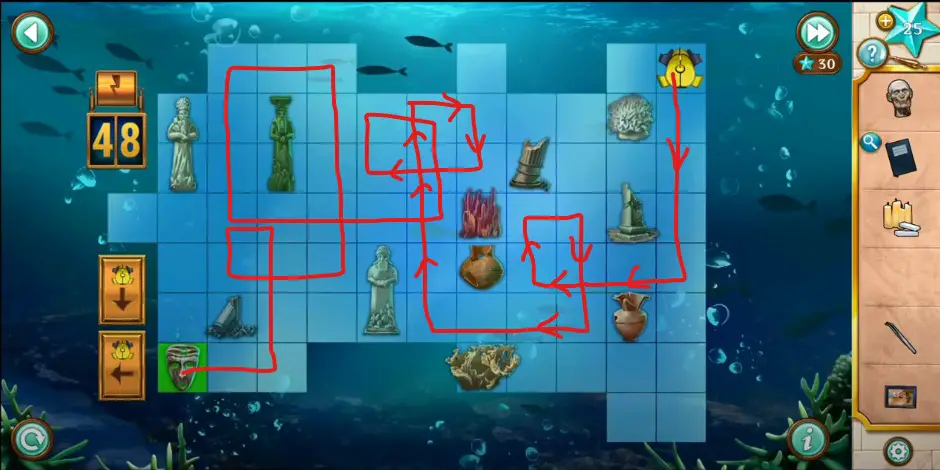
- Once you solve the puzzle, the game grants you a Dark Wooden Mask. Leave the area and return to the laboratory.
Return to Laboratory
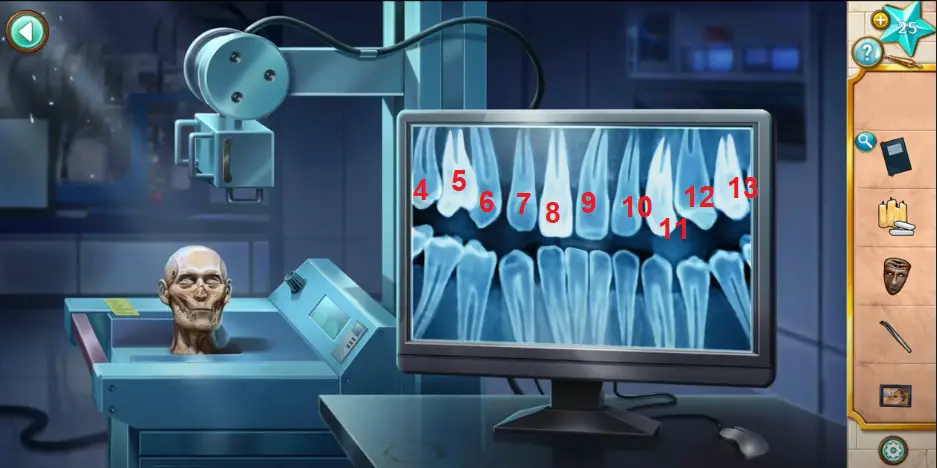
- After getting a Dark Wooden Mask, you should go back to the Laboratory near Professor Burns and tap the Computer where keeping the Mummified Head is mandatory to run the X-Ray Machine.
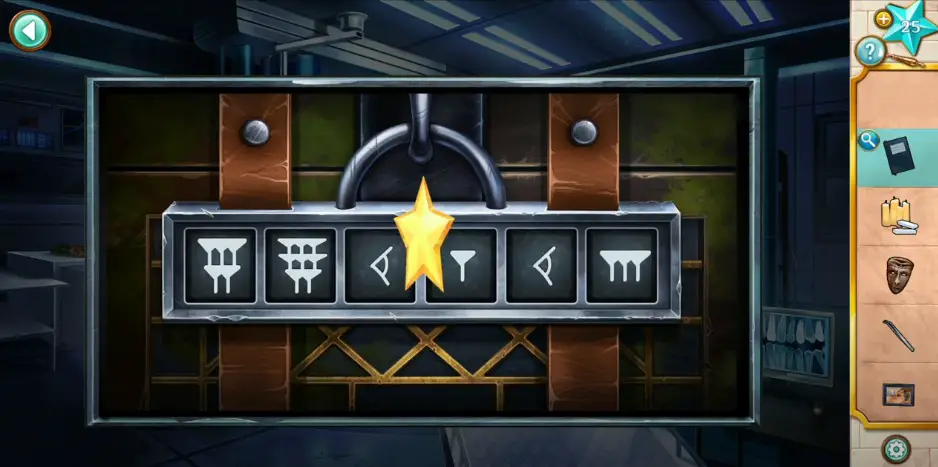
- Next, hit the back button and head to the trunk, where you must set the numbers to unlock it for a mask inside it.
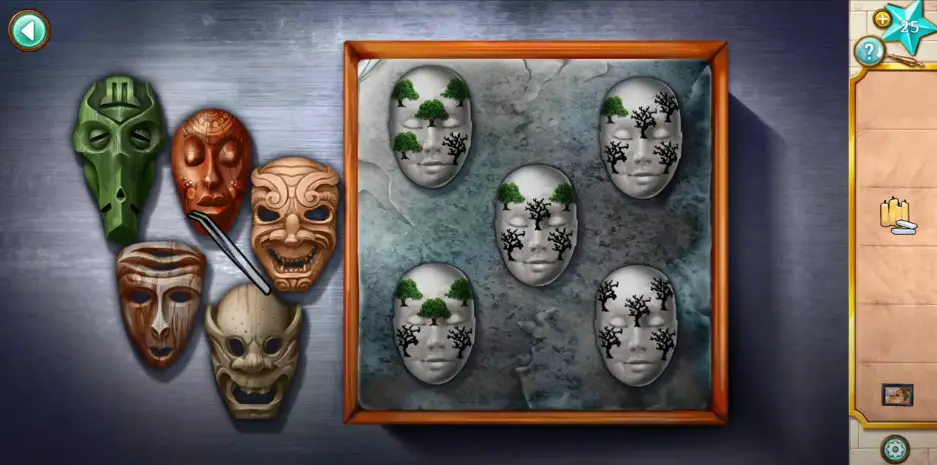
- Now, head to the box on the table and add wooden masks from inventory. Select and use the Tweezers to collect all wood samples of each mask, and hit the back button.
- Tap the machine near the PC on the right side of the passageway and place all wood samples inside the machine.
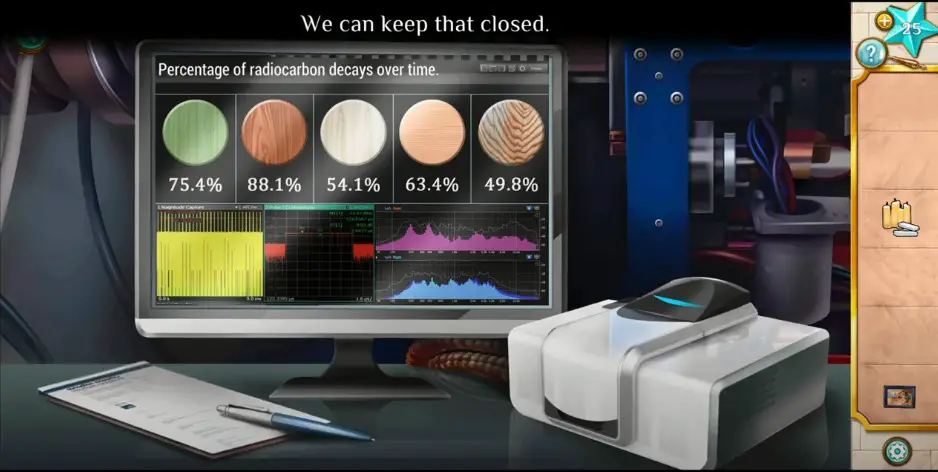
- After that, the screen displays the percentage of Radiocarbon Decays over time.
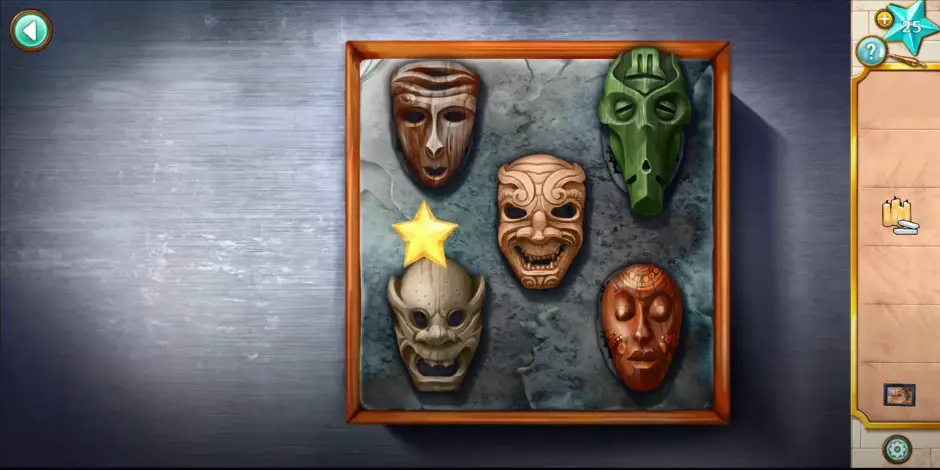
- Return to wooden masks and place them on the empty places as shown in the image below to get a scroll of Mot.
- Select the Candles and Chalk from the inventory to draw a pattern on the bed, select the photo and place it between candles. Now, keep the Scroll of Mot above Professor Burns, and you are done.
That’s the End of AEM: Lost Ruins Revenge of Atlantis Chapter 3 Walkthrough.
Read More: |Level 1||Level 2||Level 3||Level 4||Level 5||Level 6||Level 7||Level 8|

 CodyCross Answers
 Daily Themed Crossword Answers
 Top 7 Answers
 Word Craze Answers