

Introduction
Adventure Escape Mysteries: Lost Ruins Revenge on Atlantis Chapter 2 challenges your puzzle-solving skills and takes you to the ancient Temple, where finding hidden objects won’t be easy. There are three different rooms available, including Temple and Gold Room. You don’t need anything special key to access the Temple, while going to the Gold Room may require you to solve a tricky puzzle. To solve the puzzle, you have to see the map and read the books to find clues and utilize them to find the shapes you need. Besides, you can read Lost Ruins Revenge on Atlantis Chapter 2 Walkthrough to discover all answers and solutions at once.
Adventure Escape Mysteries: Lost Ruins Revenge on Atlantis Walkthrough Chapter 2
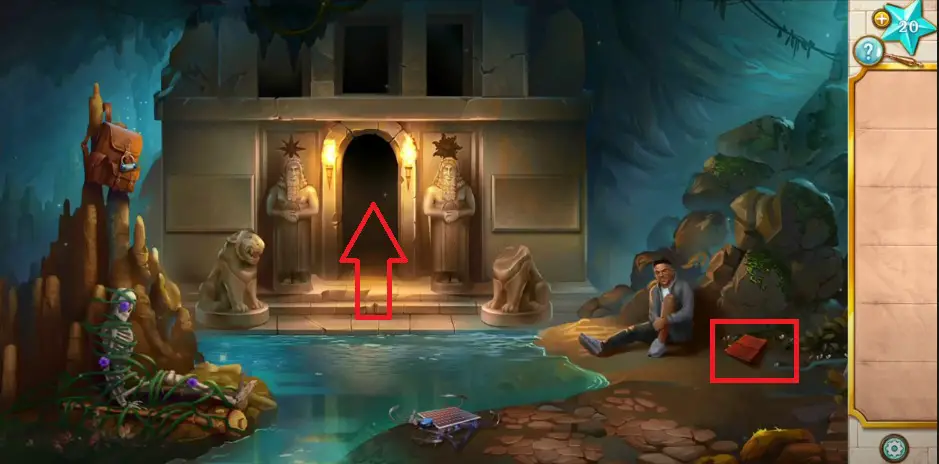
Soldiers and their captain kicked down Peter and Xochi into a vast pit. Both characters have decided to search the scene and find a way out. It’s not possible because Peter gets injured during the incident, and Xochi must find the Medical Kit to treat Peter. Apart from that, Xochi needs to head the Temple alone to discover hidden objects and back to Peter for his treatment and repair the drone. Start your journey by reading a book.
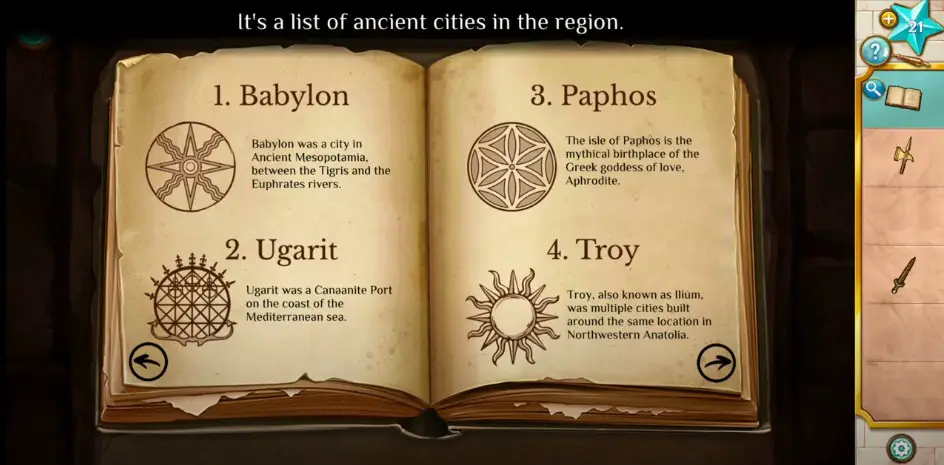
- First off, pick up the journal near Professor Burns and read it to discover clues.
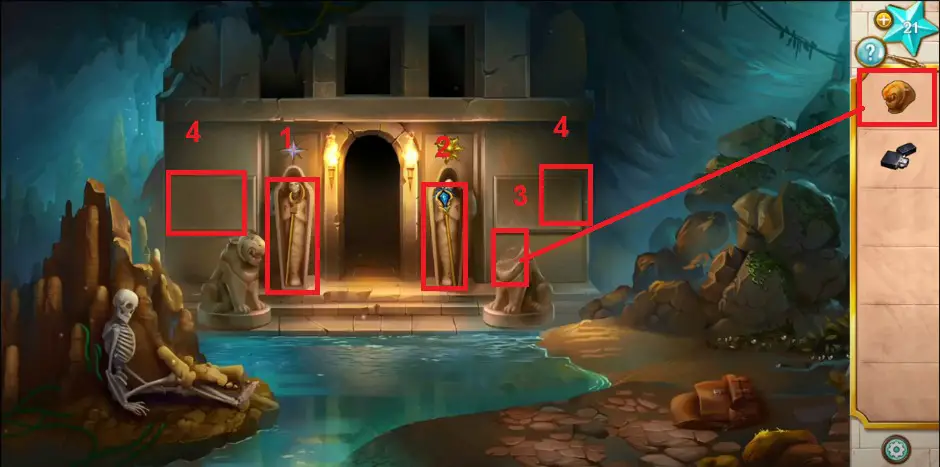
- Tap the passageway and go through it to get into the temple. After reaching the temple, you will discover five statues, and the central statue is a Lamassu.
Temple
- Collect the sword from the first statue’s hands and add it to your inventory.
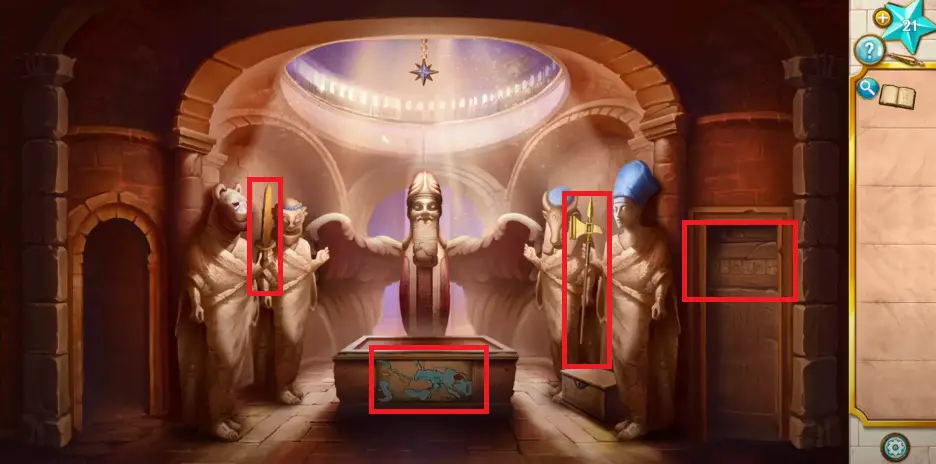
- Head to the first statue from the right side and pick up a Warhammer from its hands.
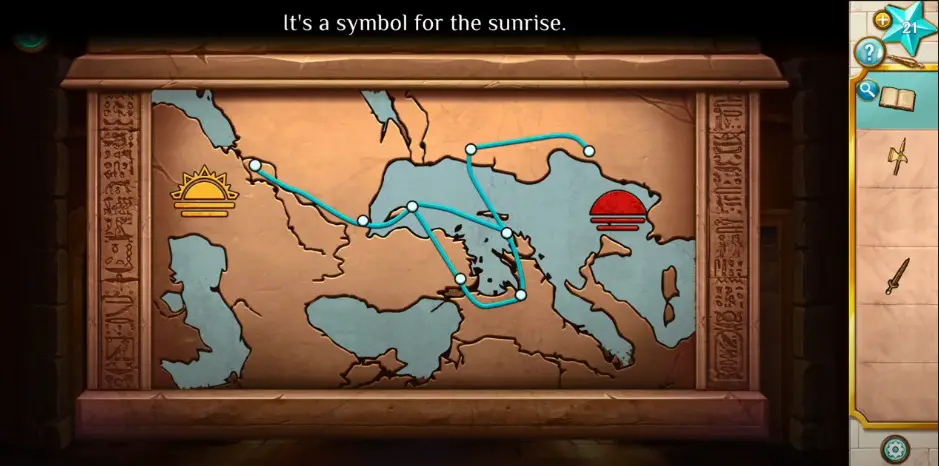
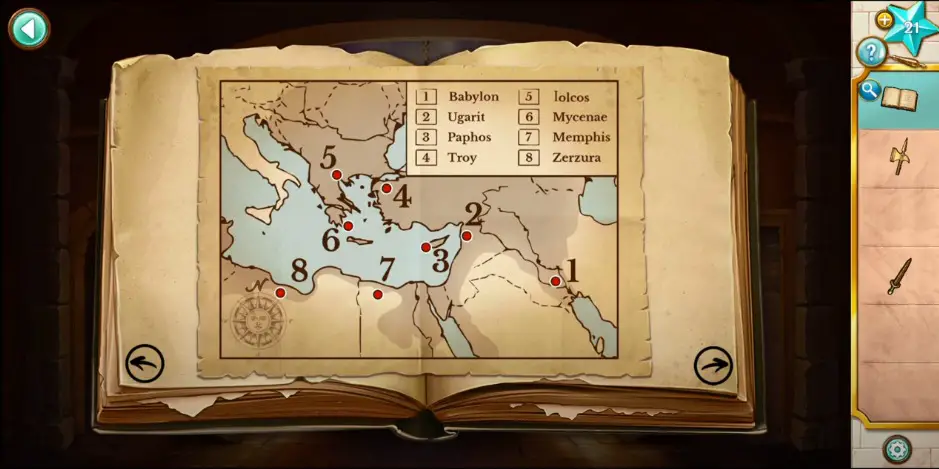
- Click the map printed below the main statue and discover a symbol for the sunrise.
- Now, click the puzzle on the right side of the first statue containing the sentence “Follow the Shortest Path to Zerzura.”
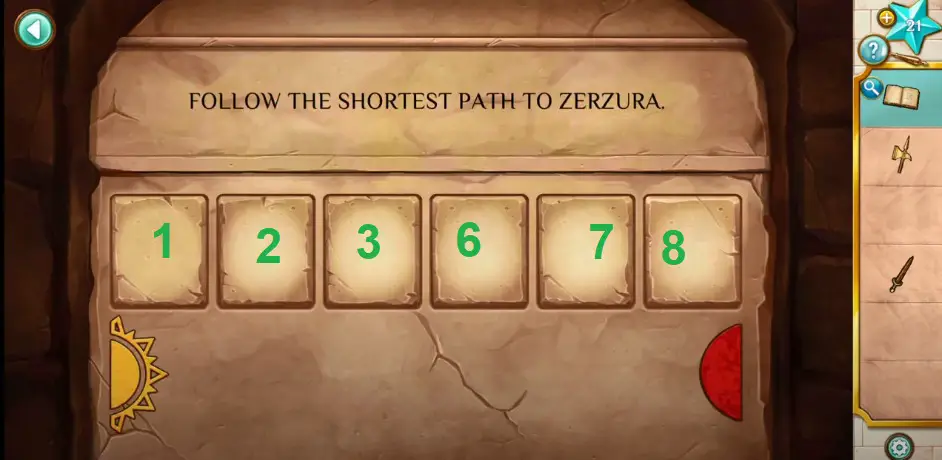
- Now, your ultimate goal is to use the journal to detect the location on the map, along with the shortest path. Once you find all symbols, you have to set them on the lock as shown in the image below.
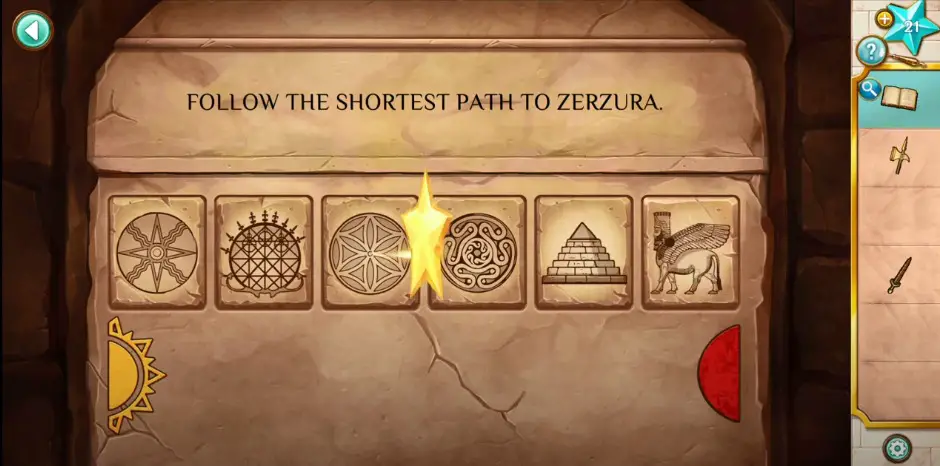
- Soon, the secret passageway will open and let you go through it to discover a new scene.
Leave the Temple and Go Outside
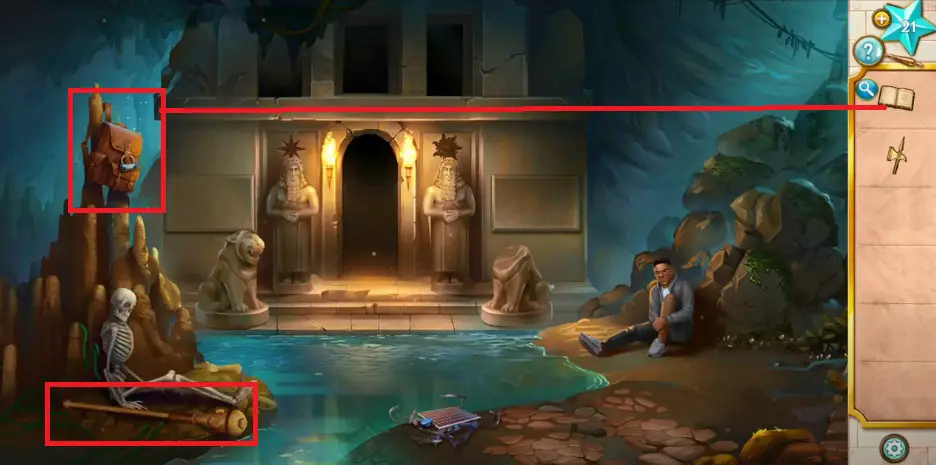
- Before going through the passageway, you should leave the temple, select the sword, and use it to get the Beekeeper Staff from near the skeleton.

- Next, use the Warhammer from the inventory to get the bag from the height above the skeleton and crack the lock.
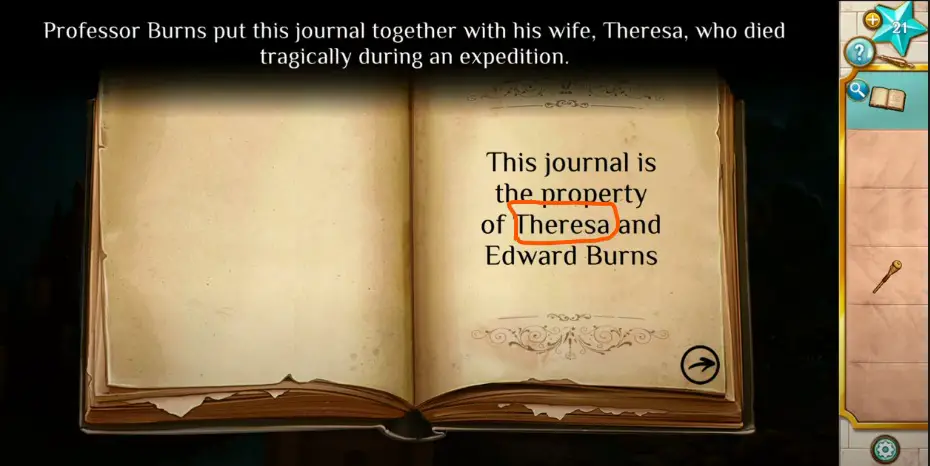
- To find the code, you need to open the book once again and discover the code, which would be “Theresa.”
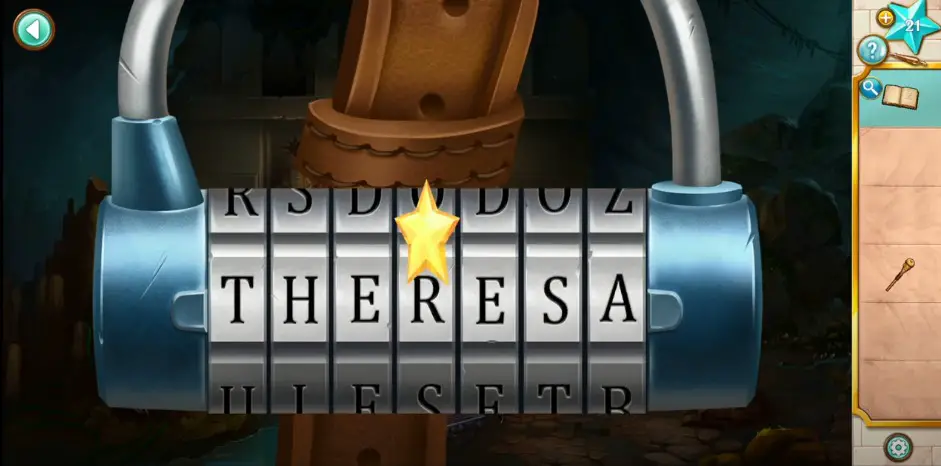
- Head to the bag again and tap on it to enter the passcode “Theresa” to discover the following hidden objects: Medical Kit and Lighter.
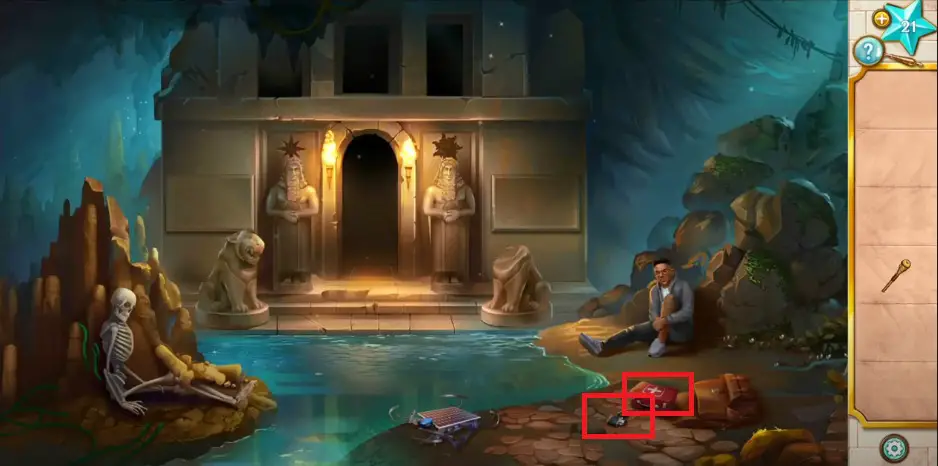
- After that, select the Medical Kit and help Peter to recover.
Return to the Temple and Go through the Passageway
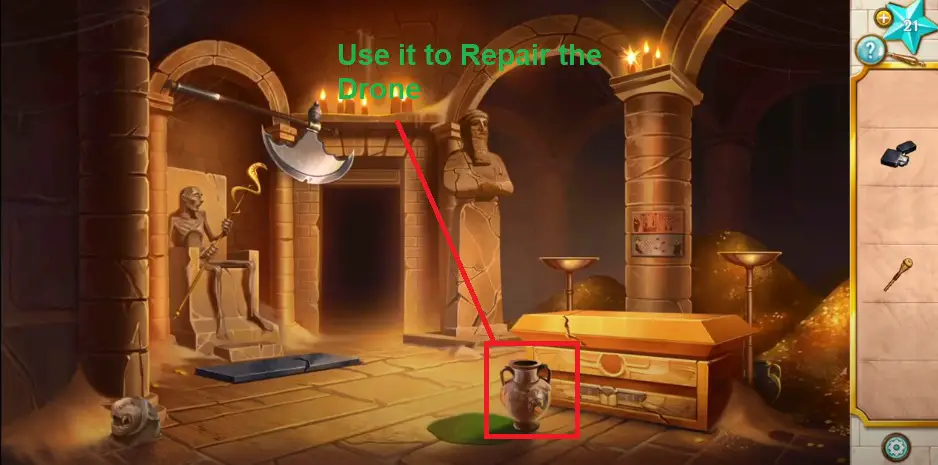
After helping Peter, you should go inside the temple and pass through the secret passageway to reach the room full of gold and jewelry. Note: You should be careful as the room is cursed.
- At the start, pick up an Amphora of Oil from the ground and take it outside to Peter. Select the Amphora from your inventory and pour it on the Drone to repair it.
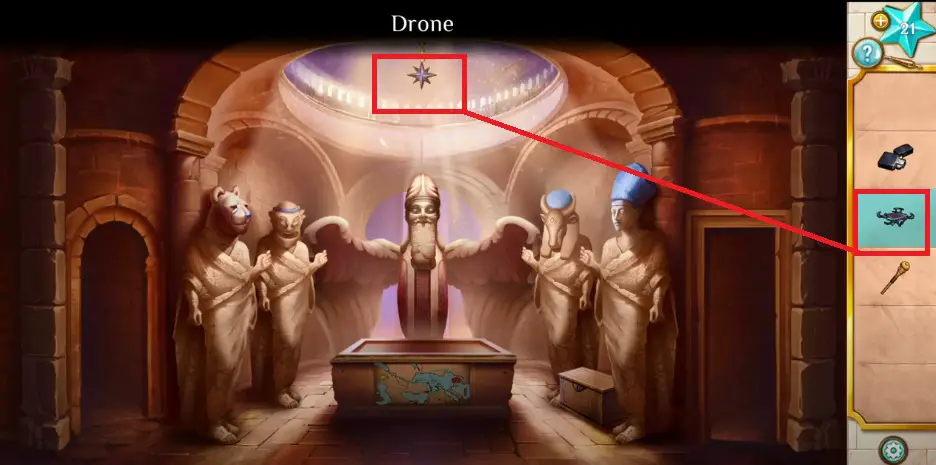
- Tap on the drone to collect it and add it to your inventory for later use.
- Return to the temple, select the drone, and tap the start above the statues to release it and collect the Star of Ishtar.
Gold Room
- Visit the Gold Room by tapping the secret passage and using the lighter to light up all lamps.

- Lightning the lamp may help you remove the box’s cover and discover a mini-game to play.

- Once you solve the puzzle, pick up the Sun of Smash from the box inside and add it to your inventory. Before leaving the scene, don’t forget to pick up the lion head on the left side from near the sand.
- There’s a statue on the right of the passageway that you must break by doing repetitive taps. Click the Heavy Statue Head and add it to your inventory.
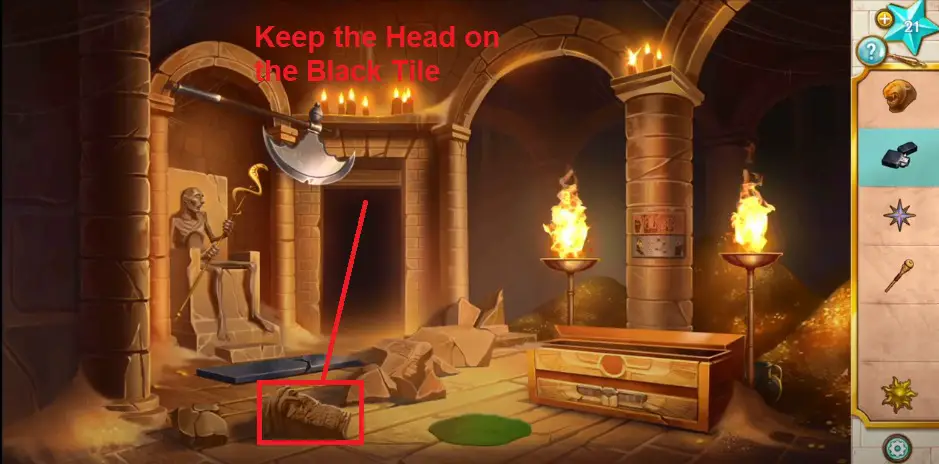
- Select the statue head from the inventory and place it on the black tile that in itself is a trap. Next, collect the Vintner Staff from the mummy and hit the back button to reach the previous room.

- Before leaving the area, don’t forget to see the painting of ancient people printed on the pillar of the right side.
Temple
- After reaching the previous room, select the Beekeeper Staff from the inventory, tap the lion’s statue, and give the stick to it.
- Next, select the Vintner Staff and give it to the statue next to the lion.
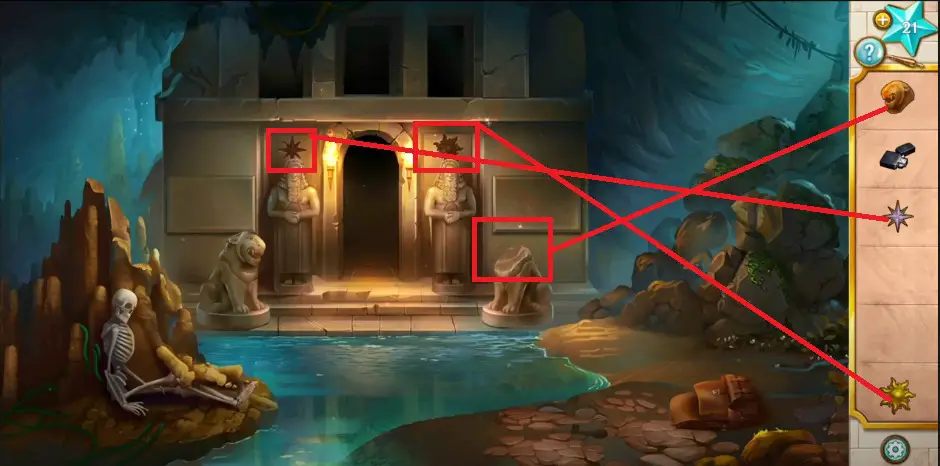
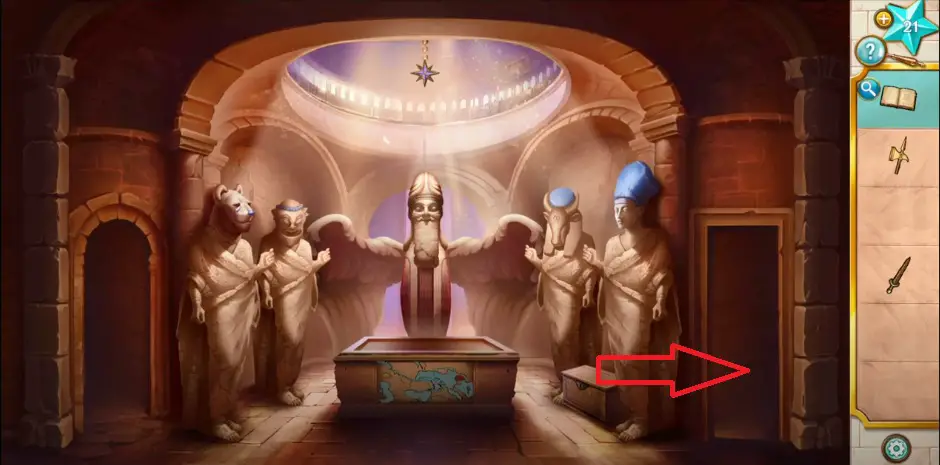
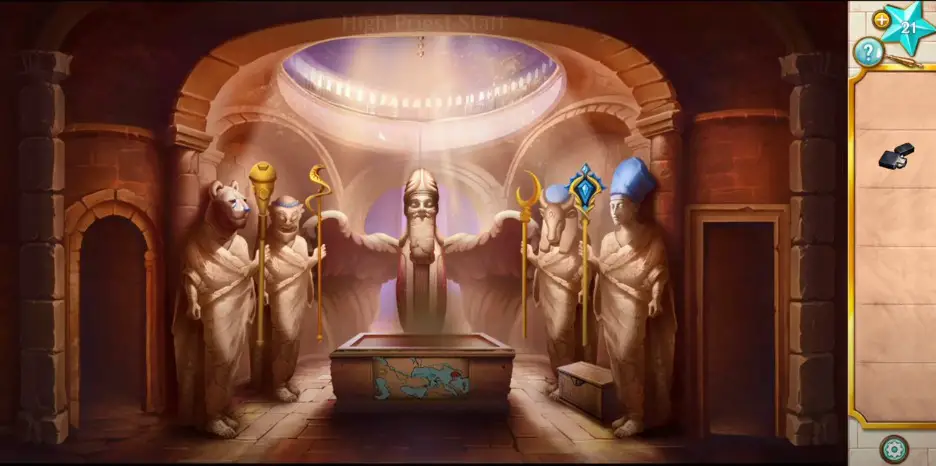
- Leave the temple for a while and head to the statue standing on both sides of the entrance. Select the Sun of Shamash and Star of Ishtar, and place them above both figures to open the coffin and collect Scythe Staff and High Priest Staff.
- Next, select the lion head from the inventory and place it on the lion with the missing head.
- The earth shakes and opens two windows as you place the head. Discover the paintings to find clues and get into the temple.
Return to Temple
- Before leaving the temple, we’ve collected two objects and gave them statues on the left side. Now, there are two other sticks available that you must offer to the figures on the right side, as shown in the image given below.
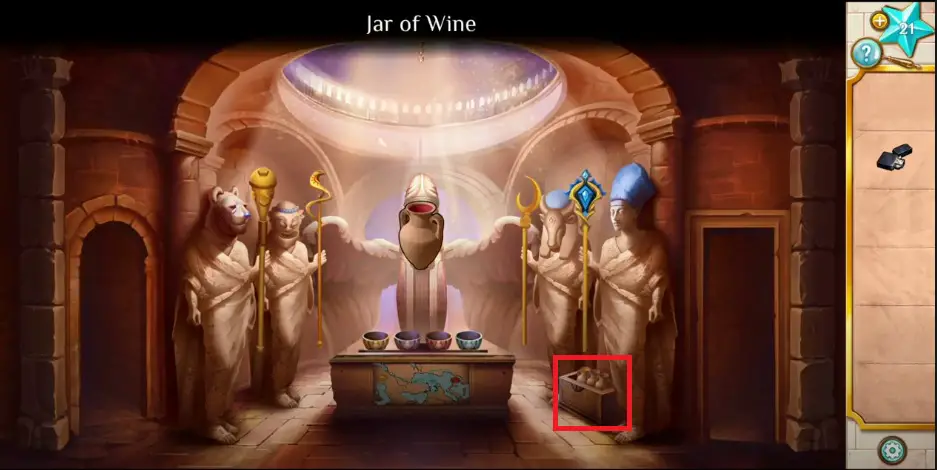
- After that, a platform appears on the spot, holding four cups and a key. Tap the key and use it to open the trunk between two statues to collect a Jar of Wine, along with other jars and One Empty Jar.
Return to the Gold Room
- Go through the passageway to reach the Gold Room, where you must choose the Empty Jar and fill it with Amphora of Oil spread on the ground.
- Now, leave the temple and head to the pond, where you must fill another empty jar with water.
Go Back to Temple
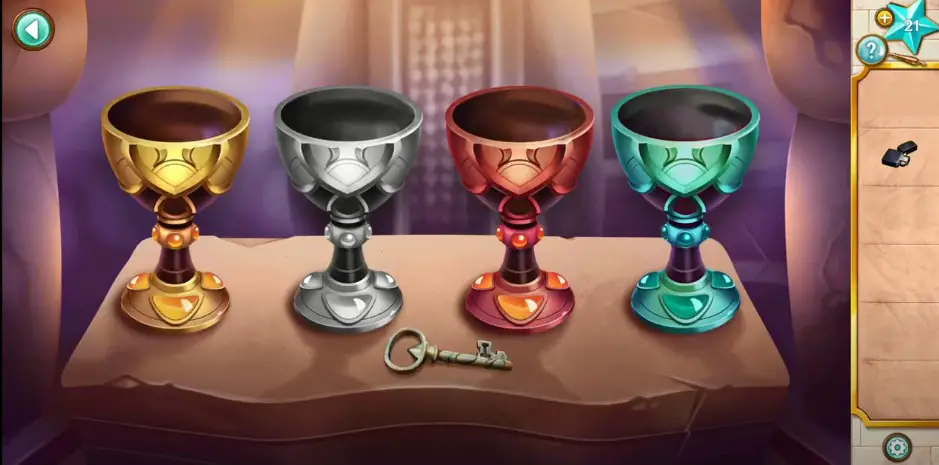
- After collecting Amphora of Oil, you should return to the temple where you discovered four cups. Select the Jar of Honey from your inventory and pour it on the silver cup, and for others, follow the steps given below:
- Silver Cup – Jar of Honey
- Red Cup – Jar of Wine
- Yellow Cup – Jar of Water
- Green Cup – Jar of Amphora of Oil
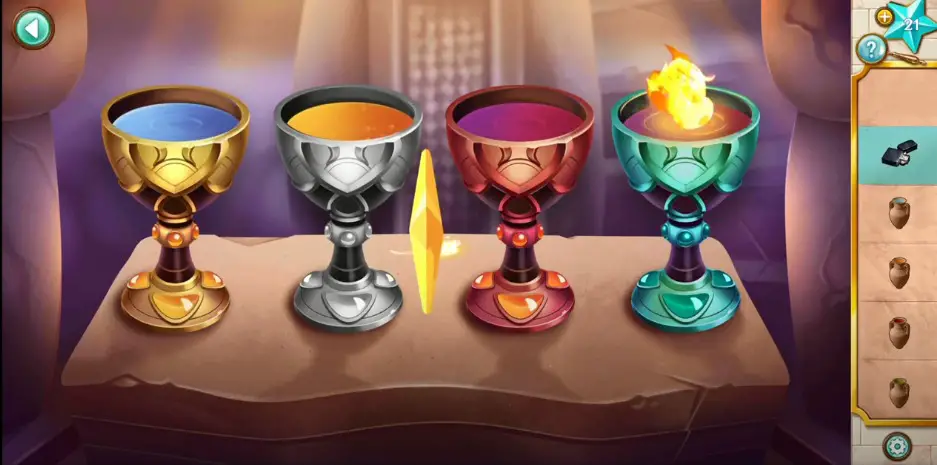
- After pouring jars to their related cups, you have to select the lighter from the inventory and use it to light up fire on the green cup.
- Something happens on the spot as you solve the puzzle; meanwhile, stairs appear behind the statues.
As it seems, Lost Ruins: Revenge on Atlantis Chapter 2 has been ended; meanwhile, the game takes you back to the Ziggurat Chamber.
Back in Ziggurat Chamber
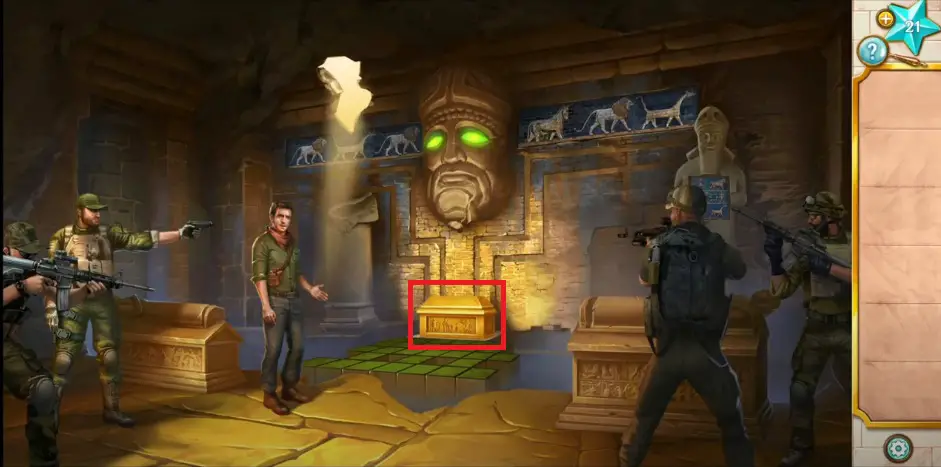
- Upon reaching the Ziggurat Chamber and ending the discussion with soldiers, tap the treasure box to help Professor burns reach there and unlock to play a mini-game.
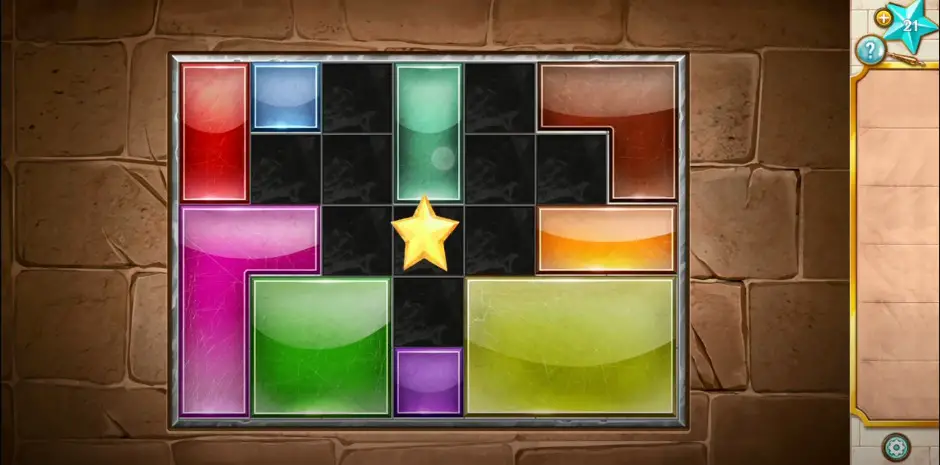
- When playing the mini-game, your objective is to slide the colored pieces around until all black tiles are uncovered.
That’s the end of AEM: Lost Ruins Revenge on Atlantis Chapter 2 Walkthrough.
Read More: |Level 1||Level 2||Level 3||Level 4||Level 5||Level 6||Level 7||Level 8|
 CodyCross Answers
 Daily Themed Crossword Answers
 Top 7 Answers
 Word Craze Answers