

Introduction
The fourth level of Hidden Escape: Lost Temple takes place in a freak house where both characters aim to find the third part of the Scepter and escape the house timely. Level 4 starts with a conversation having between Leela and Liam who are talking about the trapdoor and to escape the freak house after completing their job. Similar to previous levels, the premise of the game focuses on finding hidden objects using the point-and-click interface.
Although the game doesn’t show you the characters moving across the screen, you can tap the object to investigate and find clues. If you don’t want to fall in any trouble, then read our Hidden Escape: Lost Temple Level 4 Walkthrough. In the third level, we have escaped the Lighthouse after visiting the powerhouse, graveyard, and lighthouse as well. Now we are stuck in a freak house wherefrom coming out seems almost impossible. Therefore, concentrating on each object is mandatory because who knows it may be a clue required for the completion of the puzzle.
Hidden Escape: Lost Temple Level 4 Walkthrough – Freak House
The fourth level throws you amidst the Freak House where lots of objects are available to interact with for the completion of challenging puzzles. Read our Hidden Escape: Lost Temple Guide to find solutions.
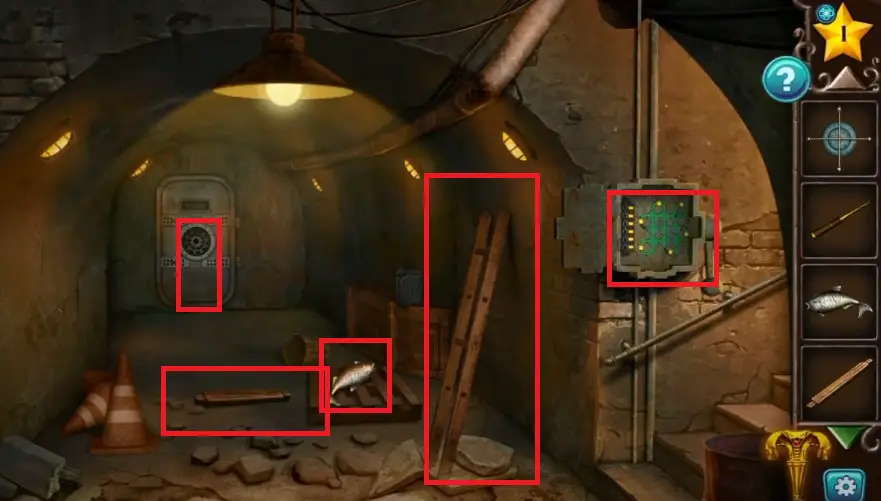
- Firstly, you have to collect a lever handle from near the pillar and click on a box kept on the right side of the same pillar to play a mini-game.
- Your objective is to form the correct equations in the corresponding green circles. To arrange the numbers, you need to tap on the number and move each one to the empty slot.
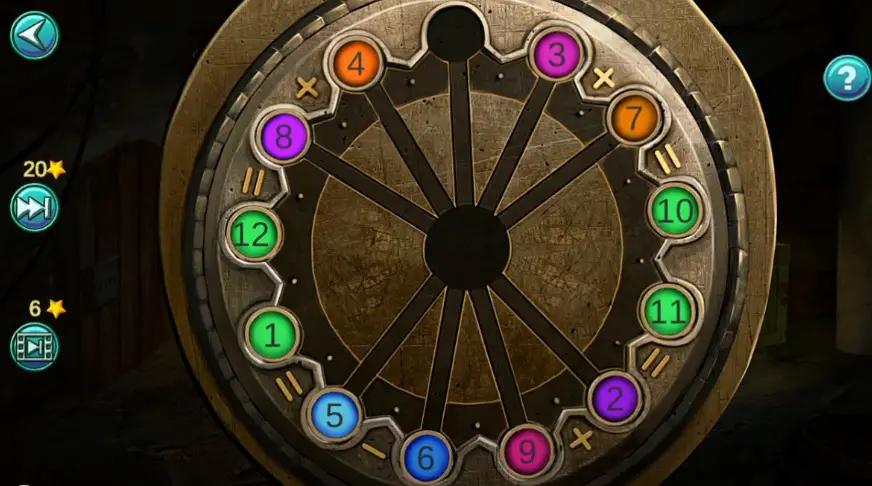
- Collect a wheel handle as the box opens after solving the puzzle.
- Near the stairs, the game features a photo frame holding a jigsaw puzzle for you to complete.
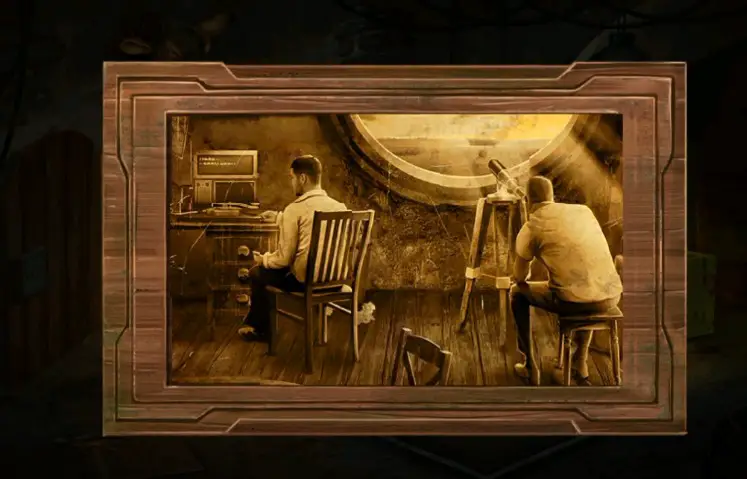
- Tap on the jigsaw puzzle and arrange the pieces to complete the image. Collect a telescope and a Fish Statue 1 from behind the photo frame.
Second Room
After collecting all said things, go through the door to discover a new room where you need to find hidden objects and use them to solve tricky puzzles. The room contains a variety of things, including a lamp, fuel tank, furniture, and more.
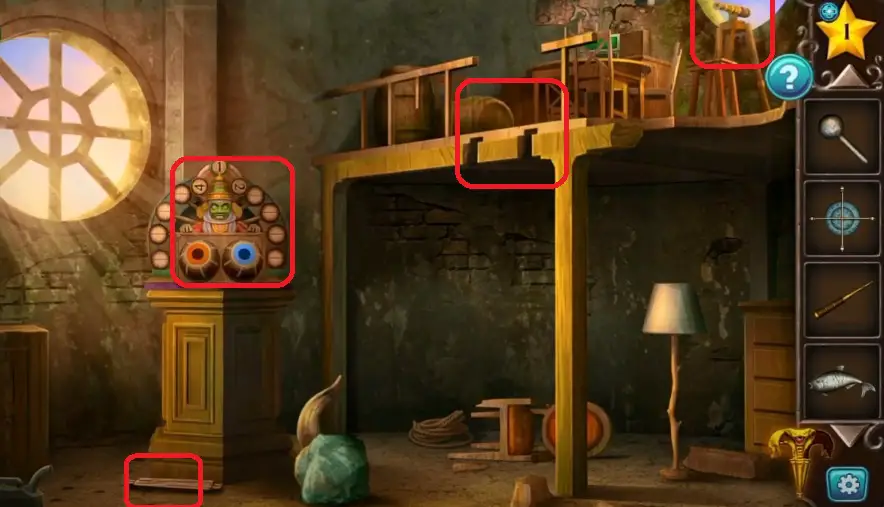
- Firstly, collect a wooden piece 1 from the floor and add it to your inventory.
- Secondly, tap on the statue with several eyes and play a mini-game where your task is to watch the statue’s eyes and beat the specific colored drum following the number of eyes. You have to complete the puzzle before the time runs out.
- Once you complete the puzzle, the game reveals the third part of the Scepter that you can collect to use later.
- Soon, light flashes outside, and everything falls on fire. Collect bulbs from a box and keep them in your inventory to use later.
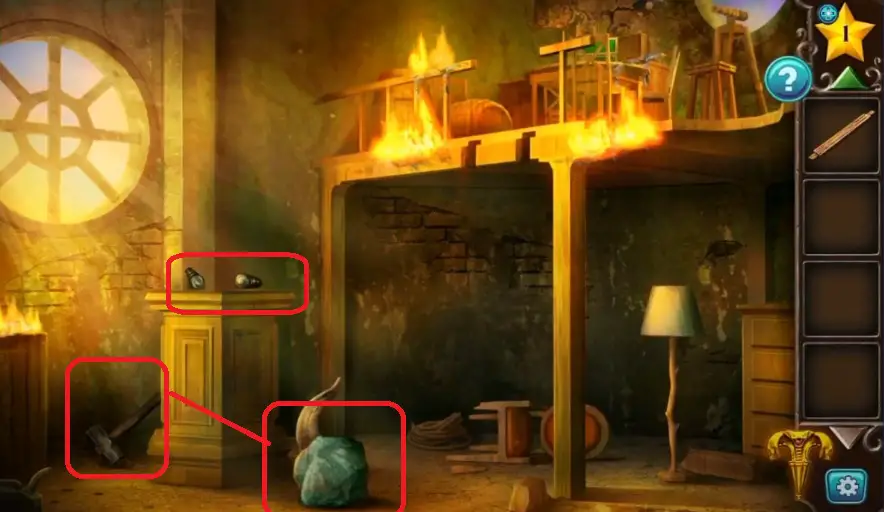
- Before leaving the area, don’t forget to collect a hammer available behind the stand where the mini-game was placed.
- Select the hammer from the inventory and use it to break the object kept on the floor to collect a bull horn.
- Go to the first room and fix the horn on the bull statue and in return you can collect a door handle available in its mouth.
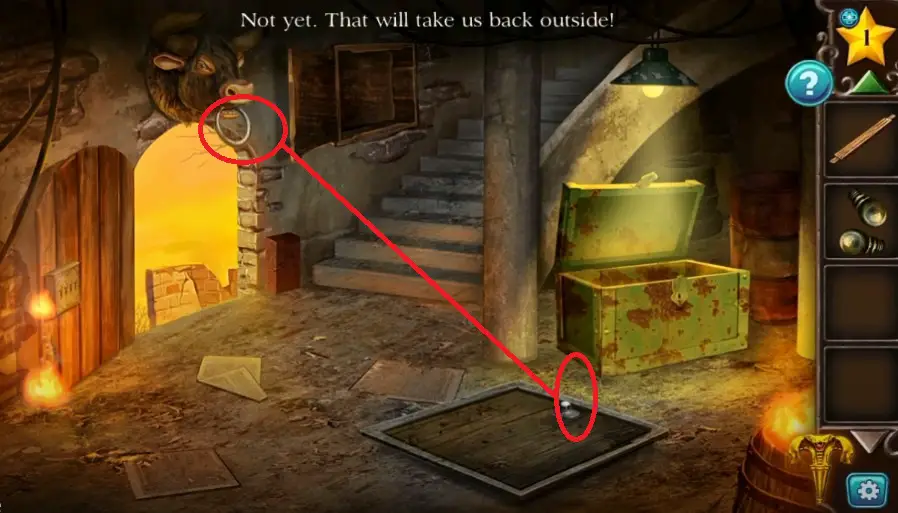
- Use the door handle to open the trapdoor and go into the basement where your objective is to select the lever handle from the inventory and connect it with the circuit box.
Basement
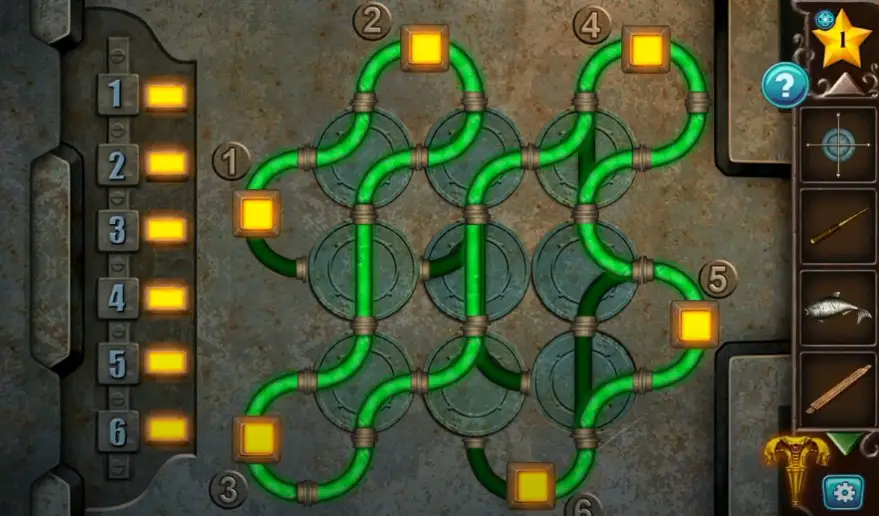
- Head to the circuit box and repair it by merely connecting wires with the accurate fuses as shown in the image given below.
- After that, start collecting hidden objects as follows: Broken Ladder, Fish Statue 2, and Wooden Piece 2.
- Choose the wheel handle from the inventory and place it on the door to open it. But first, you have to solve a tricky puzzle.
Generator Room
You find yourself standing in a new room after going through the door where you may discover a generator.
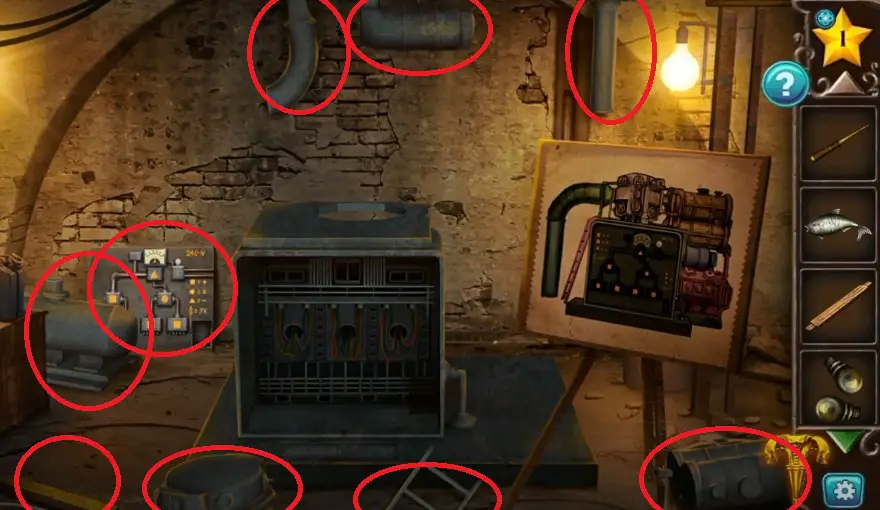
- Discover a wooden piece 3 from above the floor and drag the circuit to the generator.
- Watch the painting and try to fix the generator accordingly. There is a rod kept near the painting, drag the rod and connect it with the generator as it looks like in the painting.
- Now, connect the head of the generator after picking it up from the floor and keeping it above the generator.
- To connect wires, you must follow a simple rule – every cable has almost 5-volt power and your goal is to connect all cables in a way that the total voltage sums up to 240 volts.
- Once you are done, collect a lock picker from there and add it to your inventory.
Second Room
After discovering a lock picker, you should leave the area and reach the second room where you once played a mini-game with a time limit that caused a fire.
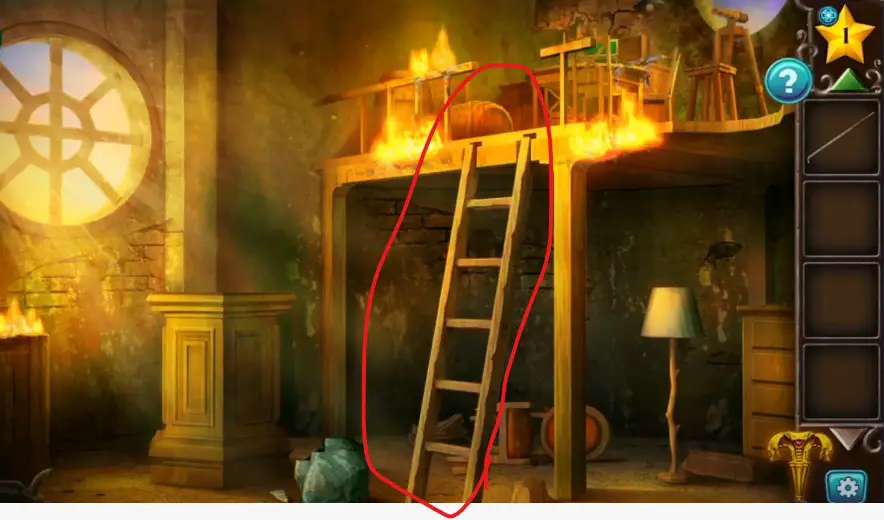
- Select the ladder from the inventory and combine it with the other three wooden pieces.
- Choose the ladder and use it to approach the telescope to stand kept above.
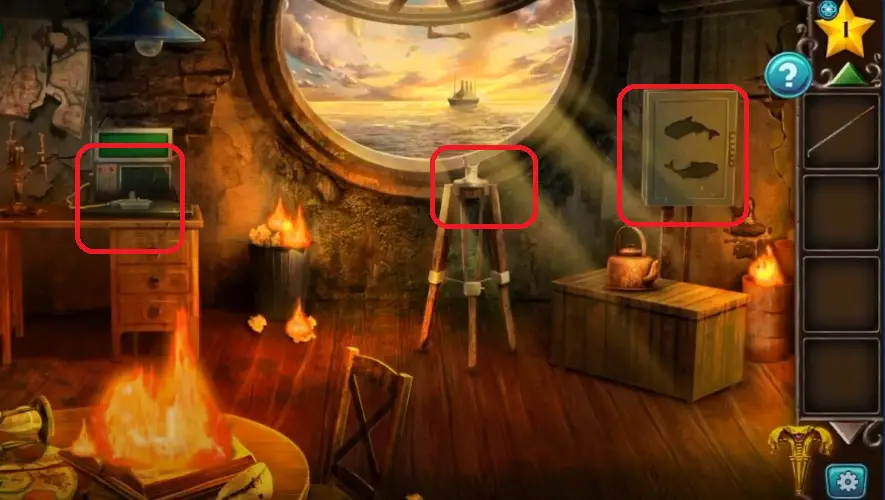
- Fix the telescope on the stand and discover the numbers written on the ship (5037).
- Now, use both fish statues to open the box available on the right side of the telescope and get the main battery.
- Leave the area and head to the room where you find stairs leading you to a door that is locked.
Unlock the Door
A lock picker is available in your inventory, select it and try to open the door using your puzzle-solving skills.
- Firstly, you have to head to the door and then select the lock picker to open it.
- Secondly, your objective is to create the same pattern as the key has with the pry bar. By merely tapping the bars to push them up or down might work and you can easily form them according to the key pattern to unlock the door.
Next Area
As the door opens, you find yourself ahead of a new machine where two bulbs are missing. You have collected two bulbs from a room, so select them from the inventory and fix them there.
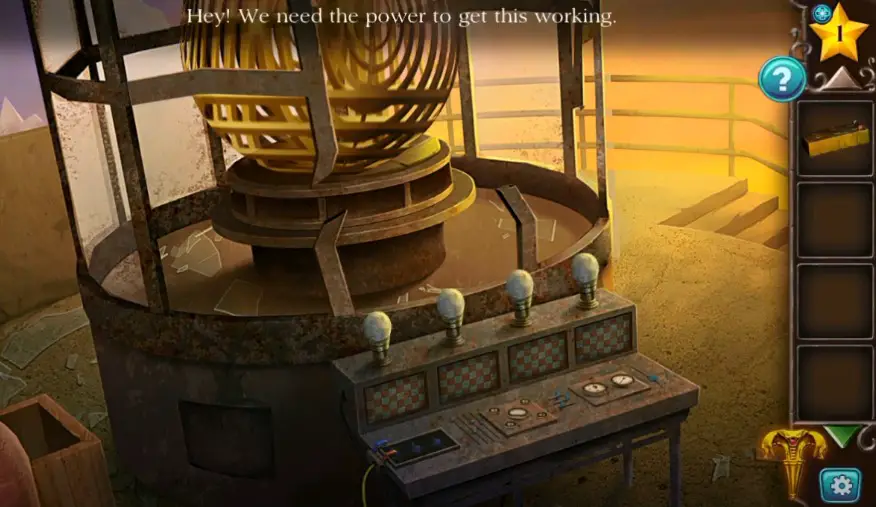
- Choose the bulbs from the inventory and add them to the machine.
- In the second step, you need power that is only possible with the help of the main battery. So, select the battery and connect it with the machine.
- Click on the mini-game placed below the bulbs and try to solve different puzzles wherein your goal is to connect two objects of the same color by merely drawing a line in a way that won’t touch another one.
- Once it is completed, collect a knob from a secret box opened after the completion of the puzzle and add it to your inventory.
- Go back to the floor where you fixed the telescope and keep the knob near a paper board available on the table kept on the left side of the room.
- After that, your ultimate goal is to tap in the correct morse code following the clues to solve the puzzle.
- Send the signal to the ship captain and inform him you are trapped in the burning lighthouse.
Soon the ship will come to receive you after getting the signals you sent for help. Hidden Escape: Lost Temple Chapter 4 has been completed. Click here for the next walkthrough.
 CodyCross Answers
 Daily Themed Crossword Answers
 Top 7 Answers
 Word Craze Answers