

Introduction
Kate Gray was trapped in the Stranger’s Cabin in the previous chapter. She hardly managed to escape the cabin and now must travel on foot through the rich forest to find a way back to the city. Once again, Kate Gray is looking for your help to solve upcoming challenging puzzles and tricky mini-games. This time, you need to be active and use your detective skills as many challenging puzzles are on the way and will bend your mind. If you are stuck and didn’t know what to do next, read AEM: The Echo Bay Murders Chapter 3 Walkthrough to get all solutions and answers.
AEM: The Echo Bay Murders Walkthrough Chapter 3
After escaping the cabin, Kate must travel on foot to reach the civilization before the strange man notices that you are gone.
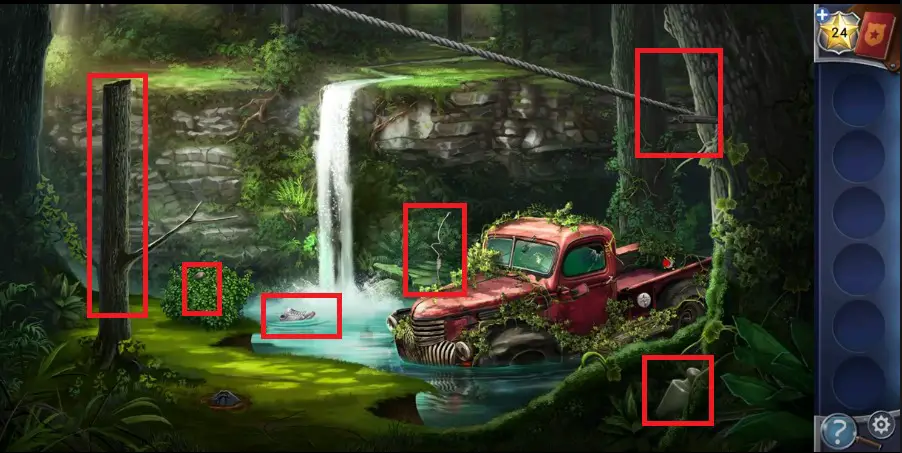
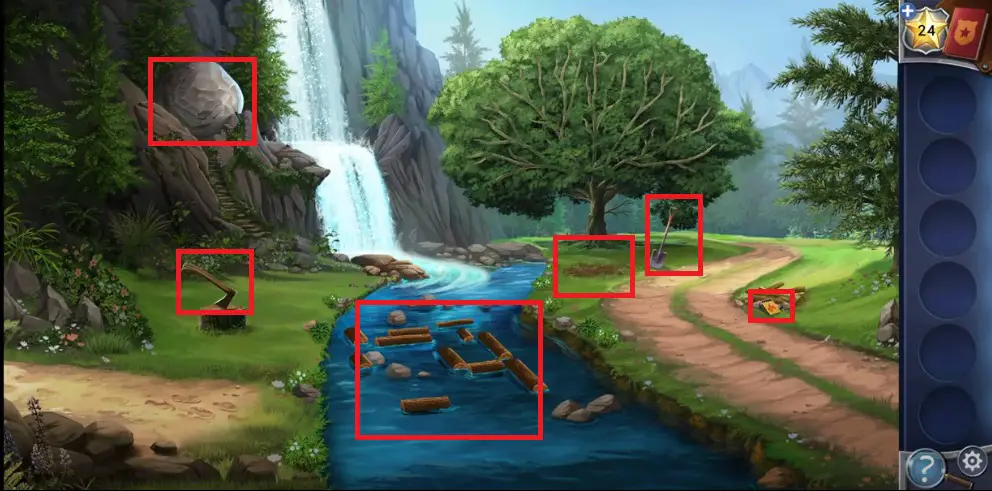
- Firstly, tap the ground on the right side to grab the first weight, while the second is available in the bushes on the left side.
- Get the antenna from the vehicle and collect the shoe from the water.
- Use the antenna to open the door and enter the vehicle to collect the following hidden objects, such as Knife and a hook from the car’s bonnet after opening it from inside. Go back to the car and get the leaves aside to grab an electrical tape.
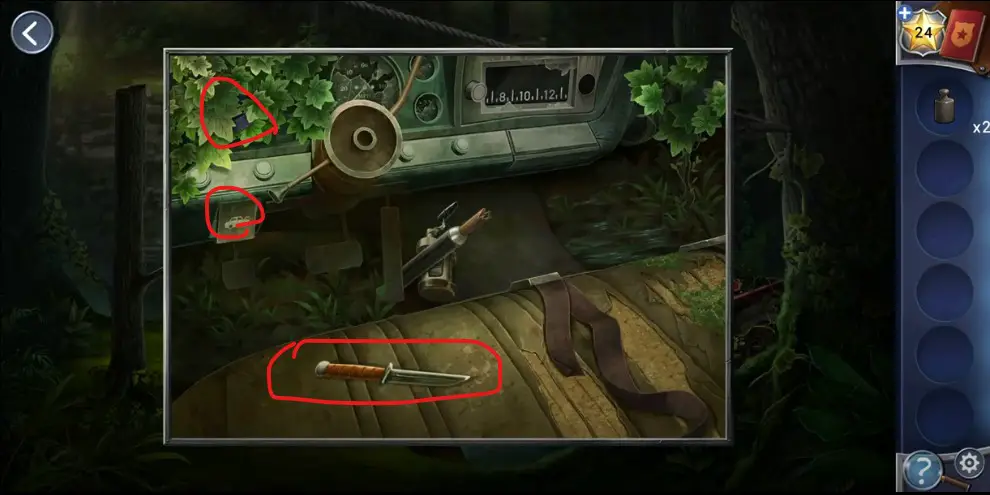
- Select and use the knife to cut the steel cable added to your inventory for later use. Next, use the knife to cut the branches from the tree on the left side.
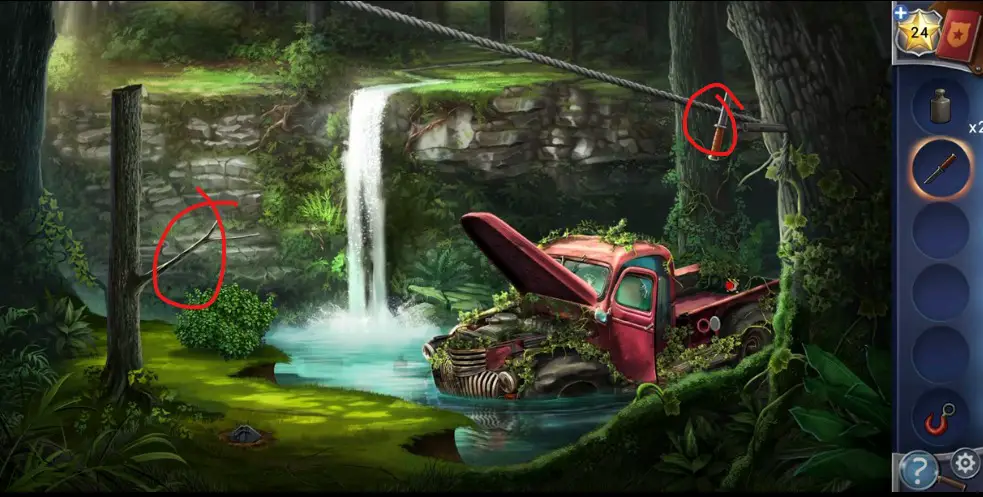
- Enter the vehicle, insert the tree branch into the rod, attach the steel cable, and then a hook to prepare a fishing rod.
- Use the fishing rod to bring a treasure chest and another weight out of the water.
- Tap the truck’s backside and keep all weights on it to play a mini-game.
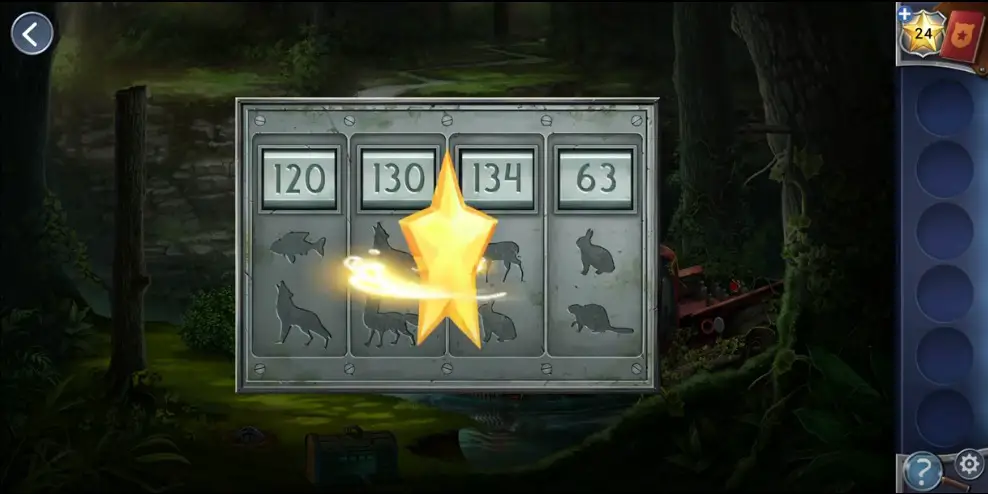
How to solve the Weights Puzzle?
To solve the weights puzzle, your objective is to add and remove weights to the truck’s bed to unravel the weight of each animal. You can do this by merely dragging the weight onto the metal part of the truck and then hitting the red button to activate the scale.
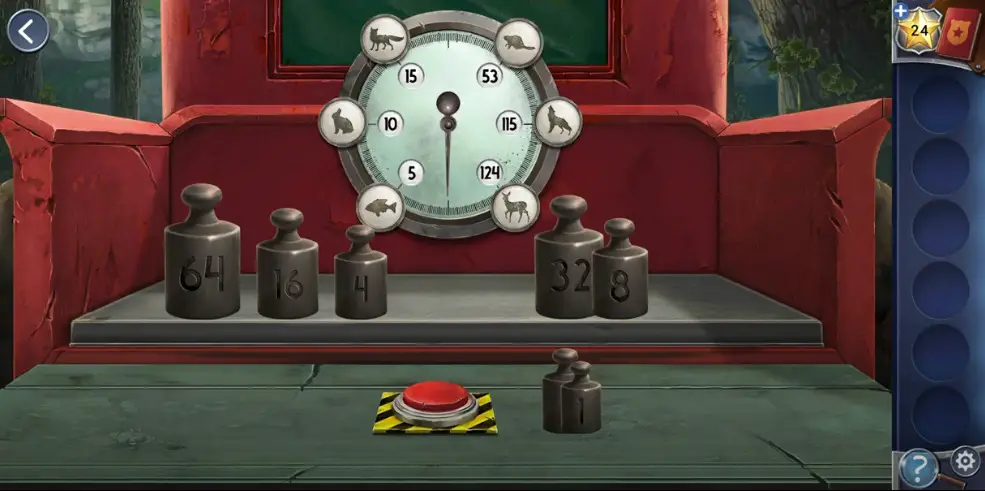
- Fish: (4 + 1 = 5)
- Rabbit: (8 + 2 = 10)
- Fox: (8 + 4 + 2 + 1 = 15)
- Beaver: (32 + 16 + 4 + 1 = 53)
- Wolf: (64 + 32 + 16 + 2 + 1 = 115)
- Deer: (64 + 32 + 16 + 8 + 4 = 124)
You have to use the information given above to unlock the treasure chest.
- Fish + Wolf = 120
- Wolf + Fox = 130
- Deer + Rabbit = 134
- Rabbit + Beaver = 63
As the box gets opened, obtain the climbing gear and go to the next scene to find other hidden objects.
New Scene
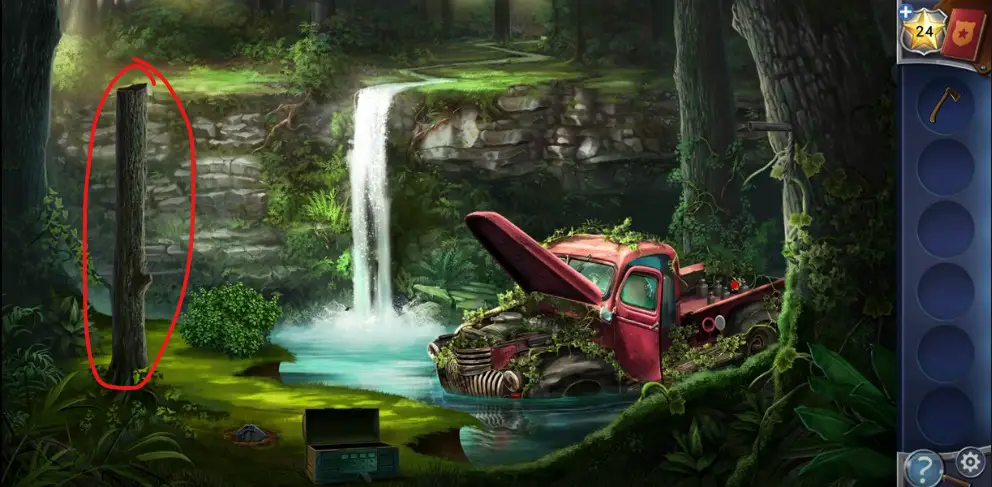
- After climbing the wall, you find yourself in a new area where your objective is to collect an ax from the spot and go back to the truck to chop down the tree into three pieces.
- Collect all logs from the spot and climb the wall to reach the river; place all logs down to start a mini-game where you have to solve the Logs Puzzle.
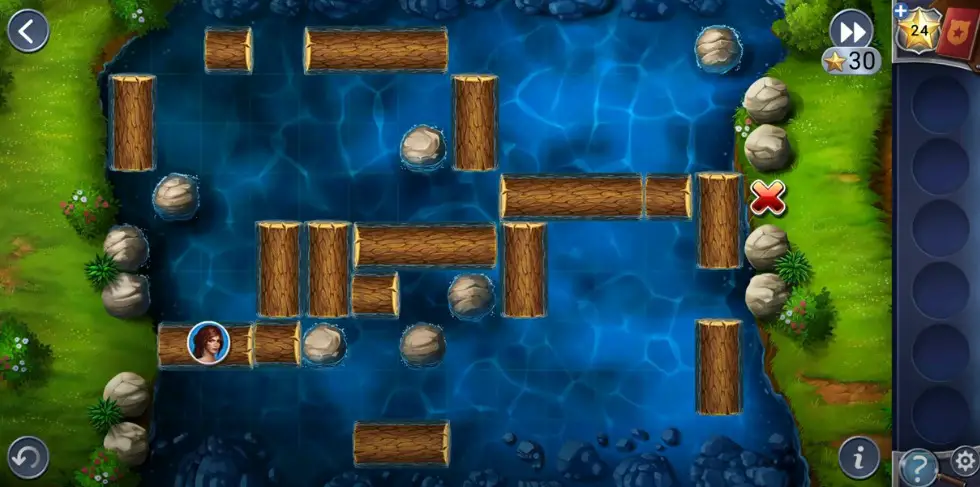
Logs Puzzle
To solve the Logs Puzzle, you have to arrange the logs so that they make a path from Kate to the X on the other side of the river. Then, select the log and hit the arrow button to roll it.
- After reaching the other side of the river, grab the matchbox and a shovel that you have to use on the same spot to discover the dead body of Ava McWilliams. Examine the body and collect two cloth pieces from its hand and mouth.
- Next, go back to the truck and use the shovel to dig up the land to discover a briefcase.
- Head to the briefcase and enter the code (81379) to unlock it and grab a Butane Canister from it.
- Select the cloth, put it into the truck’s fuel tank, and get a gas-soaked cloth.
- Go back close to the river, discover a massive rock on the left side, place a Butane Canister close to the rock, attach the cloth, and use the matchbox to make a blast.
- Soon, you will discover a man-made hidden cave.
Hidden Cave
- Search the hidden cave to discover a hammer near the table and a Fuel Siphon after sliding the coat hanging on the clip.
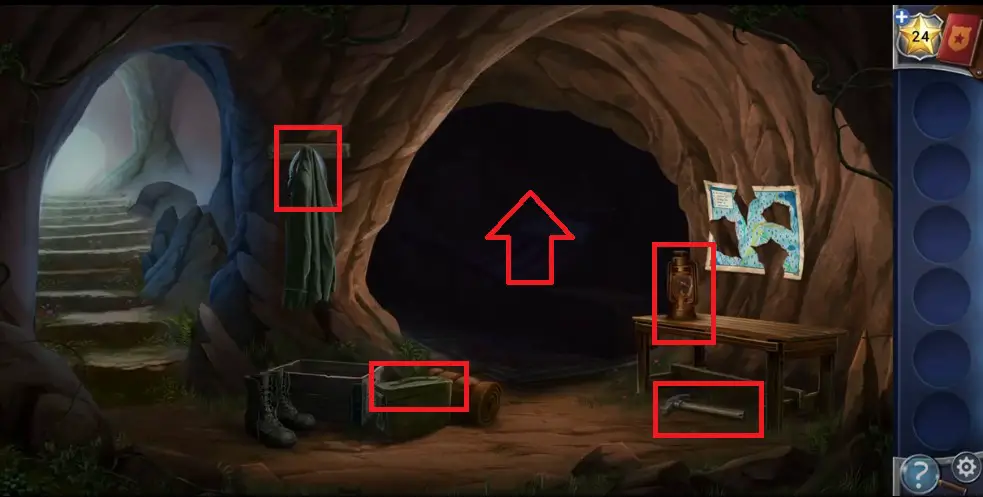
- Tap the opened boxes to discover the map piece and grab the lantern from the table.
- Go back to the truck and fill the gas into the lantern with the help of Fuel Siphon.
- Next, go back to the cave and light up the dark area using the lantern. Discover the second map piece after sliding the pillow and get the third map piece by hitting the wall using the hammer.
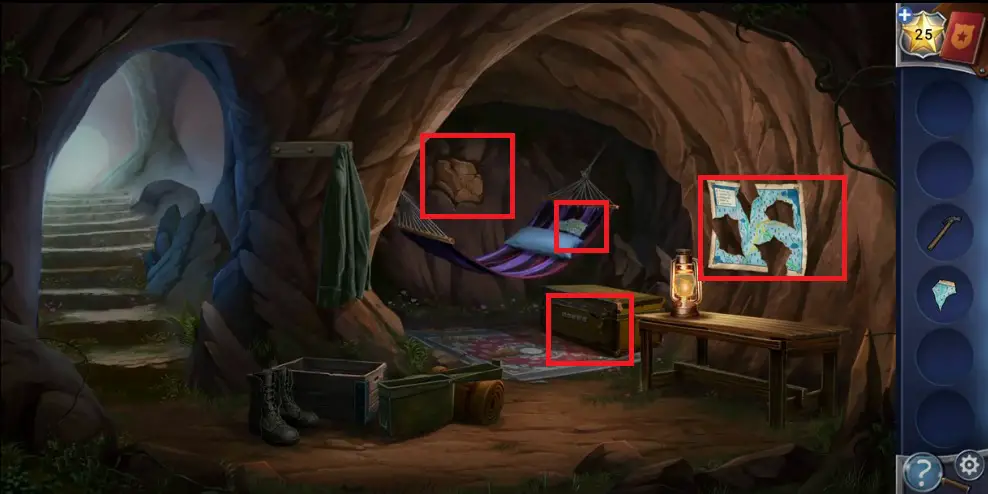
- Tap the rug to discover the fourth map and head to the sheet on the wall to add all its missing pieces to complete the jungle map.
- Get a clue after examining the map and head to the trunk in the cave that you must unlock after setting the colors in the particular sequence, such as Green, Pink, Blue, Yellow, and Orange.
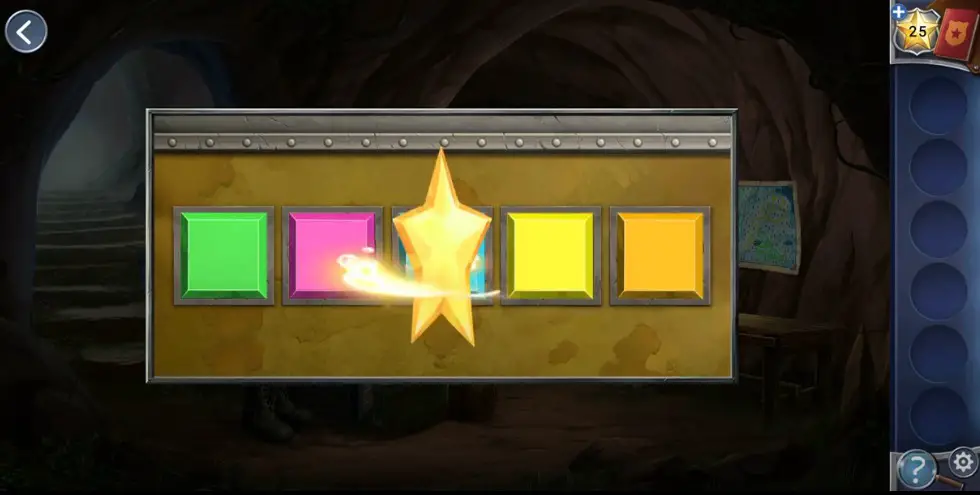
- Open the trunk to obtain the Dog Tags from inside it and add them to your evidence diary.
That’s the completion of AEM: The Echo Bay Murders Chapter 3 Walkthrough. Read More | The Echo Bay Murders Chapter 3 Walkthrough.
 CodyCross Answers
 Daily Themed Crossword Answers
 Top 7 Answers
 Word Craze Answers