
Introduction
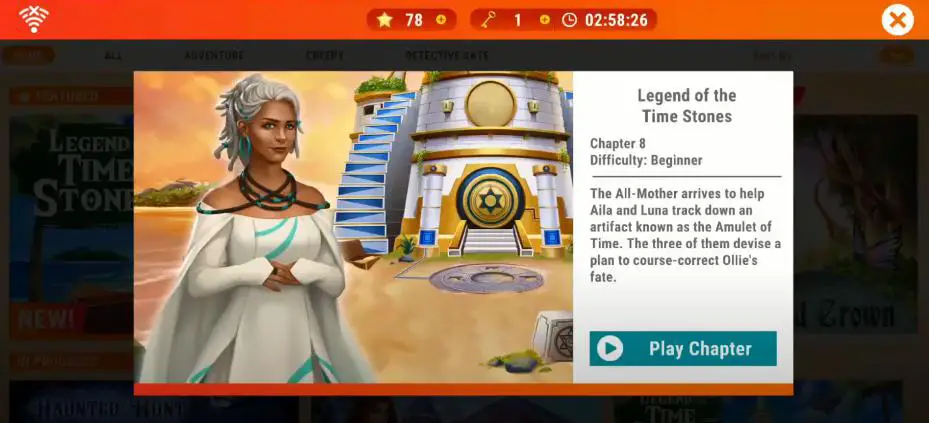
After completing chapter 7 and the maze-like puzzle, you have unlocked the Legend of the Time Stones Chapter 8 with beginner difficulty. Once you unlock the chapter, the game displays All-Mother, who recently arrived to help you and Luna find the Artifact, the Amulet of Time. Furthermore, the game’s last chapter brings many tricky puzzles to solve. Therefore, you should hone your detective skills and find hidden objects to reveal mini-games.
Besides, chapter 8 takes place on the Island of Time (Future), which you have already navigated back in Chapter 6. It could be the challenging adventure in the series of AEM adventures because you have to deal with time and challenging puzzles like any other. You don’t know where to find items because they could be in the future, present, or past; however, you have a device (Rift) with three stones of different colors, such as Green, Pink, and Orange. You can use these stones to travel in time and find items you need to solve the mystery. If you don’t know how to solve puzzles, read AEM: Legend of the Time Stones Chapter 8 Walkthrough Guide to find solutions and answers.
AE Mysteries: Legend of the Time Stones Walkthrough Chapter 8
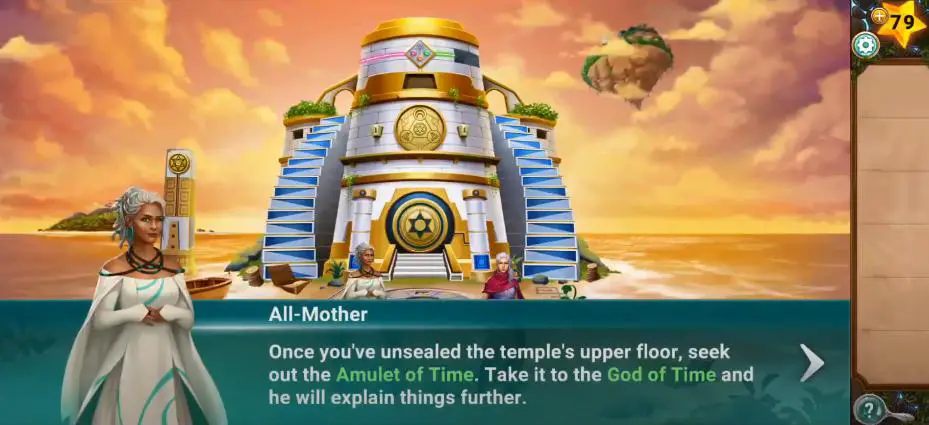
You are traveling to the future and will discover the All-Mother, who may appear to help you and Luna to solve puzzles. At the start, you will interact with Sorcerer, who will reveal himself, including who killed his father and left him abandoned on the island. Keep reading the Legend of the Time Stones Walkthrough Guide to find the truth.
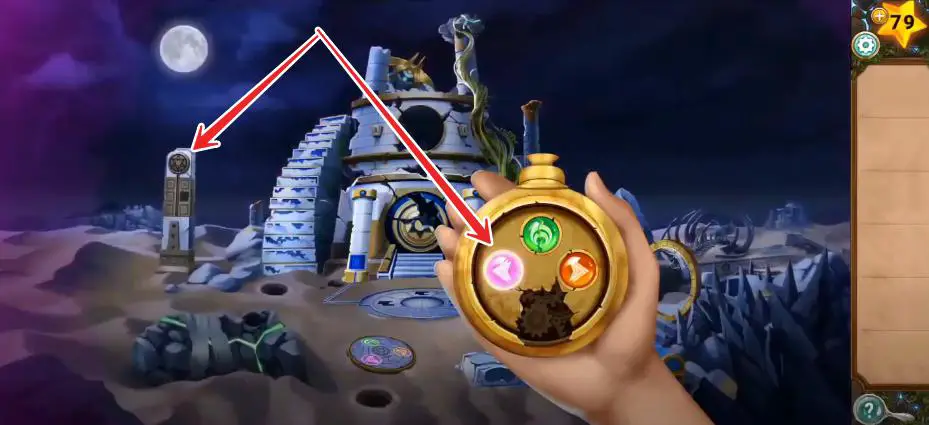
- First, tap the Star Stone on the Pillar and discover the Rift to go to the Past (Pink Stone) from the Future.
- Tap the Luna on the boat to interact with her, and soon, the All-Mother will appear on the spot.
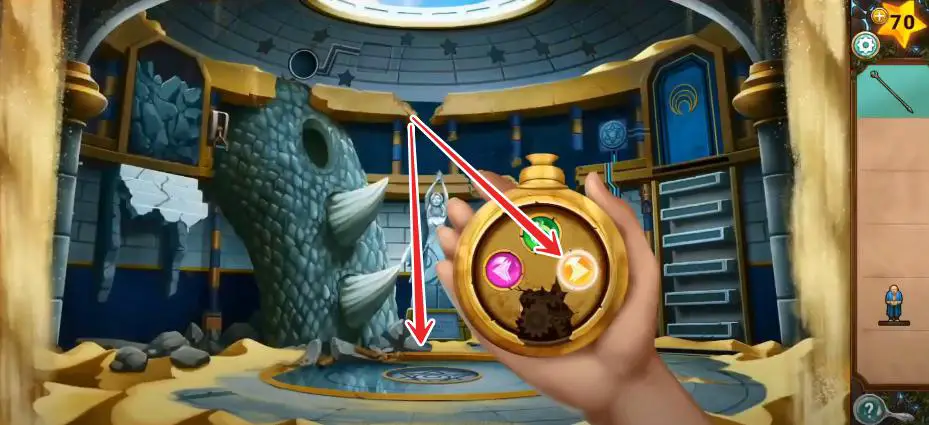
- As the discussion ends, click on the shield above the entrance door to the Temple and click on the Star Stone to discover the rift. Tap all Time Stones on the Rift one by one to glow all shapes printed on the shield.

- Head to the boat on the left side to discover the Fishing Rod and keep it in your inventory.
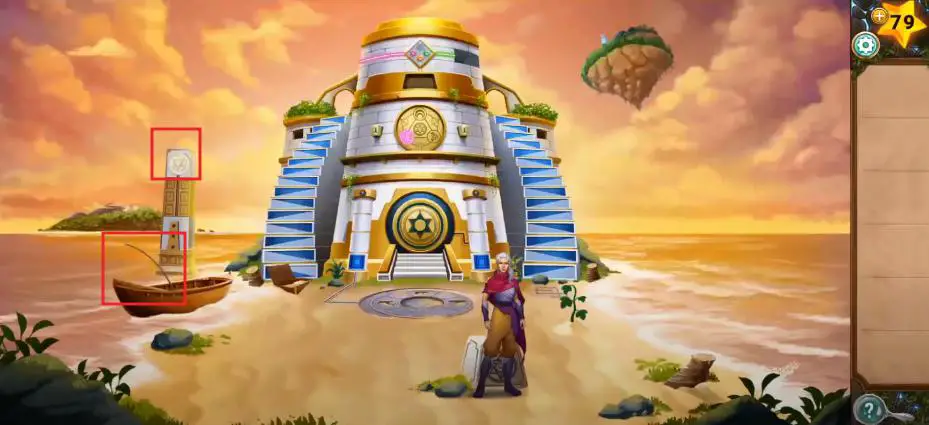
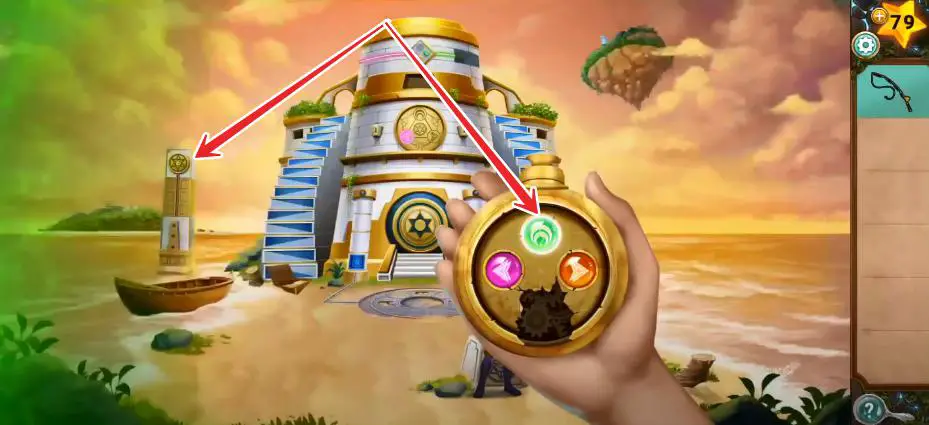
- Tap the Star Stone on the left side at the top of the pillar and go to the present by tapping the Green Stone on the Rift.
Present
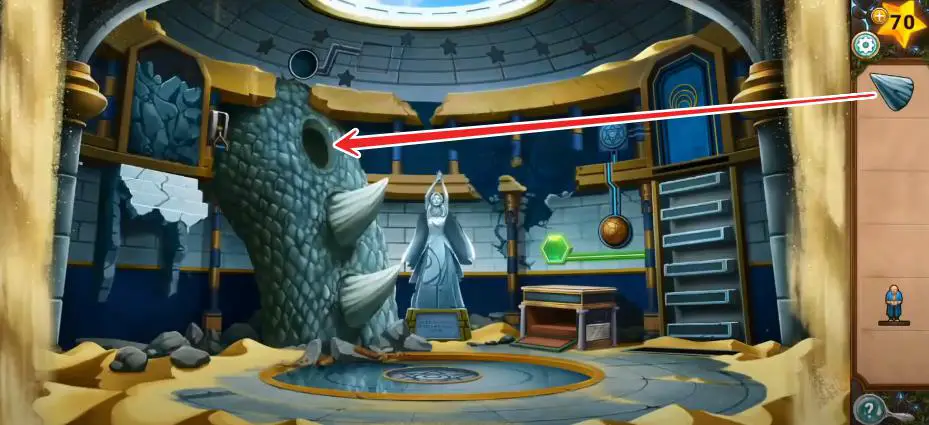
- Select the Fishing Rod from your list and use it to bring the Magic Lens out from the seaside on the right side.
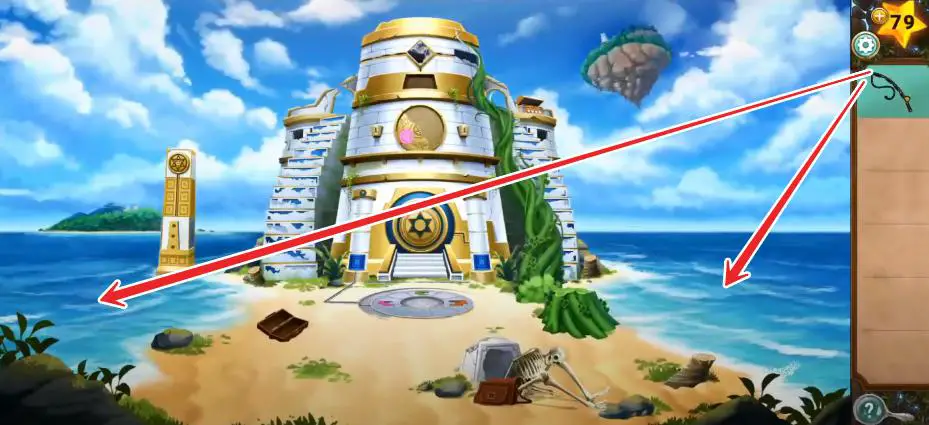
- Use the Fishing Rod again to bring the Treasure Chest out of the water from the left side.
Note: Travel to All Times – This time, you must travel to all times, including Future and Past, to discover symbols. Before leaving the location, keep the symbols and signs in mind because they are the only source to help you unlock the treasure chest you recently discovered. You must see through the Magic Lens to get symbols and signs.

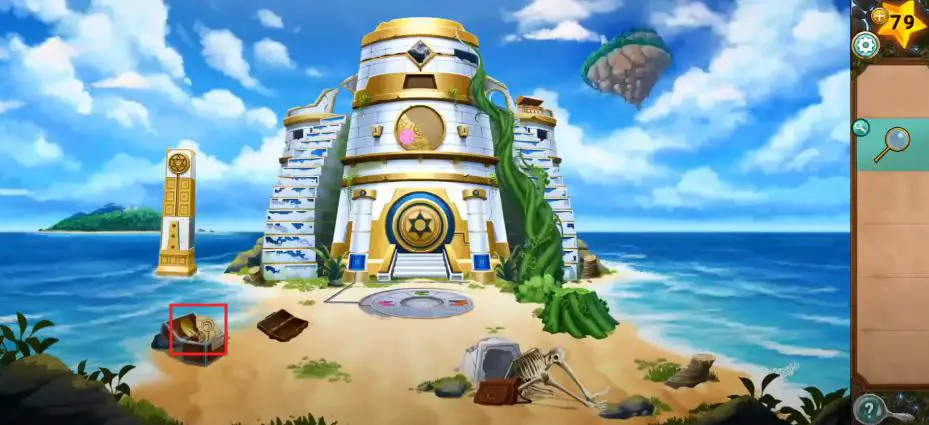
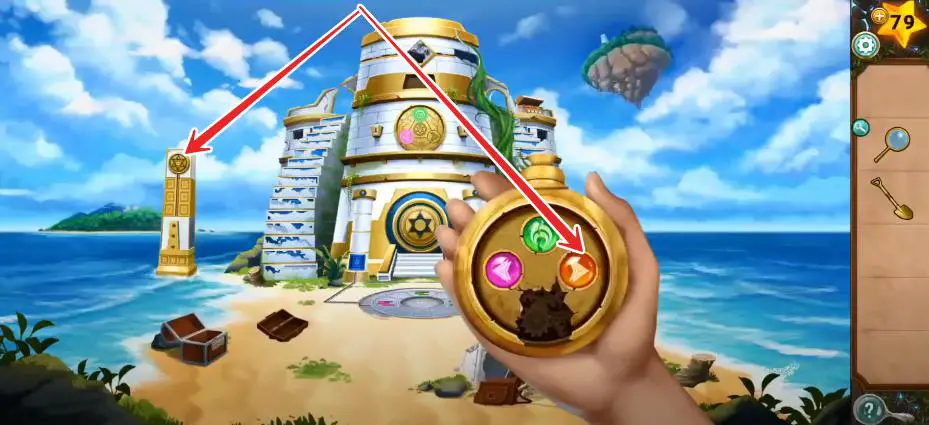
- Now, head to the Treasure Chest and set symbols using the dial for each time stone to unlock the box and get Door Half and Shovel from inside.
- Afterward, select the Door Half from the list and place it on the shield. Tap the Star sign between the diagrams to discover the Rift, and tap the Present Time Stone.

Future
After tapping the Pillar on the left side and hitting the Future Stone on the rift, you will move to the future.

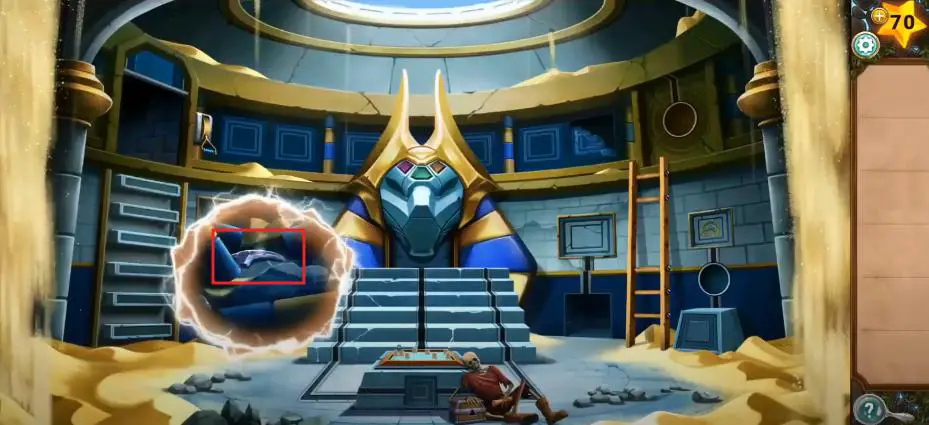
- Once you are in the future, you must use the Magnifying Glass to discover the bright spots and use the shovel to dig them up to find the Stone Pieces.
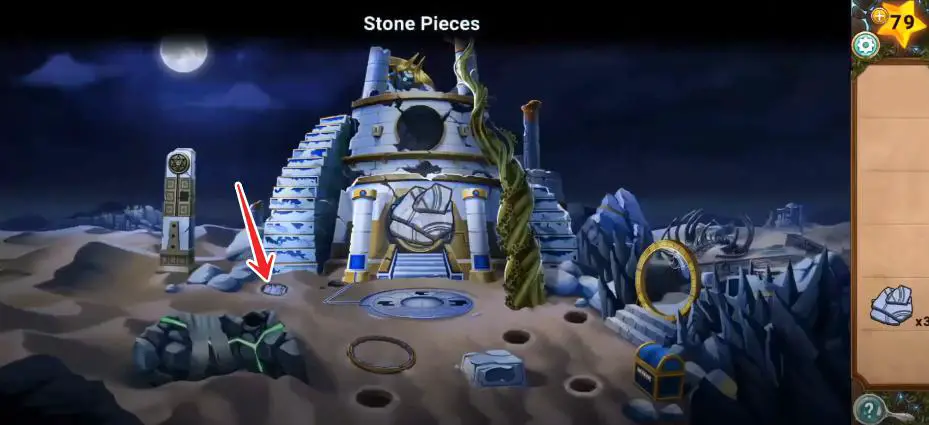
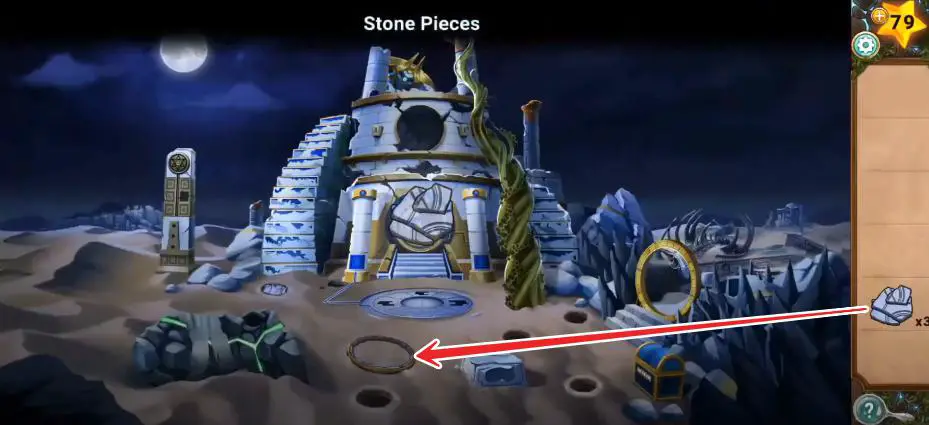
- Tap the ring on the floor near the stone and place all Stone Pieces nearby to start a mini-game to reassemble the broken door by dragging the pieces to their correct spot.
- After repairing the stone, tap on it to discover the Rift and hit the Future Stone.

- Next, tap the Pillar on the Left side, hit on the Star Stone, and go back to the Past.

Past
- Upon reaching the Past Time, Luna will give you an Amulet of time to reset your timeline and save Ollie.

- Tap the Star Stone at the top of the Pillar and go to the Present Scene.
Present
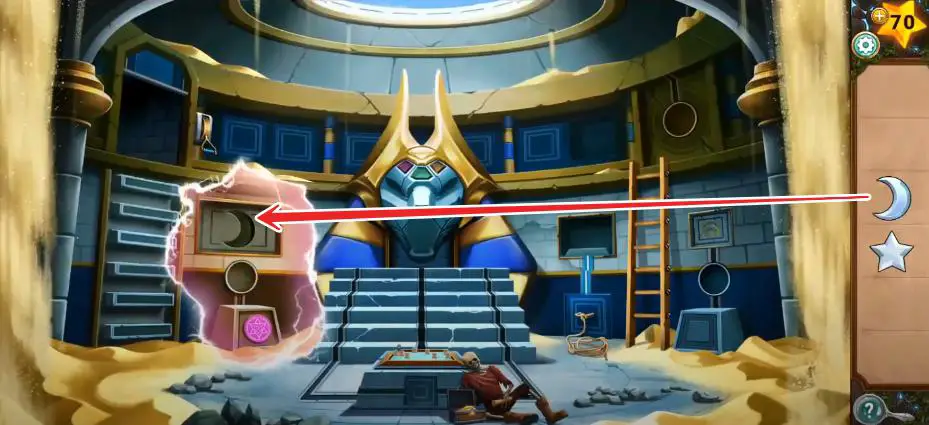
After reaching the present, tap the black-colored shield above the door to discover the Amulet of Time and tap on it to get into the Temple of Time.

Temple of Time – Second Floor

- First, you must move the small stones from the left side and discover the Lever handle.

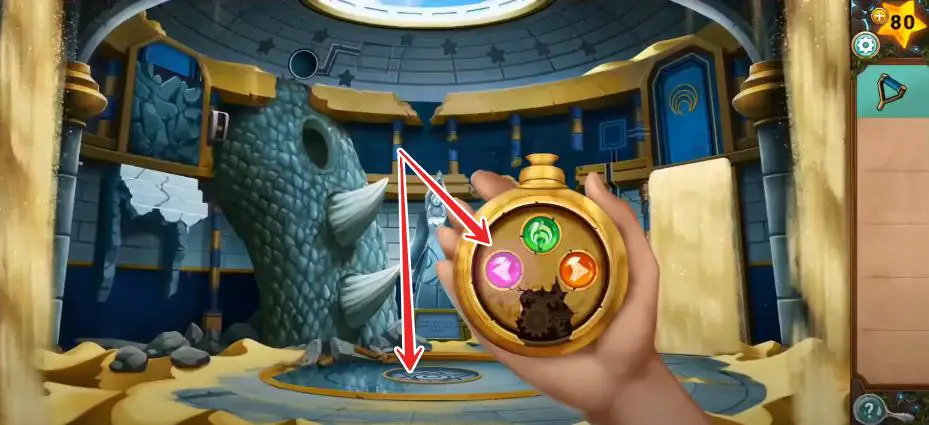
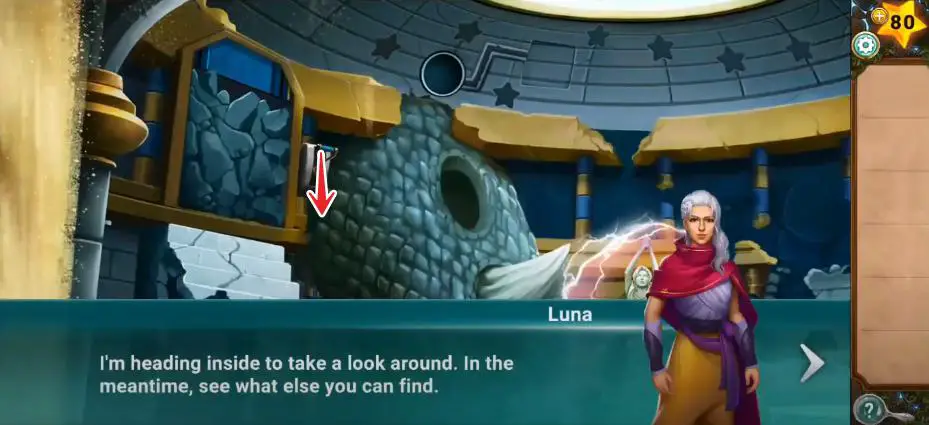
- Second, tap the star stone on the floor to discover the Rift and go back to the Past to interact with Luna for clues.
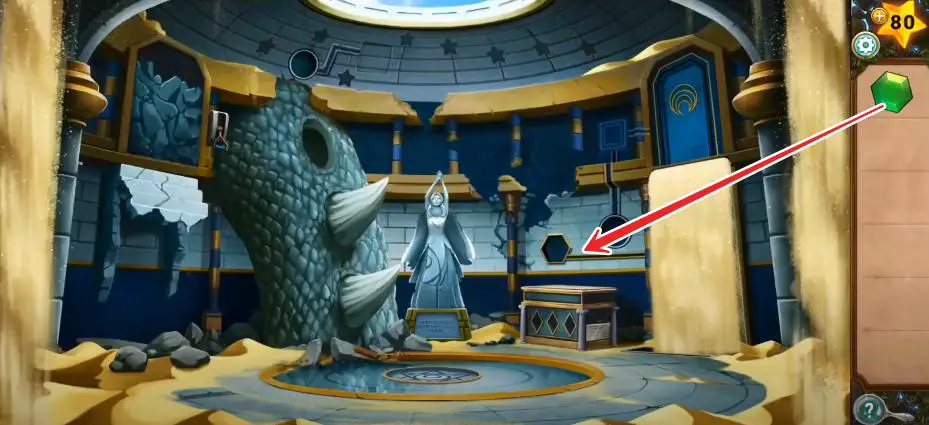
- Before leaving the spot, don’t forget to find the Green Gem from behind the statue.
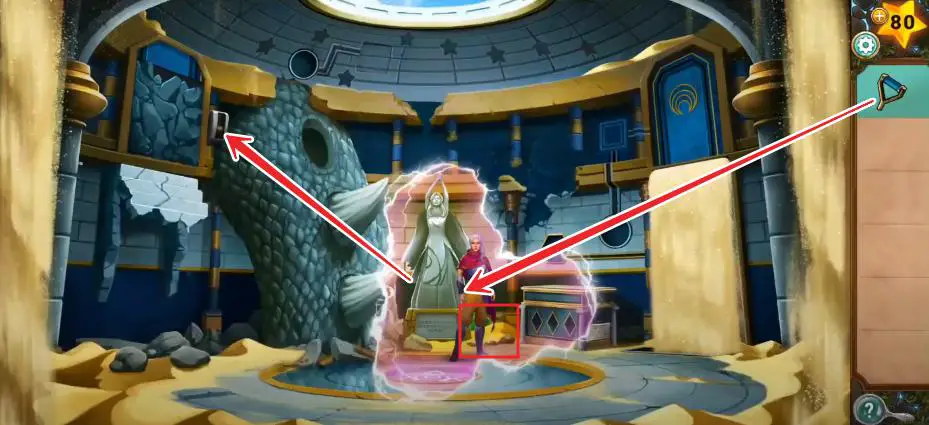
- Select the Lever Handle from the list, place it on the left side, as shown in the image below, and don’t forget to pull it down.
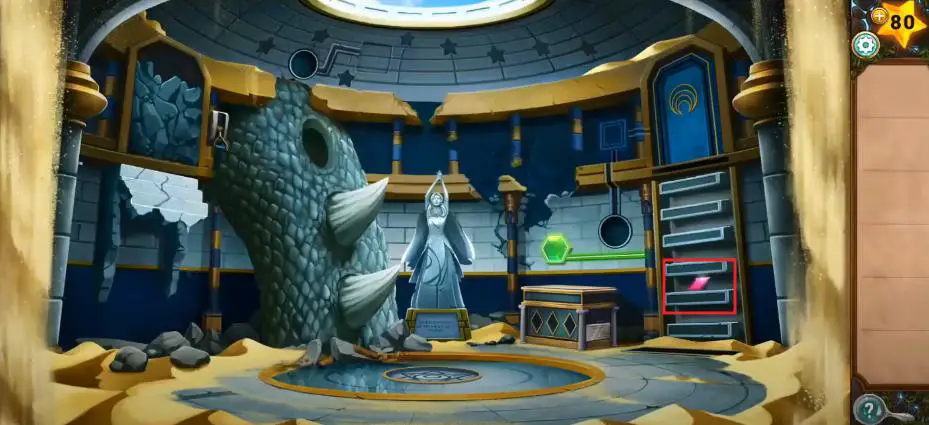
- Select the Green Gem from your inventory and place it on the wall right side of the statue above the box to stop the sand fall.
- Once the Sandfall gets stopped, you will discover a Pink Diamond.
- Head to the Star Stone again and hit the Pink Stone on the Rift to get into the Past. Select the Pink Gem from your list and place it on the trunk.
- Turn off the Past scene by tapping the stone and collect the Pink Diamond from the Trunk.
- Tap the Star Stone again and go to the Past to place the third Pink Diamond. Once you put all pieces, the trunk will reveal a mini-game to reset the images.
- After that, open the trunk to discover the Scepter.
- Go to the past to get the Golden Orb from Luna and keep it on your list.

- Place the Golden Orb on the front wall to reveal another Star Stone. Tap on that stone to discover the Rift and hit the Pink Gem to go into the past.
- Once the scene opens, you will discover the secret spot opened, and you can get the Villager Figurine from there.
- Tap the Star Stone forth the statue on the floor and tap the Future Gem to see the scene in the future.
- Use the Scepter from the list to lift the Stone for a Dragon Spike.

- Now, fix the Dragon Spike on the Dragon’s tale and tap the Star Stone on the right side near the door to discover the rift.
- Tap the Green Gem to open the door and go through it to find the Second Room. Before leaving the first room, don’t forget to get the Golden Orb from near the stairs.
Second Room
- Select the Golden Orb from your list and place it on the left side near the stairs to discover the rift after tapping the Star Stone below it.
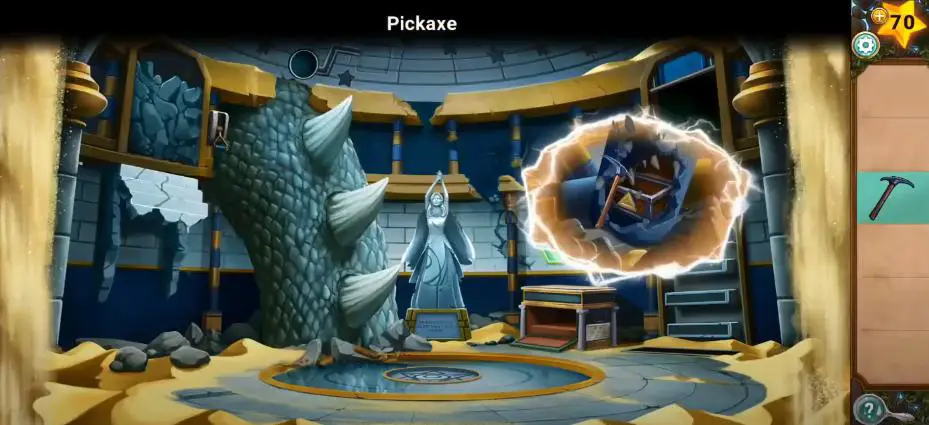
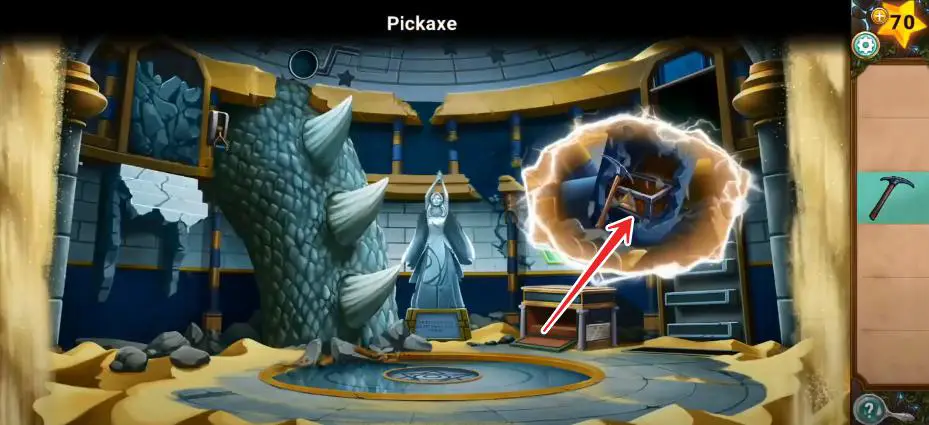
- Tap the Future Gem to get into the future and collect the Pickaxe Head.
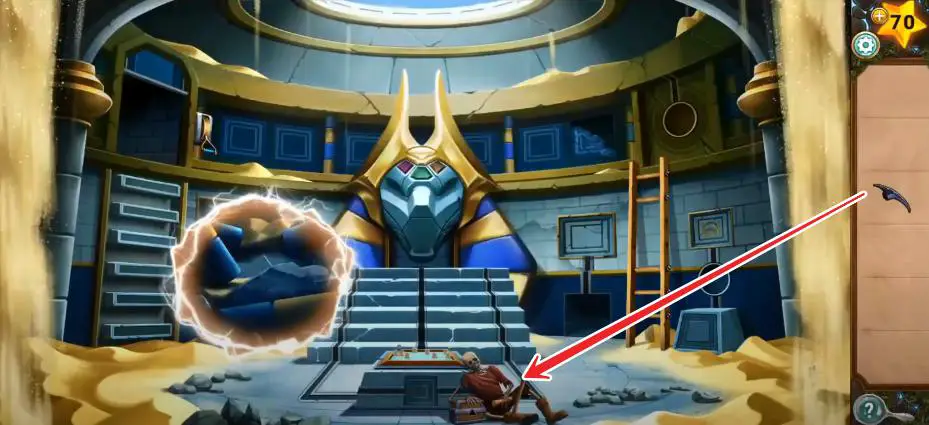
- Click on the skeleton, select the Pickaxe Head from your list, and put it on the stick to get a complete Pickaxe.
Return to the First Room
Tap the pathway on the left side to return to the first room but don’t forget to collect the Golden Orb. Select the Orb from your list and put it on the wall near the stairs to unlock the Star Stone.

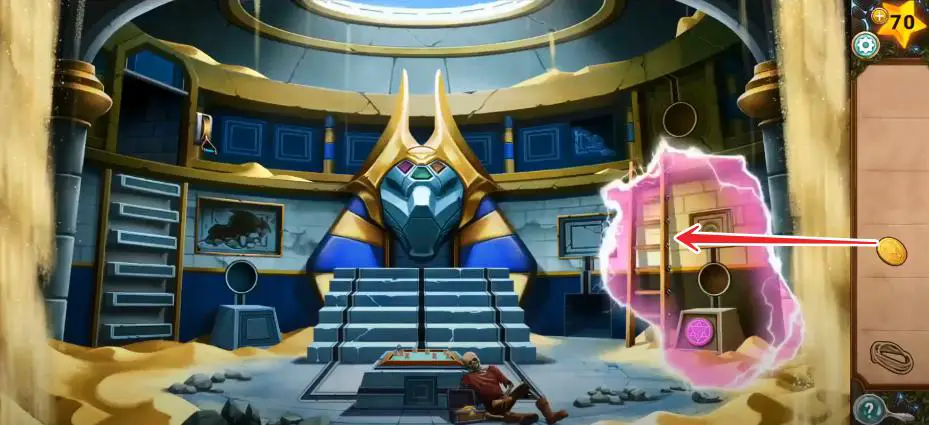
- Tap the Star Stone to discover the Rift, and tap the Orange Gem to see the past.
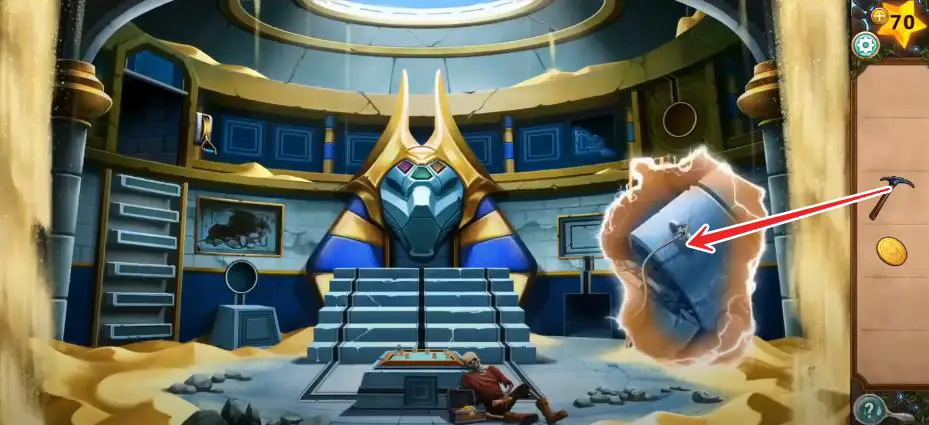
- Select the Pickaxe from your inventory and use it on the rock to reveal the Treasure box for a Pyramid Key.
- Leave the first room after collecting the Golden Orb and go to the second room.
Second Room

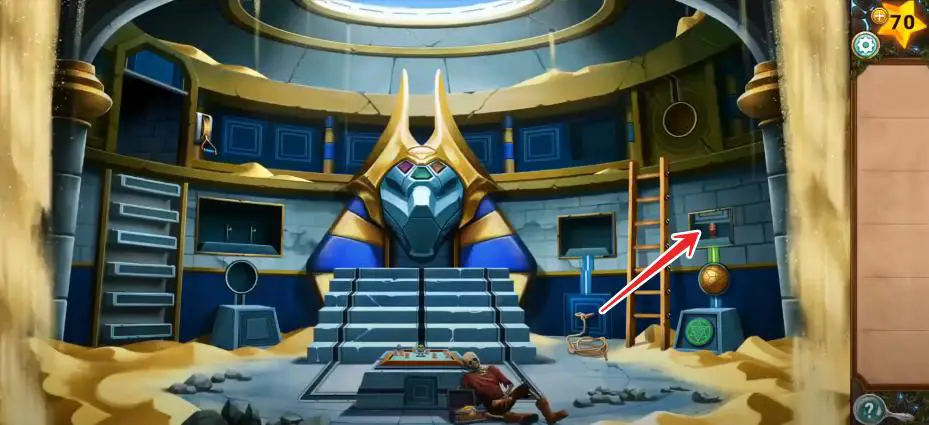
- Tap the skeleton on the floor, choose the Pyramid Key from your inventory, and place it on the chest to open it for Gold Coin.

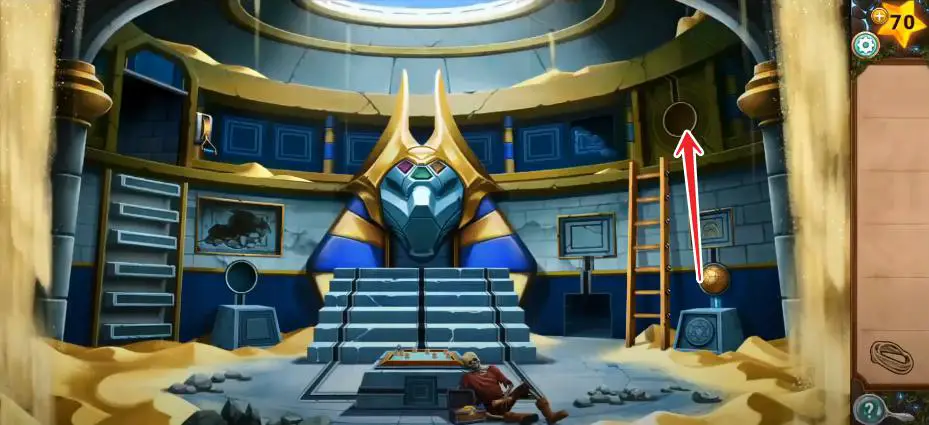
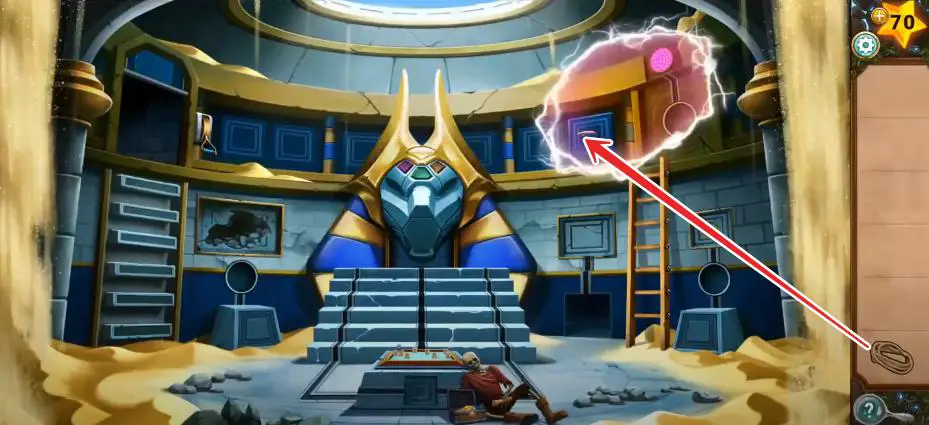
- Select the Golden Orb from your list and place it on the right side above the Star Stone. Tap the rock to discover the Rift, and tap the Orange Gem to get the Rift.
- Choose the Pickaxe and use it on the rock to get the Rope.
- Tap the same rock and use the Pink Gem to see the past where the ladder is completed.
- Use the coin to lose screws and collect Ladder Rungs.

- Return to the present and repair the ladder to place the Golden Orb at the top slot.
- Tap the Star Stone to discover the Rift and go to the Past. Select the Rope and connect it with the hook to bring the box down.

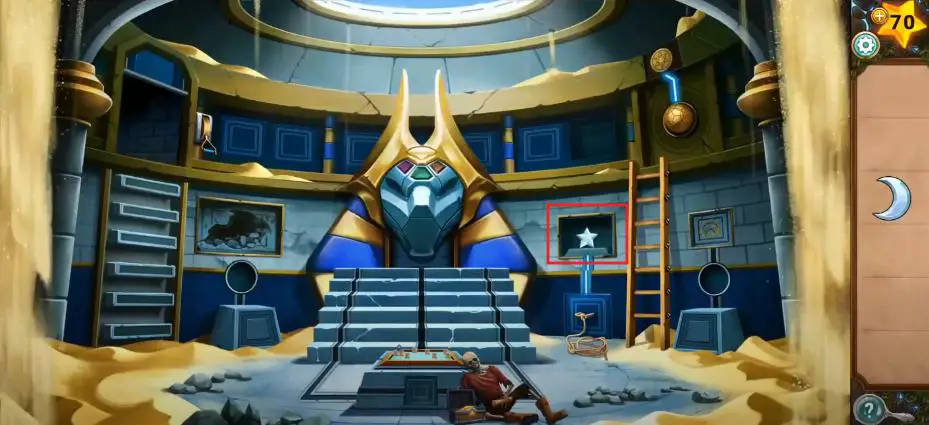
- Get the Moon Gem from the same spot after turning off the Past Scene.
- Put the block in its proper place to open another slot for a Star Gem.
- Now, use the Golden Orb to the slot on the left side and go to the Past.
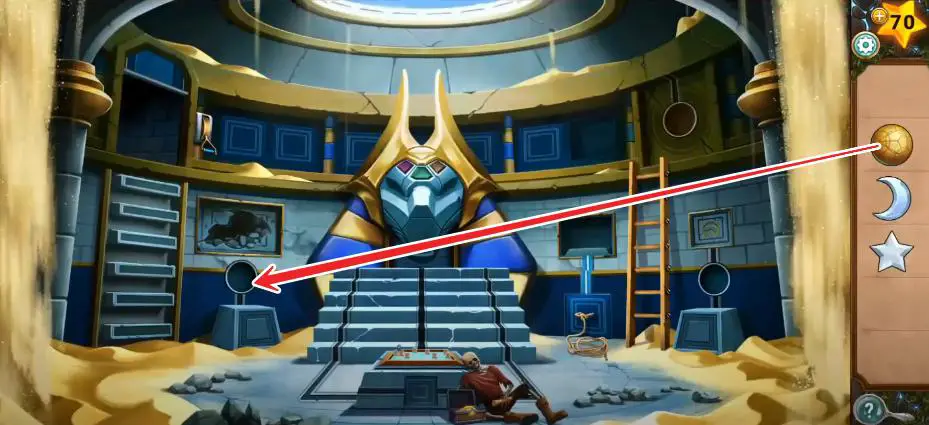
- Select the Moon Gem and place it on the slot to discover a mini-game.
- To find the solution, go to the first room after collecting the Star Orb, place it at the top slot, and tap the Past Gem.
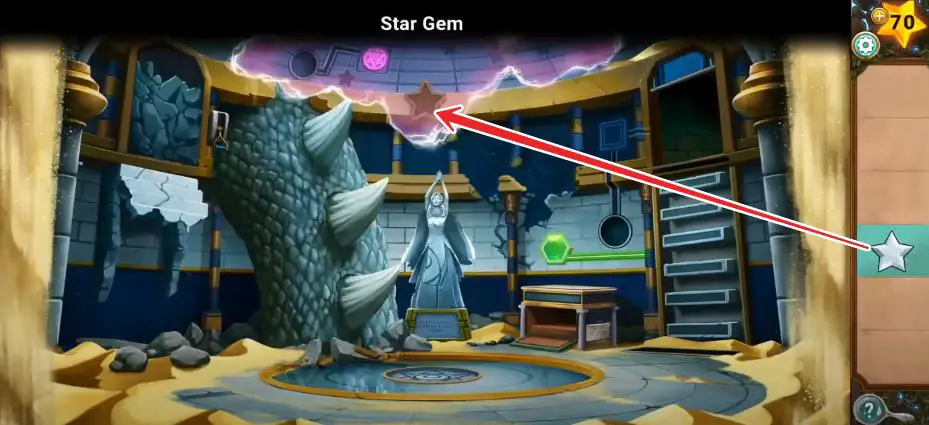
- Select the Star Gem and place it on the slot to discover the clue.
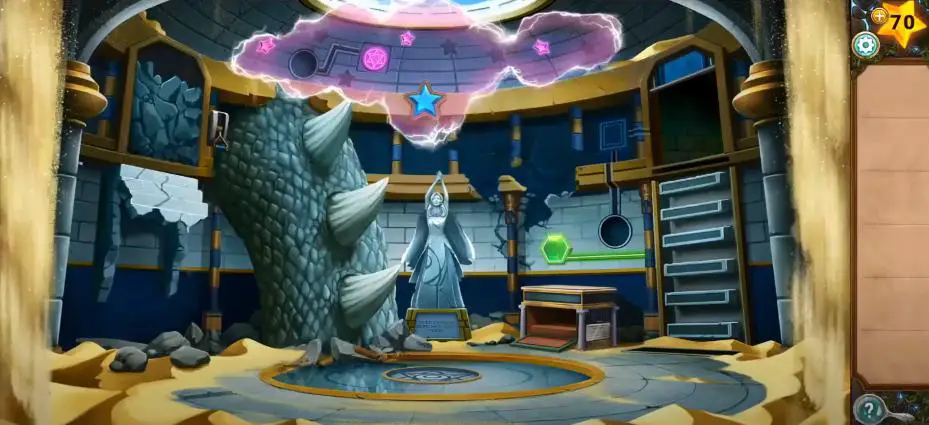
- Afterward, go to the second room and head to the mini-game, where you must set the positions of the stars as you found in the first room.

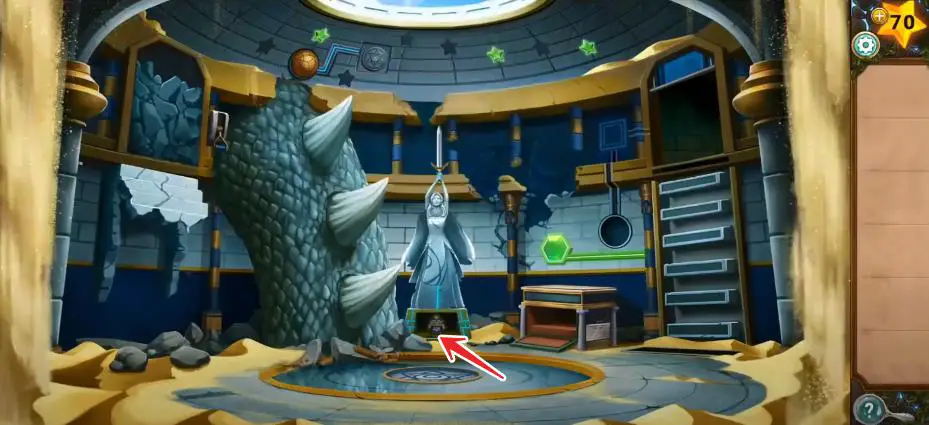
- After solving the puzzle, pick up the sword from the spot and add it to your list.

- Return to the first room, select the Sword, and put it on the Statue’s hands; tap the Golden Orb and the Future gem to open the portal.
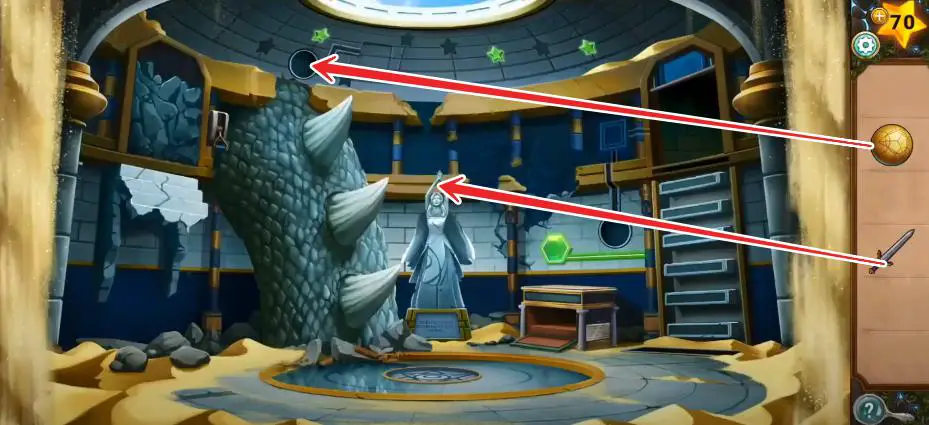
- As the thunderstorm appears, the section under the statue will open to reveal another Figurine.
- Return to the second room after collecting the Golden Orb and place it in the slot on the right side near the ladder. Go to the Present to open another section and discover the third Figurine.
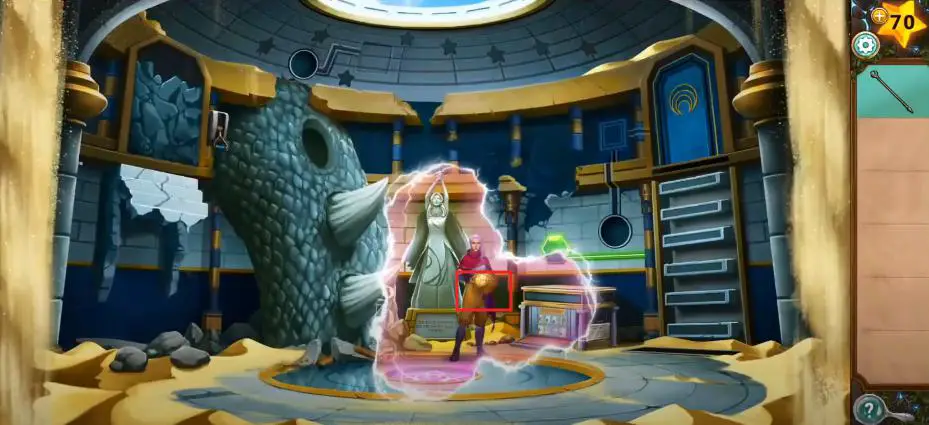
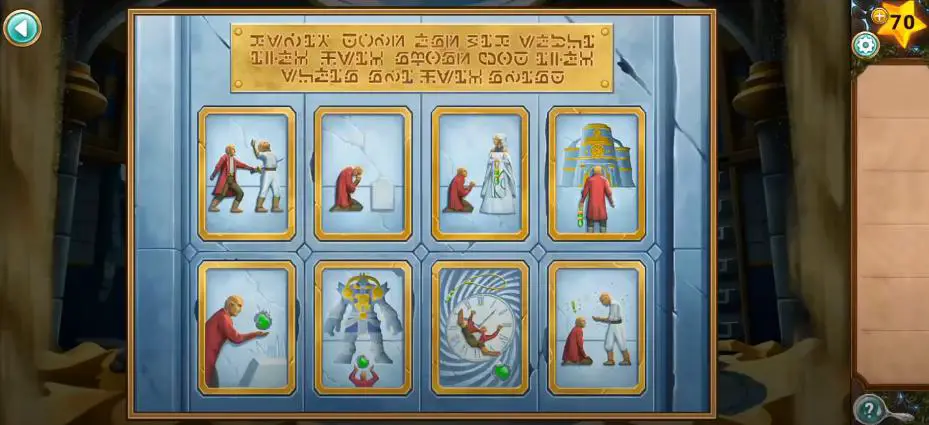
- Select the Figurine and place them on the board to start a mini-game to guide the blue and orange figurines to gather two green items; however, start moving them to their matching tiles next to the God of Time.
- Collect the Amulet of Time after solving the puzzle and keep it in your inventory.
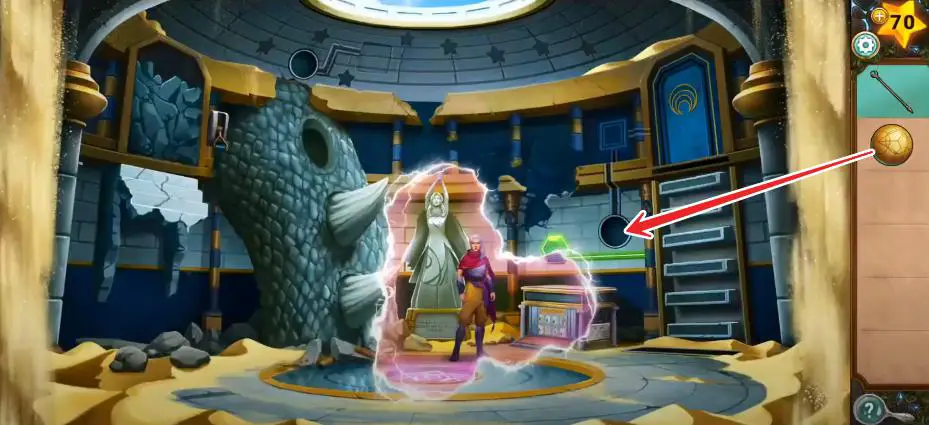
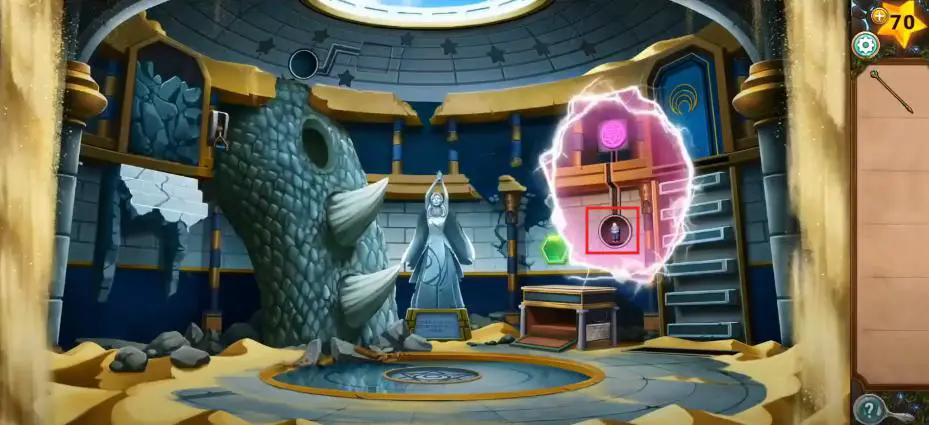
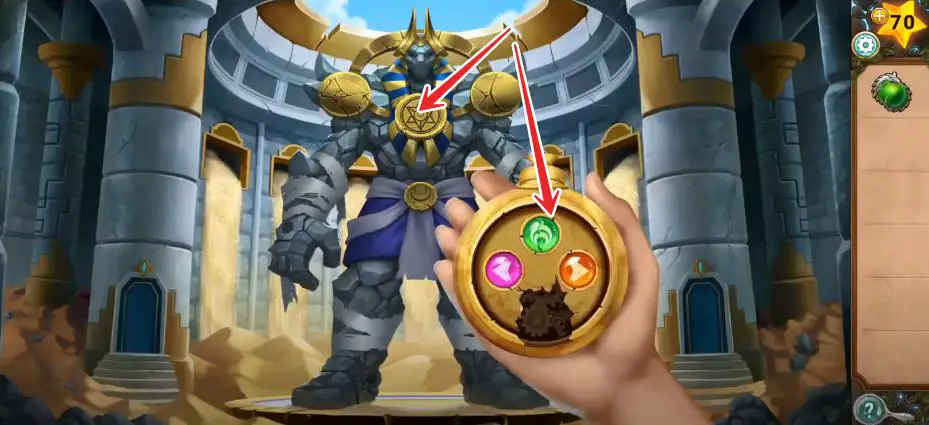
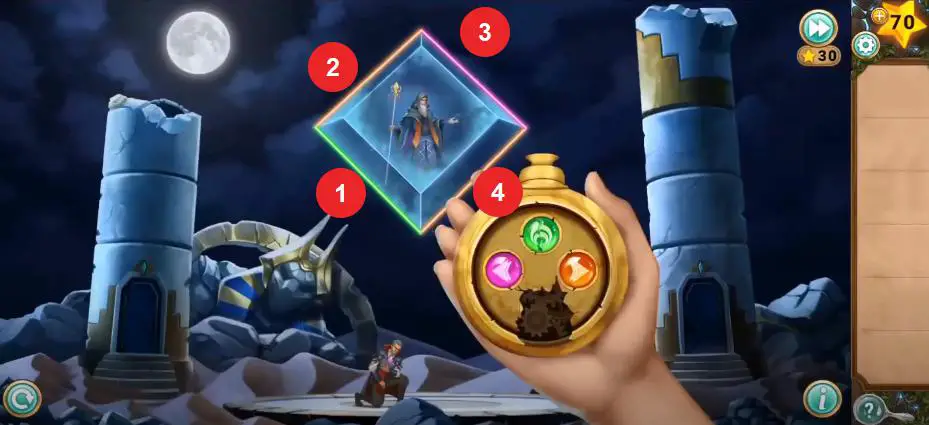
- Once you solve the puzzle, the last Star Stone appears on the spot under the board, and your ultimate goal is to tap the Star Stone and hit all the gems on the Rift one by one to open the gate.

- In the end, play mini-games and try to defeat evil using combinations of stones.
That’s the end of AEM: Legend of the Time Stones Chapter 8 Walkthrough Guide.
Read More: |Chapter 1| |Chapter 2| |Chapter 3| |Chapter 4| |Chapter 5| |Chapter 6| |Chapter 7| |Chapter 8|

 CodyCross Answers
 Daily Themed Crossword Answers
 Top 7 Answers
 Word Craze Answers